Introduction
In this guide, we will walk you through the steps to create an automation workflow in StudioHub that follows up with people when they cancel their appointments. This automation will help you engage with customers who've canceled and potentially rescheduled their appointments. Follow these steps to set up the workflow efficiently.
Steps
Step 1: Access StudioHub Automation
- Log in to your StudioHub account. Navigate to the Automation section.

- Click on "Create Workflow"

- Select "Start from Scratch" and click on continue

- Edit the name of the workflow on the top

Step 2: Setting Up the Trigger
- Click on the "Add New Trigger" box

- This will open a Trigger search panel on the right. Search for the "Appointment Status" option and select it.

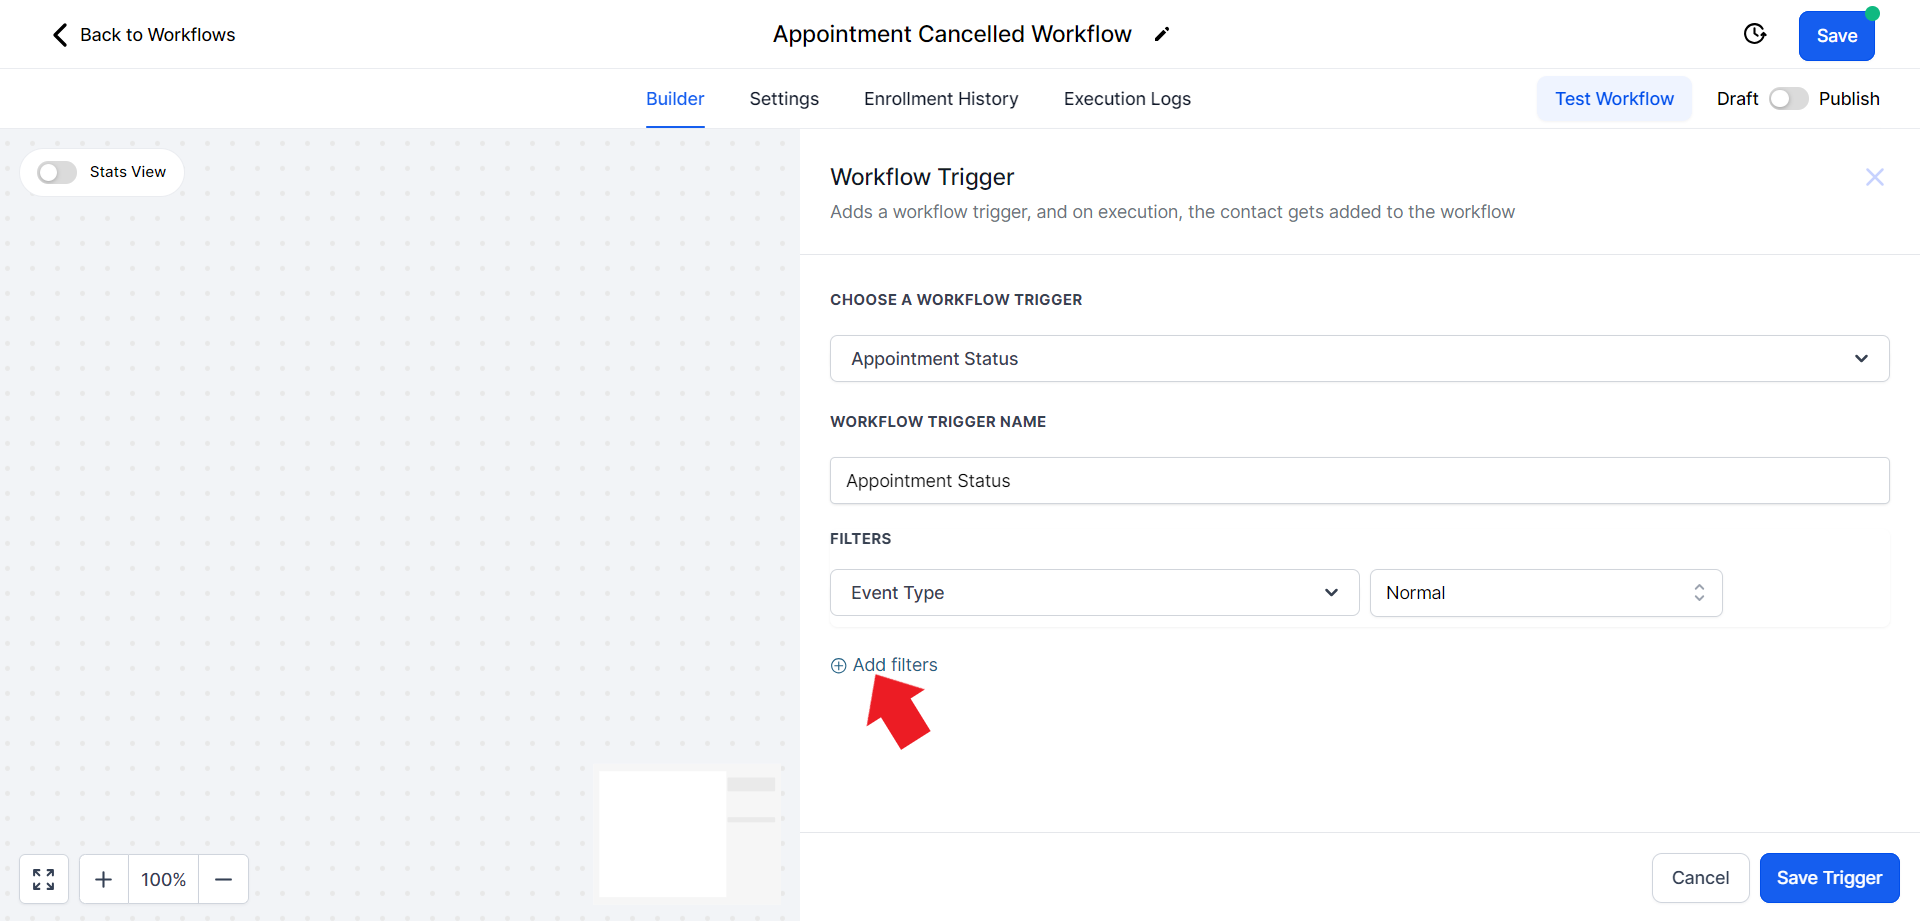
Step 3: Adding Filters
- Click "Add Filters."
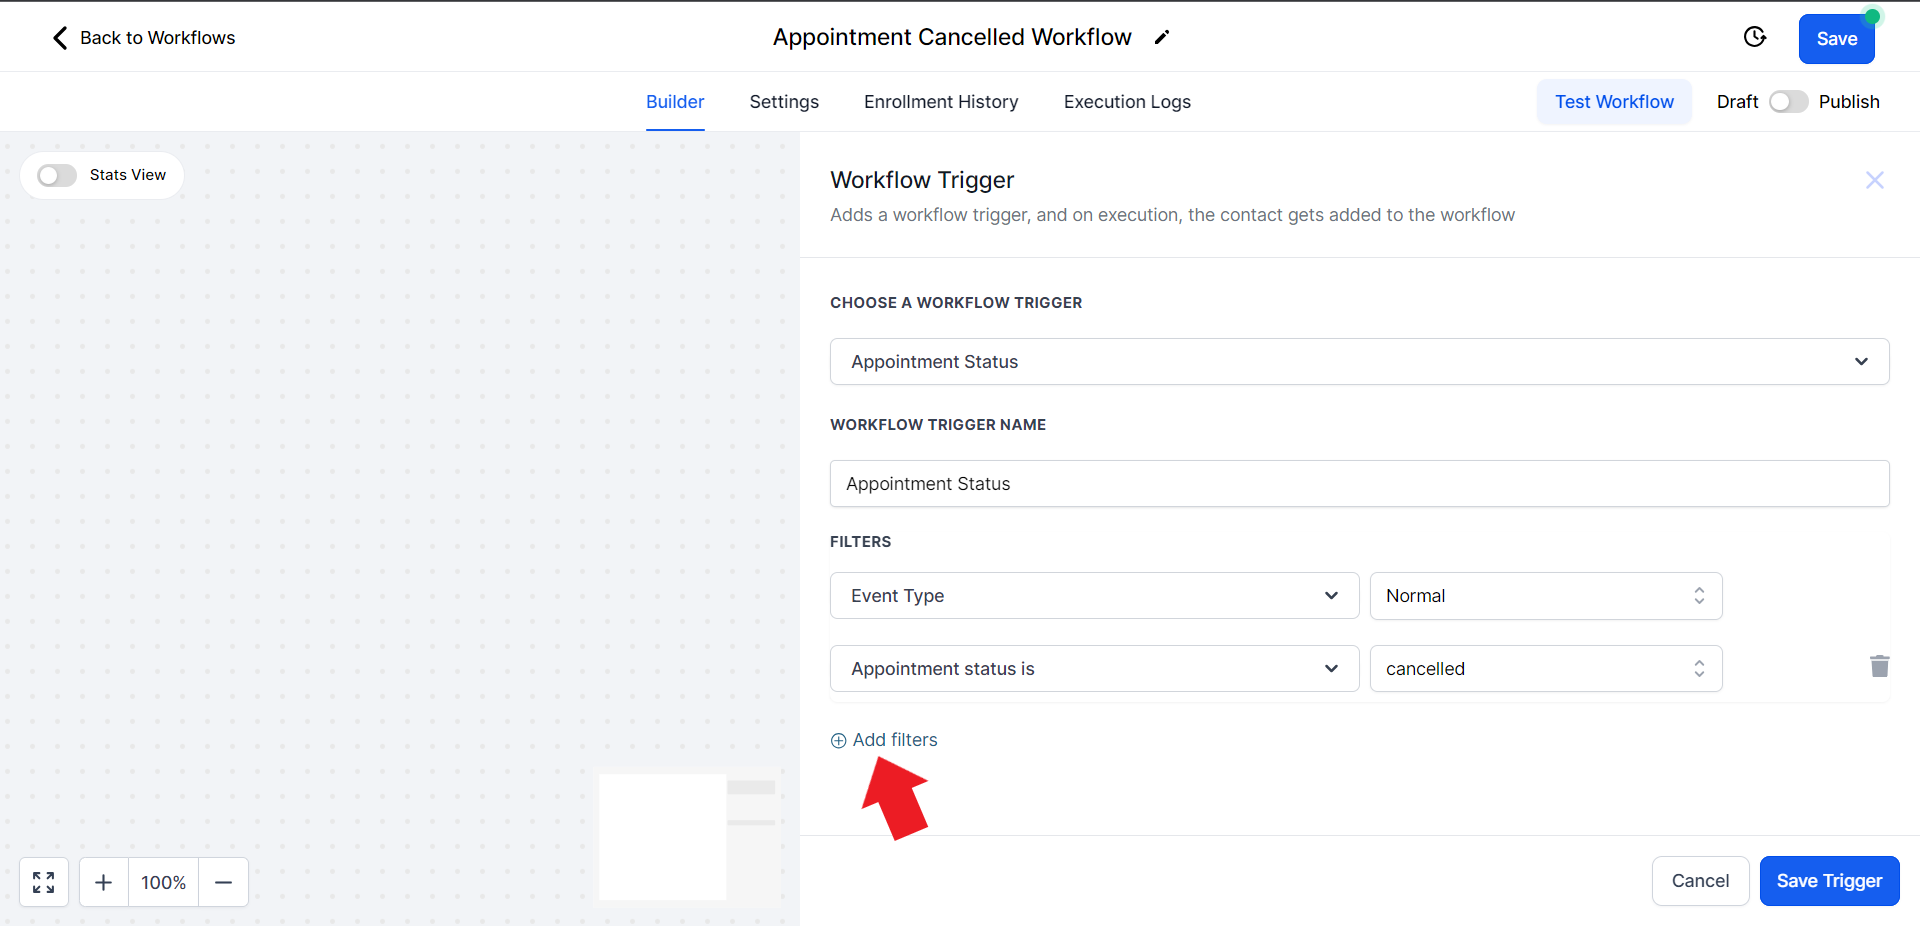
- Click on the filter field and choose the "Appointment status is" option.

- A new filter field will appear on the right side of the first one. Click on it and on the drop-down menu choose the "Cancelled" option.

- Click on "Add filter" again
- In the Select field drop-down menu choose the "In Calendar" option

- A new filter field will appear on the right side of the first one. Click on it and on the drop-down menu choose the Calendar you want to choose.

- Click "Save Trigger"

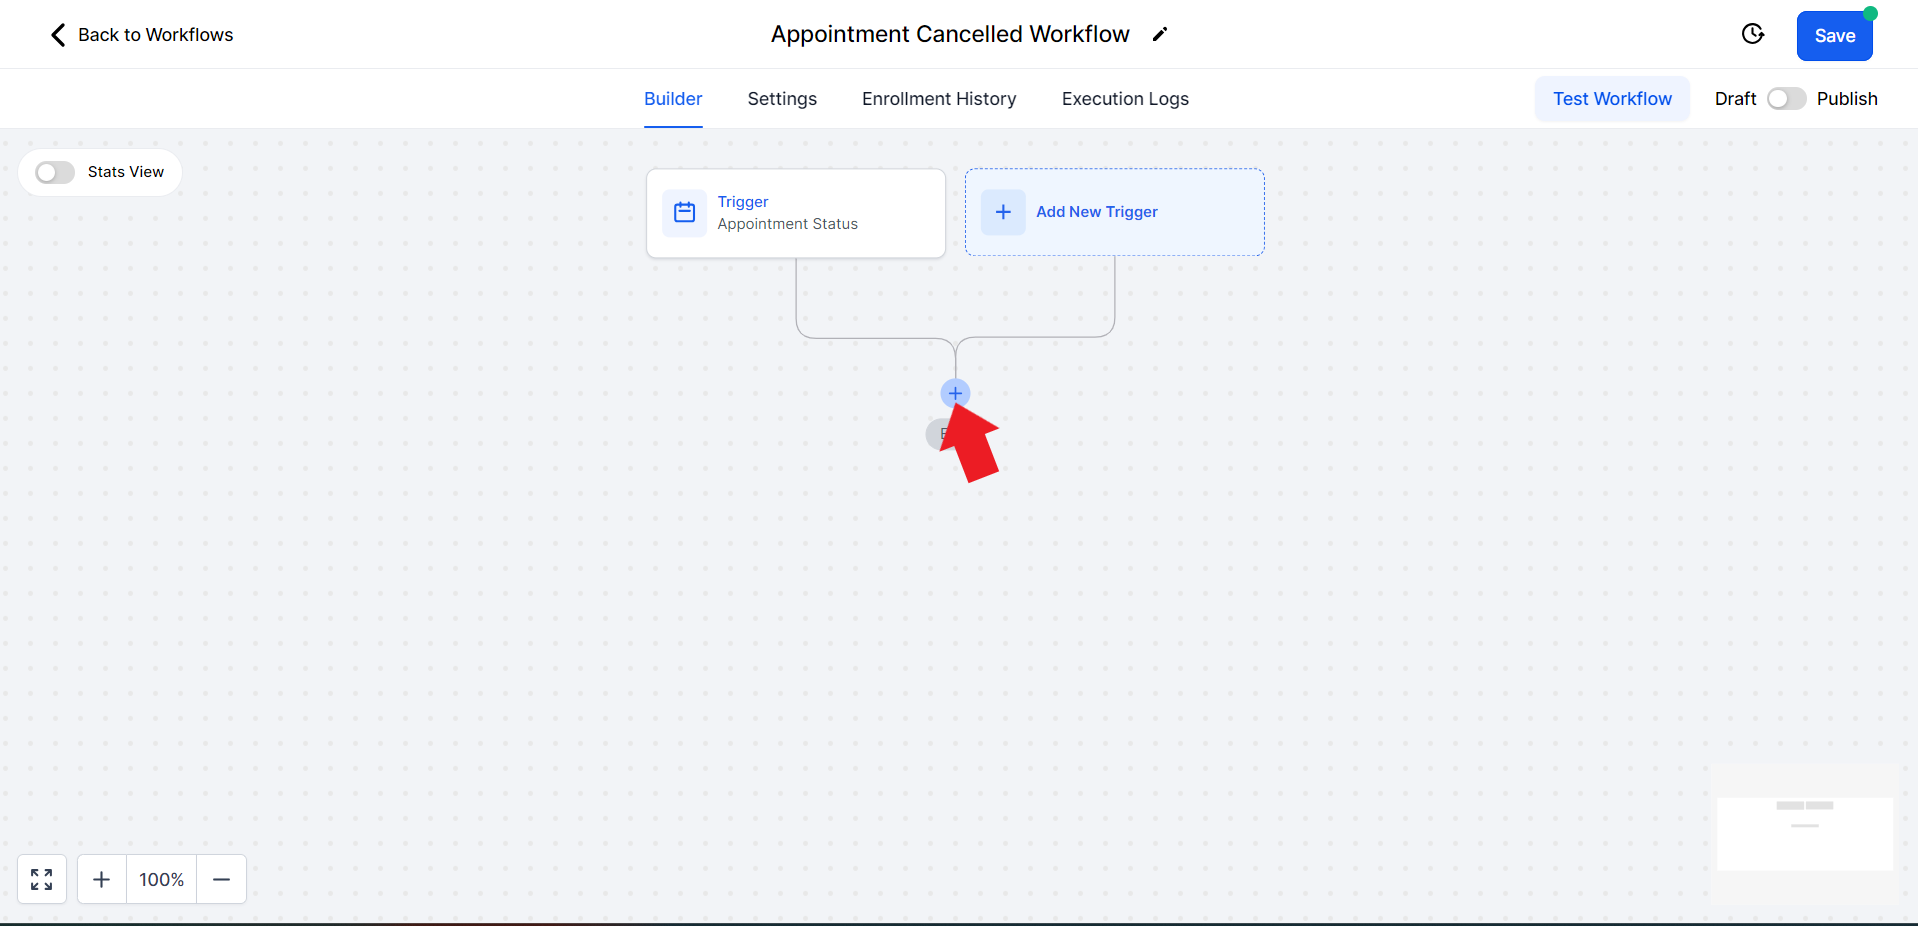
Step 4: Adding the First Action Step
- Click the plus sign to add an action step.
- In the Actions search bar on the right side, search for "Remove" and select "Remove from All Workflows".

- Toggle the switch to disable "Include current workflow". Once done click "Save Action"

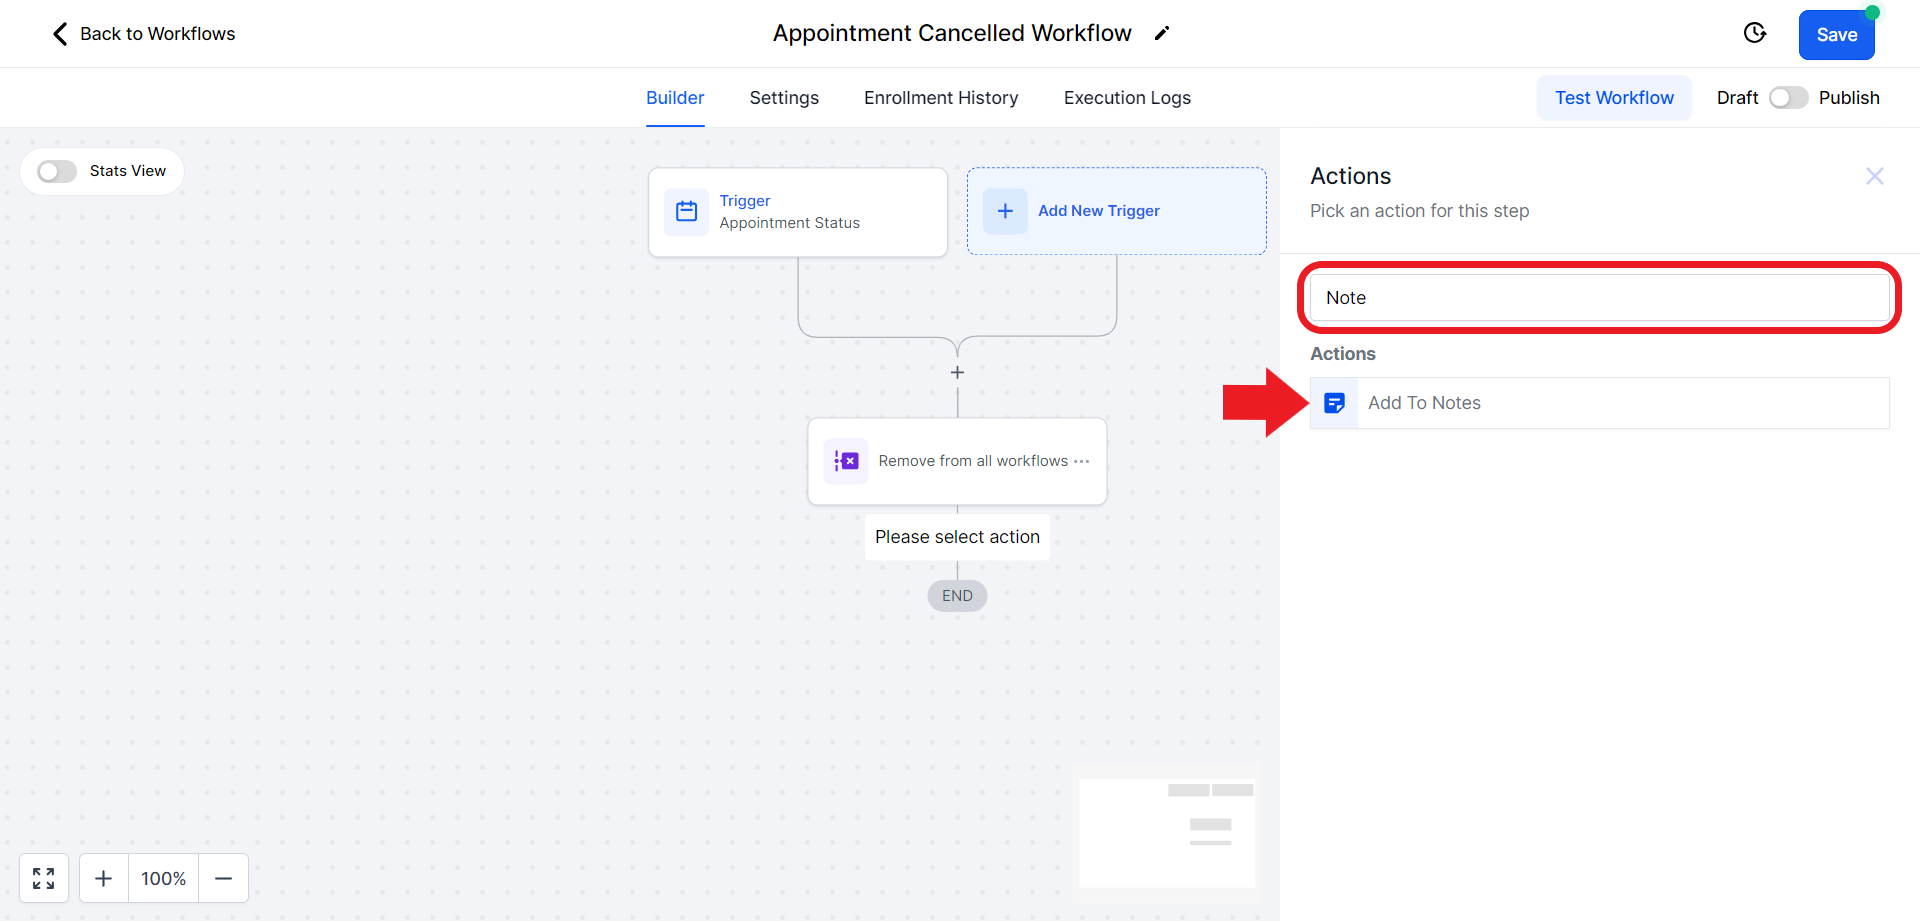
Step 5: Adding Notes
- Add another action step by clicking the plus sign.

- Search for "Note" in the search bar on the right and select "Add Note."
- In the note content, include a message like "Appointment canceled in the calendar (new calendar name)". Once done click on "Save Action"

Step 6: Updating Opportunity
- Add an action step for "Update Opportunity". Click on the plus sign

- In the Actions search bar search for "Update", and click "Create/Update Opportunity".

- Click on the "Select Pipeline" field and set the Pipeline to "Regular Classes".

- Click the "Select Pipeline Sage" field and from the drop-down menu choose the "Appointment Cancelled" option.

- Scroll down and set the Status field to "Open."

- Click "Save Action" to save.

Step 7: Adding wait delay
- Click on the Plus sign

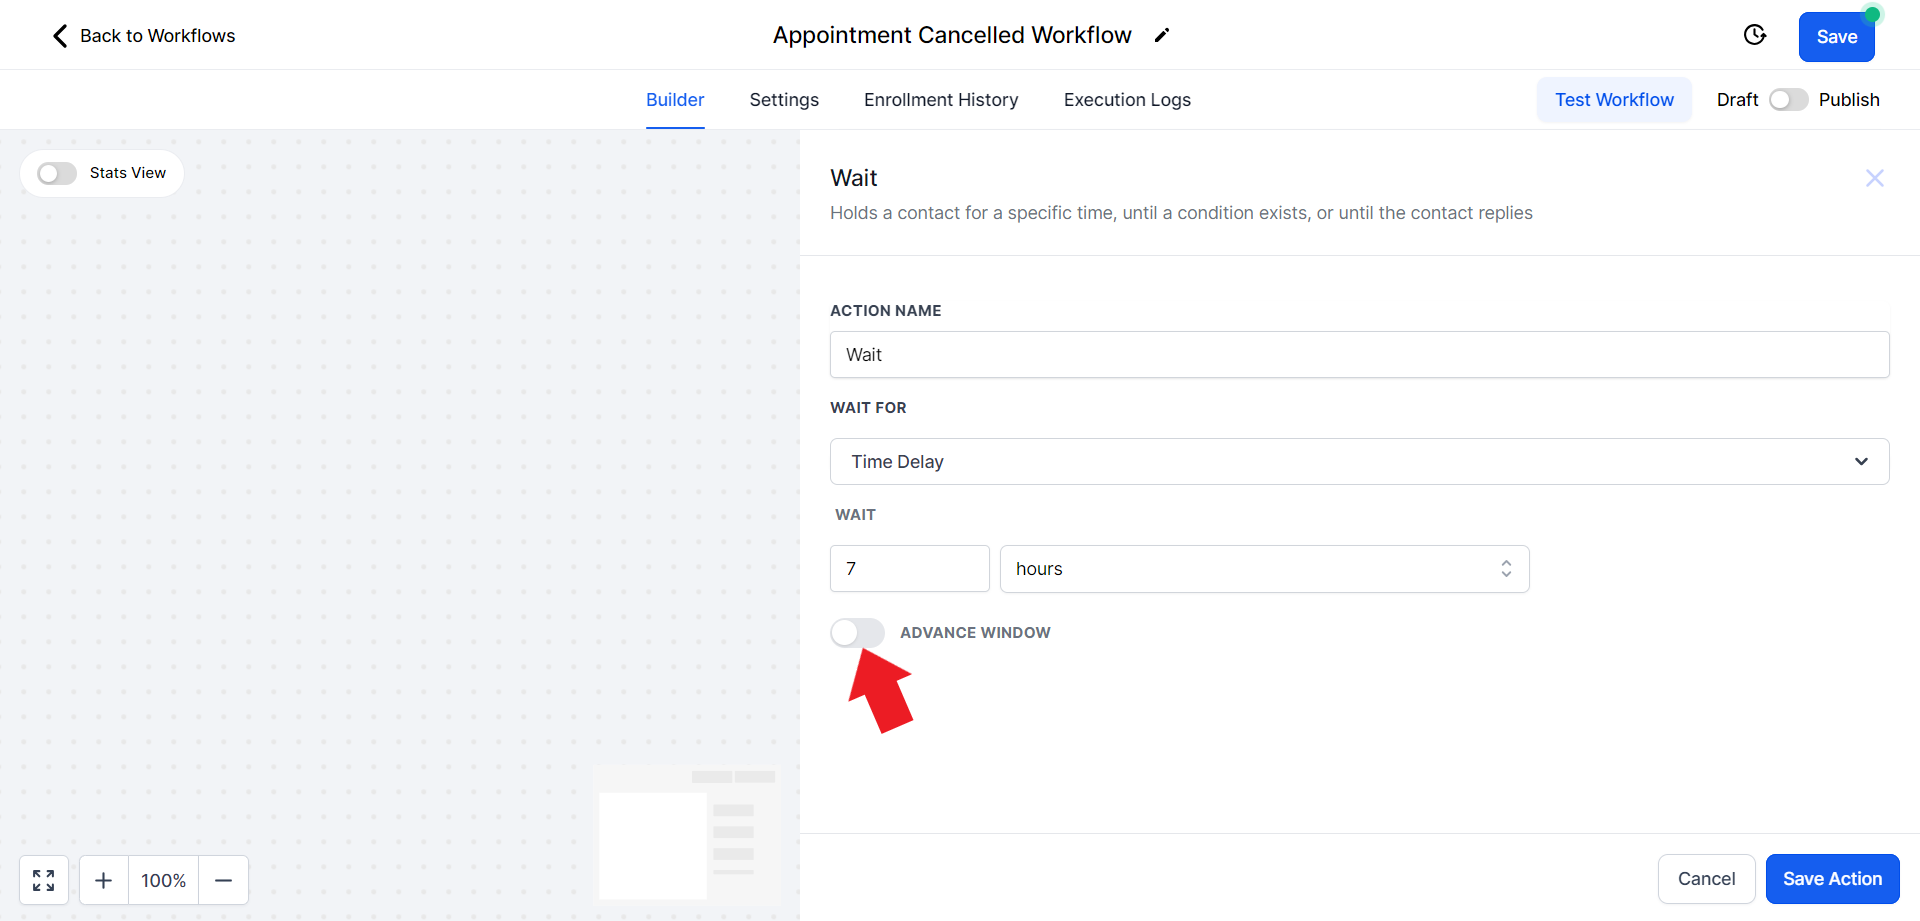
- In the Action search bar search for the "Wait" option and click on it

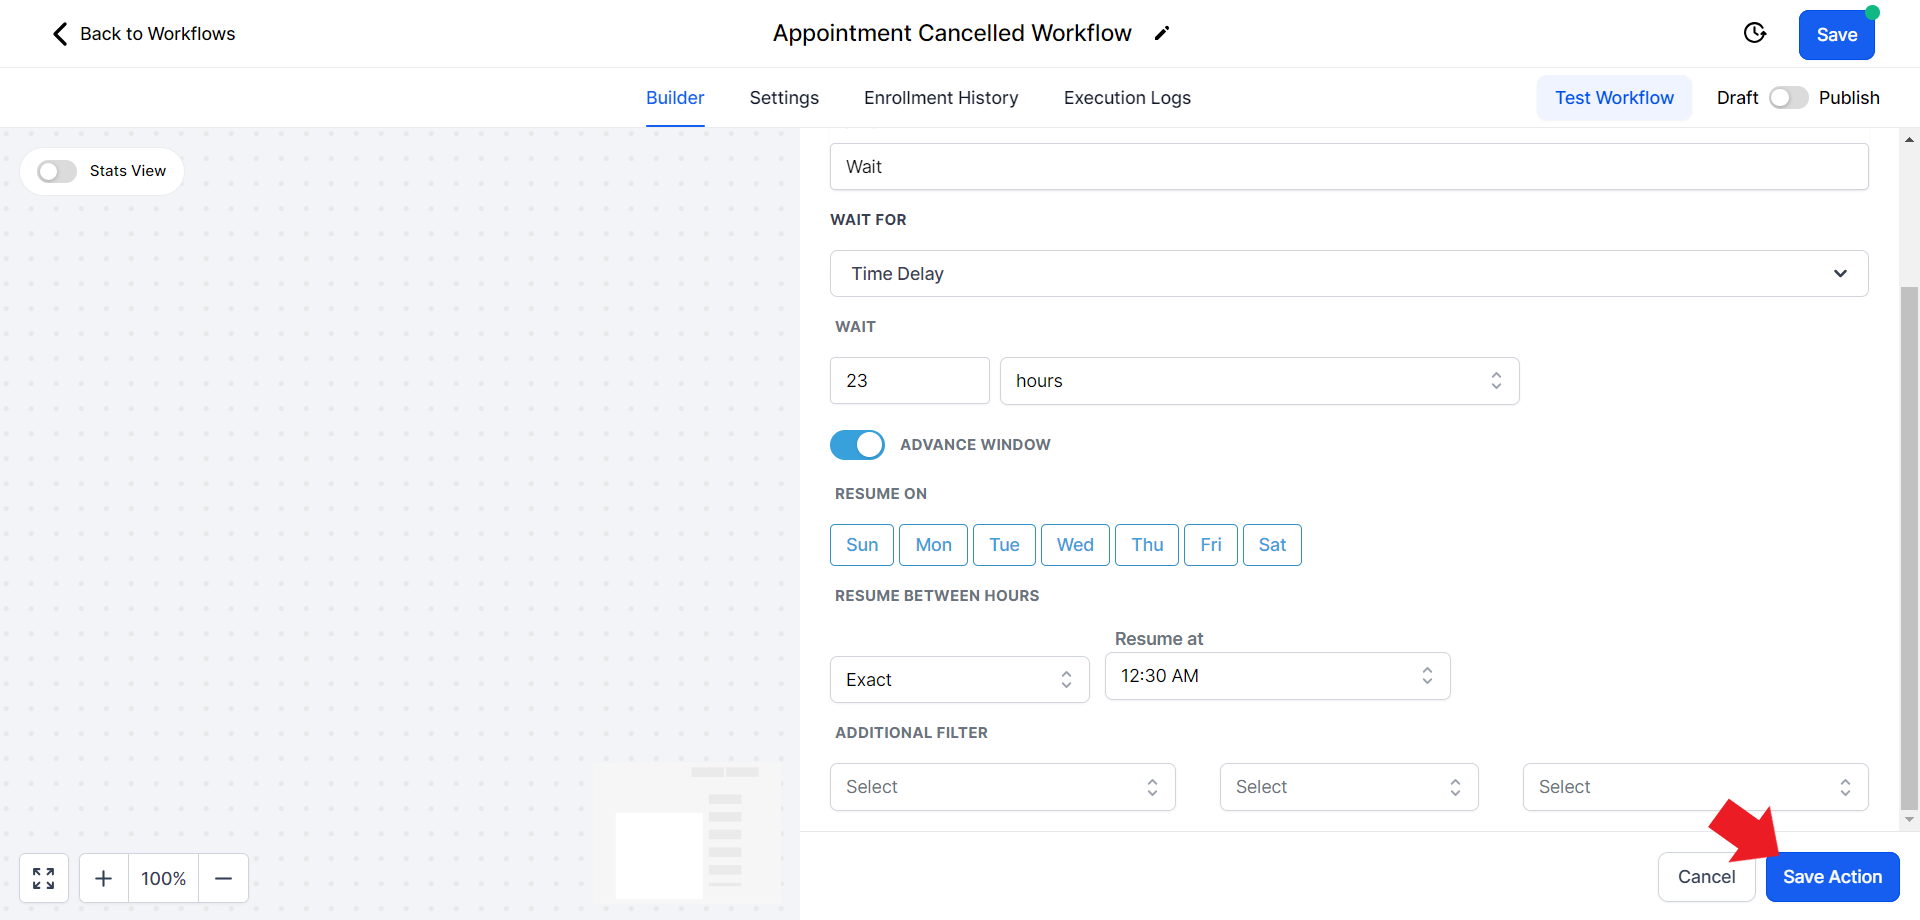
- Under the "Wait" section set the value and unit of time according to your preference

- Click on the "Advanced Window" option
- Select the days of the week by clicking on them

- Click on the option that says "Window" and change it to "Exact" from the drop-down menu.
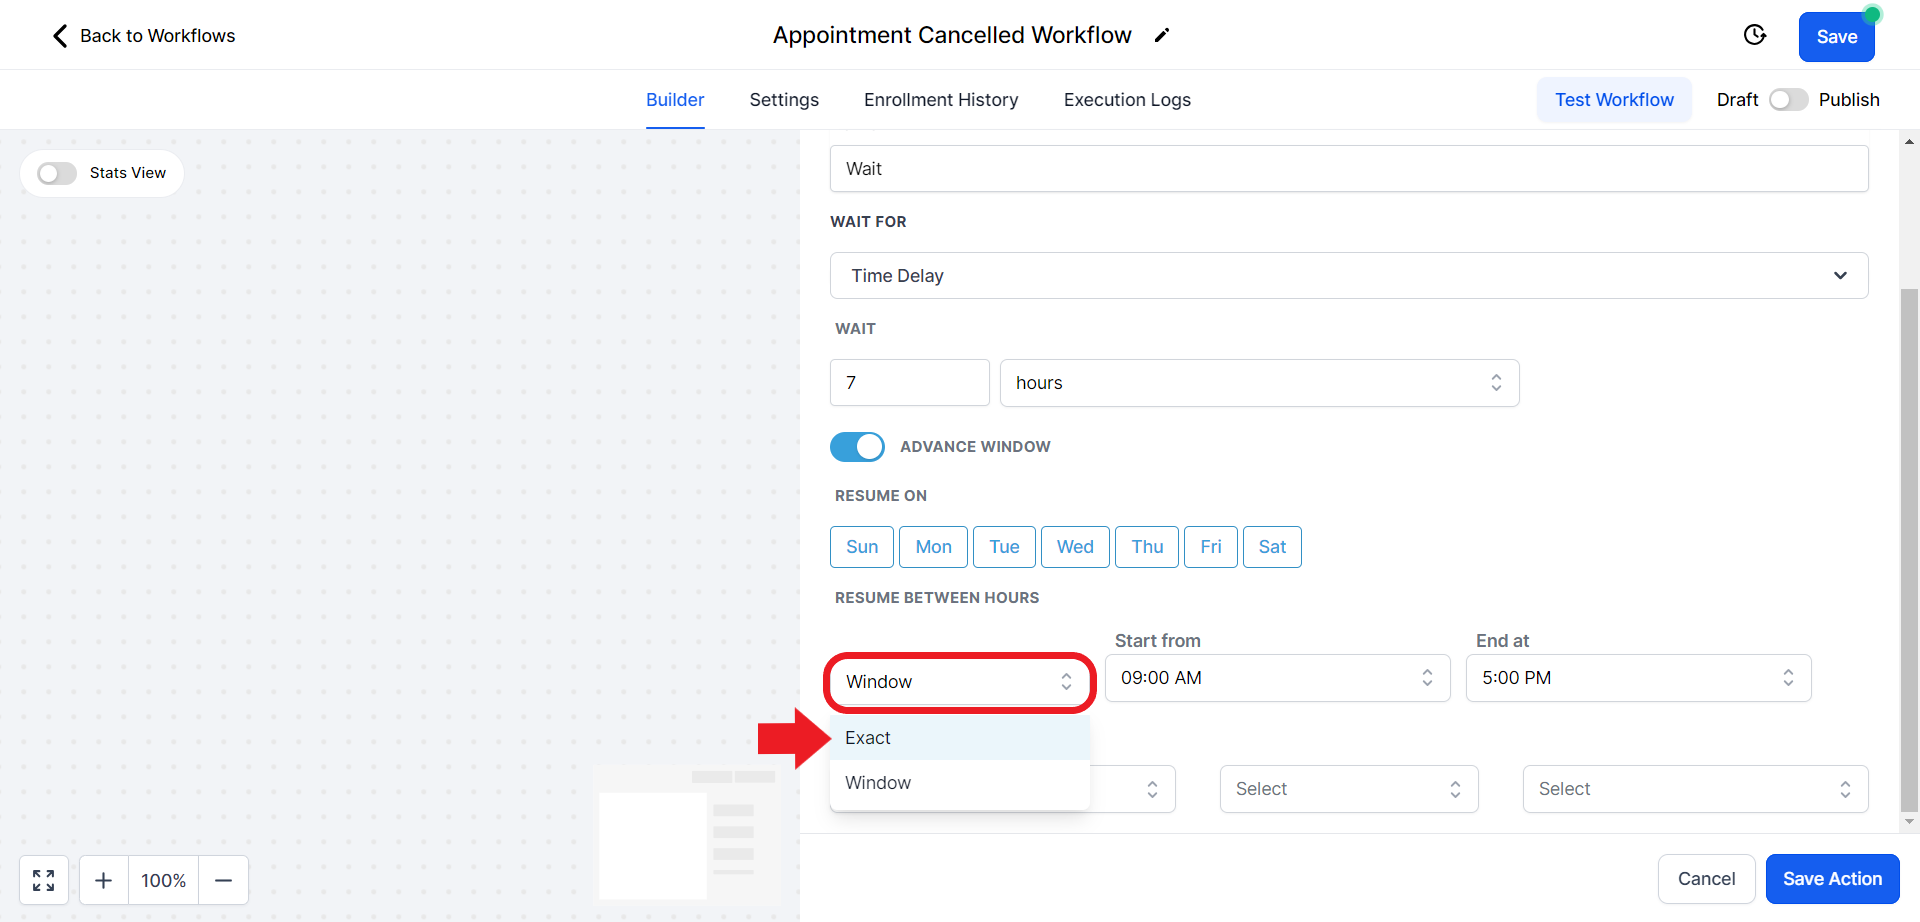
- Click on the option that says "Resume at" and change the time according to your preference

- Once done click on "Save Action"

Step 8: Sending Appointment Cancellation SMS
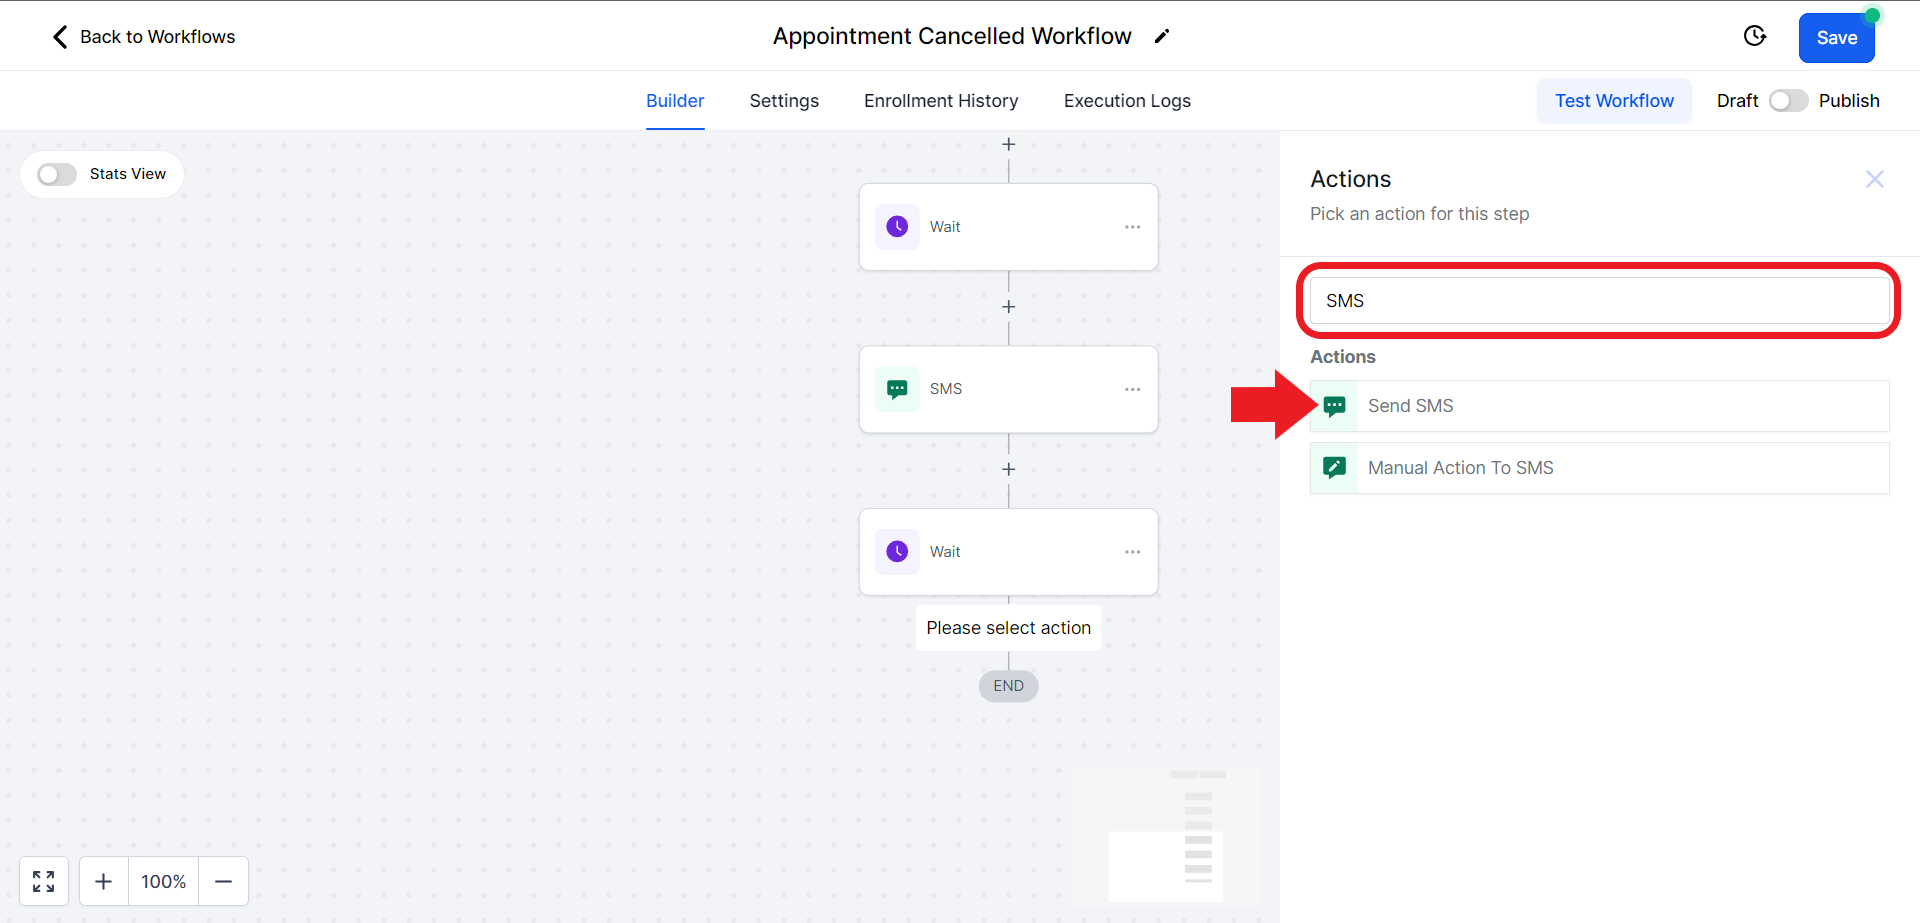
- Add an action step for sending an SMS. Click on the Plus sign.

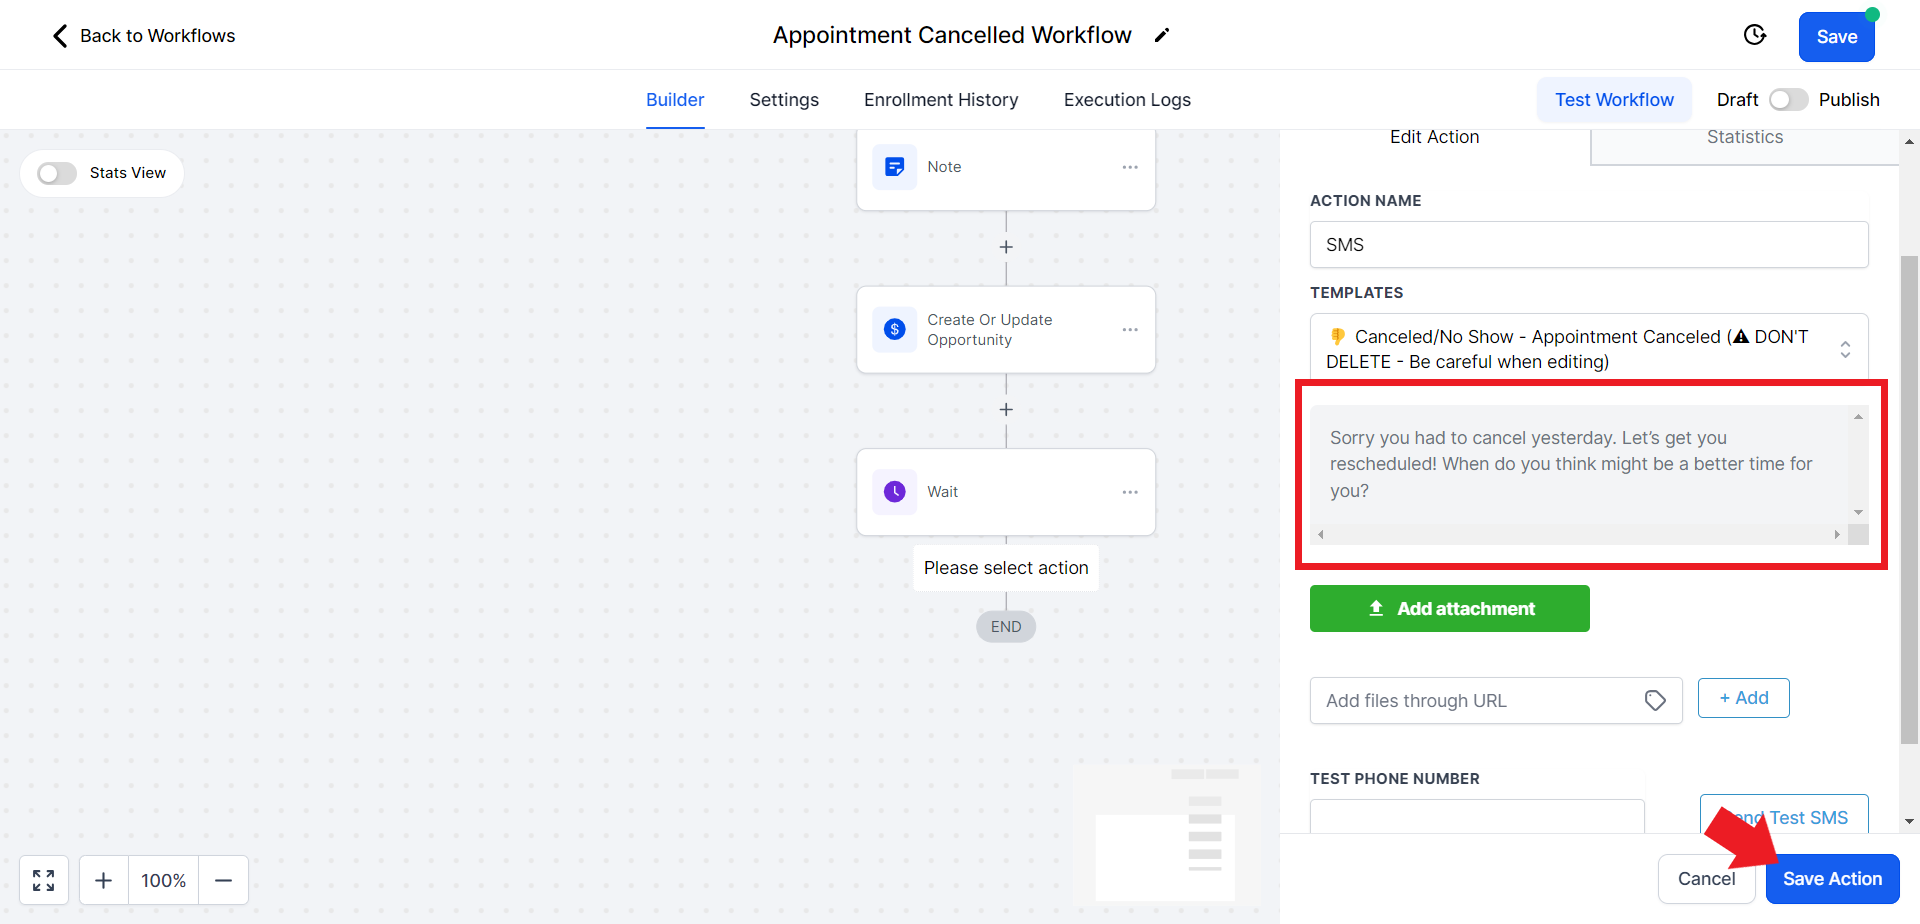
- In the Actions search bar search for "SMS" and click on the "Send SMS" option

- Click on the "Templates" option and from the drop-down choose "Cancelled/No Show- Appointment Cancelled".

- Once you choose the correct template it will automatically fill the message content for you. Once done hit "Save Action"
Step 9: Adding "Wait 1 day" delay
- Click on the Plus sign again

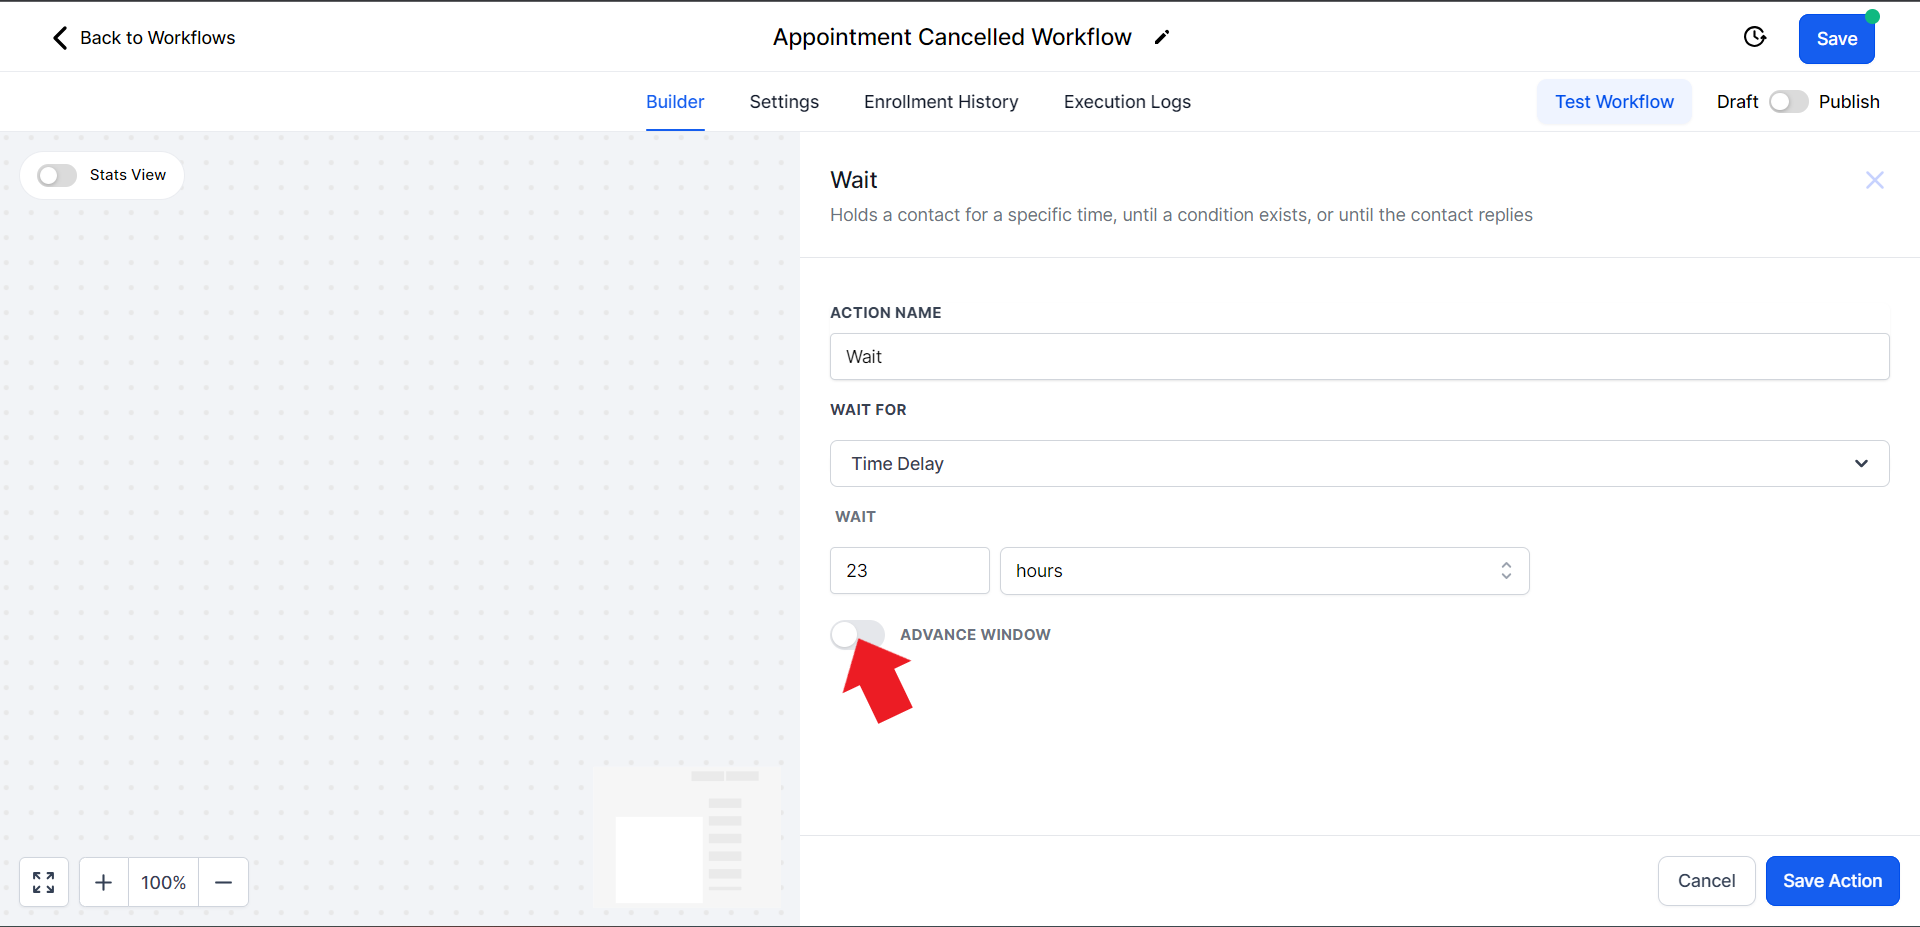
- In the Action search bar search for the "Wait" option and select it

- Under the "Wait" section set the value and unit of time according to your preference

- Click on the "Advanced Window" option
- Choose the preferred days of the week, and make sure they appear blue

- Click on the option that says "Window" and change it to "Exact" from the drop-down menu.

- Click on the option that says "Resume at" and change the time according to your preference

- Once done click on "Save Action"
Step 10: Sending SMS 2
- Click on the Plus sign again

- In the Actions search bar search for "SMS" and click on the "Send SMS" option
- Click on the "Templates" option and from the drop-down choose "Cancelled/No Show- Reschedule?".

- Once you choose the correct template, it will automatically fill in the contents of the SMS. Hit "Save Action" once ready

Step 11: Adding Second "Wait" block
- Simply click on the 3 dots present on the previous wait block and click on the "Copy" option

- Select the "Copy Action" option

- To paste this action click on the "Copy Here" box at the very end of the workflow

You can also click on this "Wait" action box to further edit its settings if needed
- Similarly, we will copy the "SMS" action and paste it below the recently created "Wait" action

- Click on this SMS action box to edit its settings. Click on the "Templates" option and choose "Follow-Up Day 3"

- Click "Save Action" once done

Step 12: Adding third "Wait" block
- Like we did before, copy the Wait block we created in Step 11. Click the 3 dots on the "Wait" block and click "Copy"
- Select the "Copy Action" option
- To paste this action click on the "Copy Here" box at the very end of the workflow
You can also click on this "Wait" action box to further edit its settings if needed
- Similarly, we will copy the "SMS" action and paste it below the recently created "Wait" action
- Click on the "SMS" action box to edit it. Click on the "Templates" option and choose "Follow-Up Day 4"

- Click "Save Action" once done

Step 13: Adding Fourth "Wait" block
- Simply click on the 3 dots present on the previous wait block and click on the "Copy" option
- Select the "Copy Action" option
- To paste this action click on the "Copy Here" box at the very end of the workflow
You can also click on this "Wait" action box to further edit its settings if needed
- Similarly, we will copy the "SMS" action and paste it below the recently created "Wait" action
- Click on the SMS Action box and edit it. Click on the "Templates" option and choose "Follow-Up Day 5"

- Once done click "Save Action"

Step 14: Adding the Last "Wait" block
- click on the 3 dots present on the previous wait block and click on the "Copy" option
- Select the "Copy Action" option
- To paste this action click on the "Copy Here" box at the very end of the workflow
You can also click on this "Wait" action box to further edit its settings if needed
Step 15:Marking Opportunity as "Abandoned"
- Click on the Add Action symbol again

- In the Actions search bar, search for "Updates" and click on "Create/Update Opportunity".

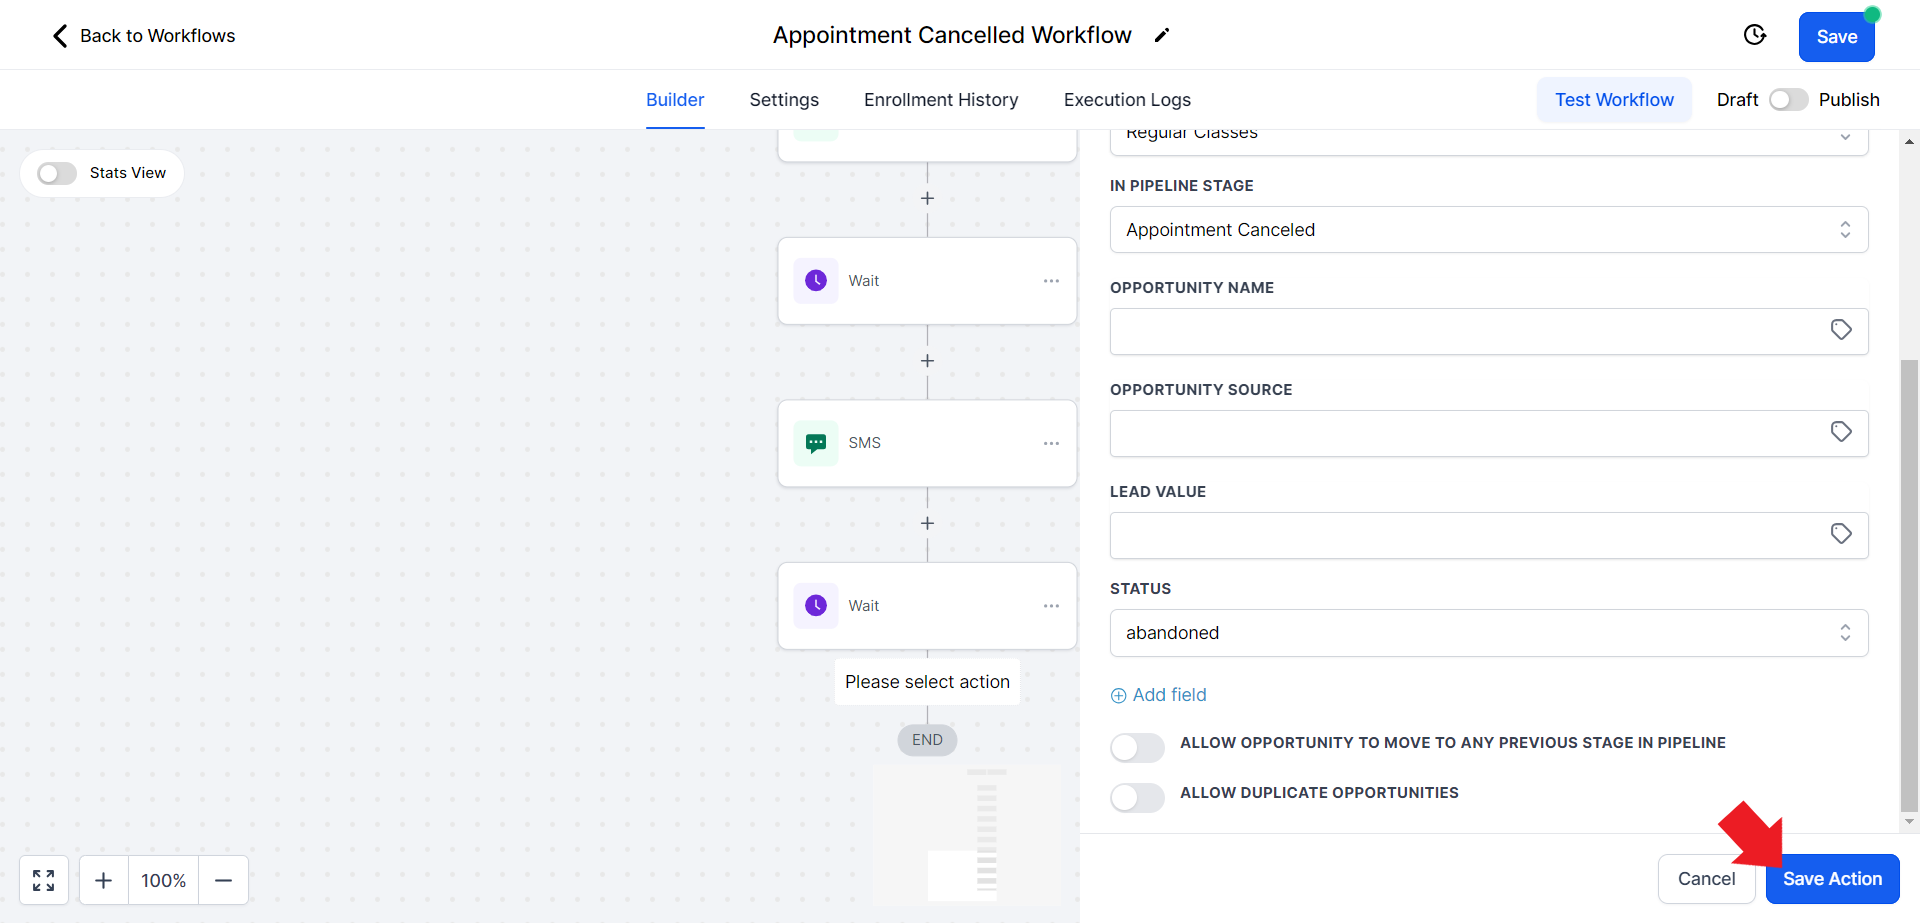
- Click on the "Select Pipeline" field and set the Pipeline to "Regular Classes".

- Click on the "Select Pipeline Stage" field and from the drop-down menu choose the "Appointment Cancelled" option.

- Scroll down and click on the "Status" field and choose "Abandoned"

- Hit "Save Action" once done
- Click on the Blue "Save" icon on the top of the window to save and update your workflow.

Step 16: Publishing the Workflow
- Once everything is done, you will need to publish the workflow to activate it. Toggle the switch on the top right corner to publish.

- Click on the "Settings" Option in the menu

- Toggle the "Allow re-entry" option to turn it ON.

- Hit "Save" on the top

Conclusion
You've now successfully set up an appointment-canceled workflow automation in StudioHub. This workflow automates the process of following up with customers who cancel their appointments, helping you re-engage with them and potentially reschedule their bookings. Ensure that you save your workflow, enable re-entry, and review it to make sure it matches the steps outlined here. With this automation in place, you'll efficiently manage canceled appointments and maintain customer engagement.
Check out the next guide on How to Create No-Show Appointment Workflow