Introduction
In this guide, we will walk you through the step-by-step process of setting up an automated "No Show" appointment workflow in StudioHub. This workflow will help you engage with clients who miss appointments, prompt them to reschedule, and optimize your appointment management process.
Steps
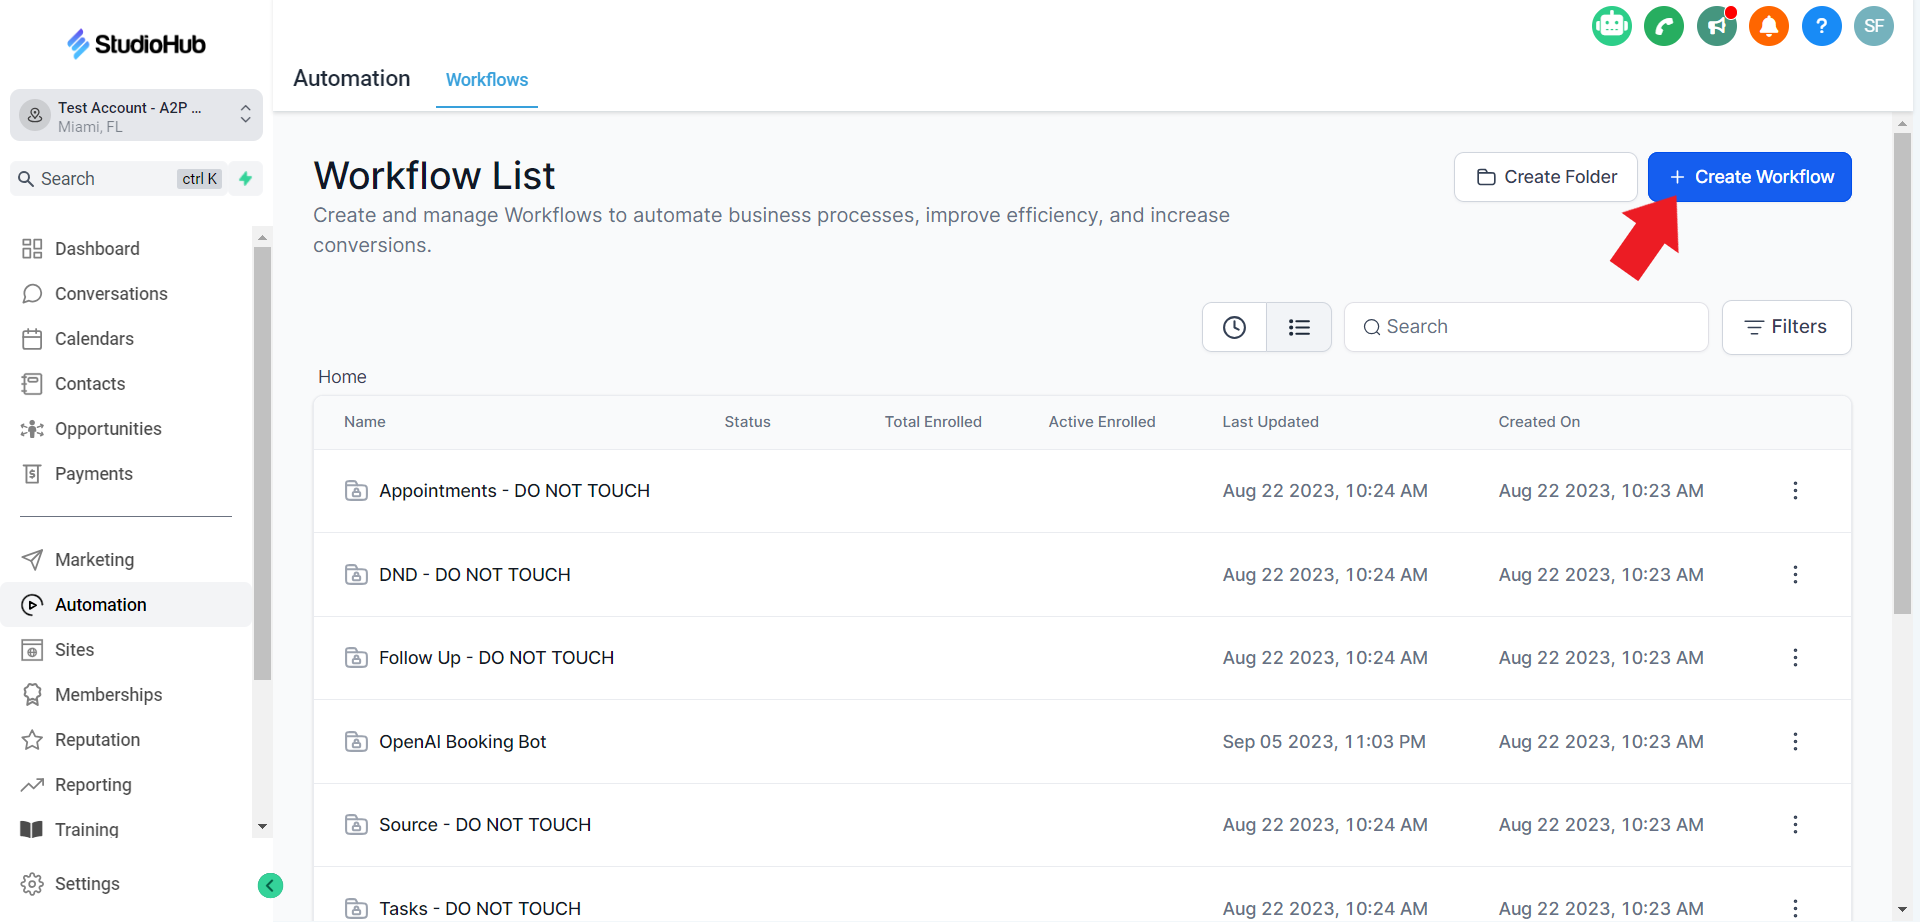
Step 1: Access StudioHub Automation
- Log in to your StudioHub account. Navigate to the Automation section.

- Click on "Create Workflow"
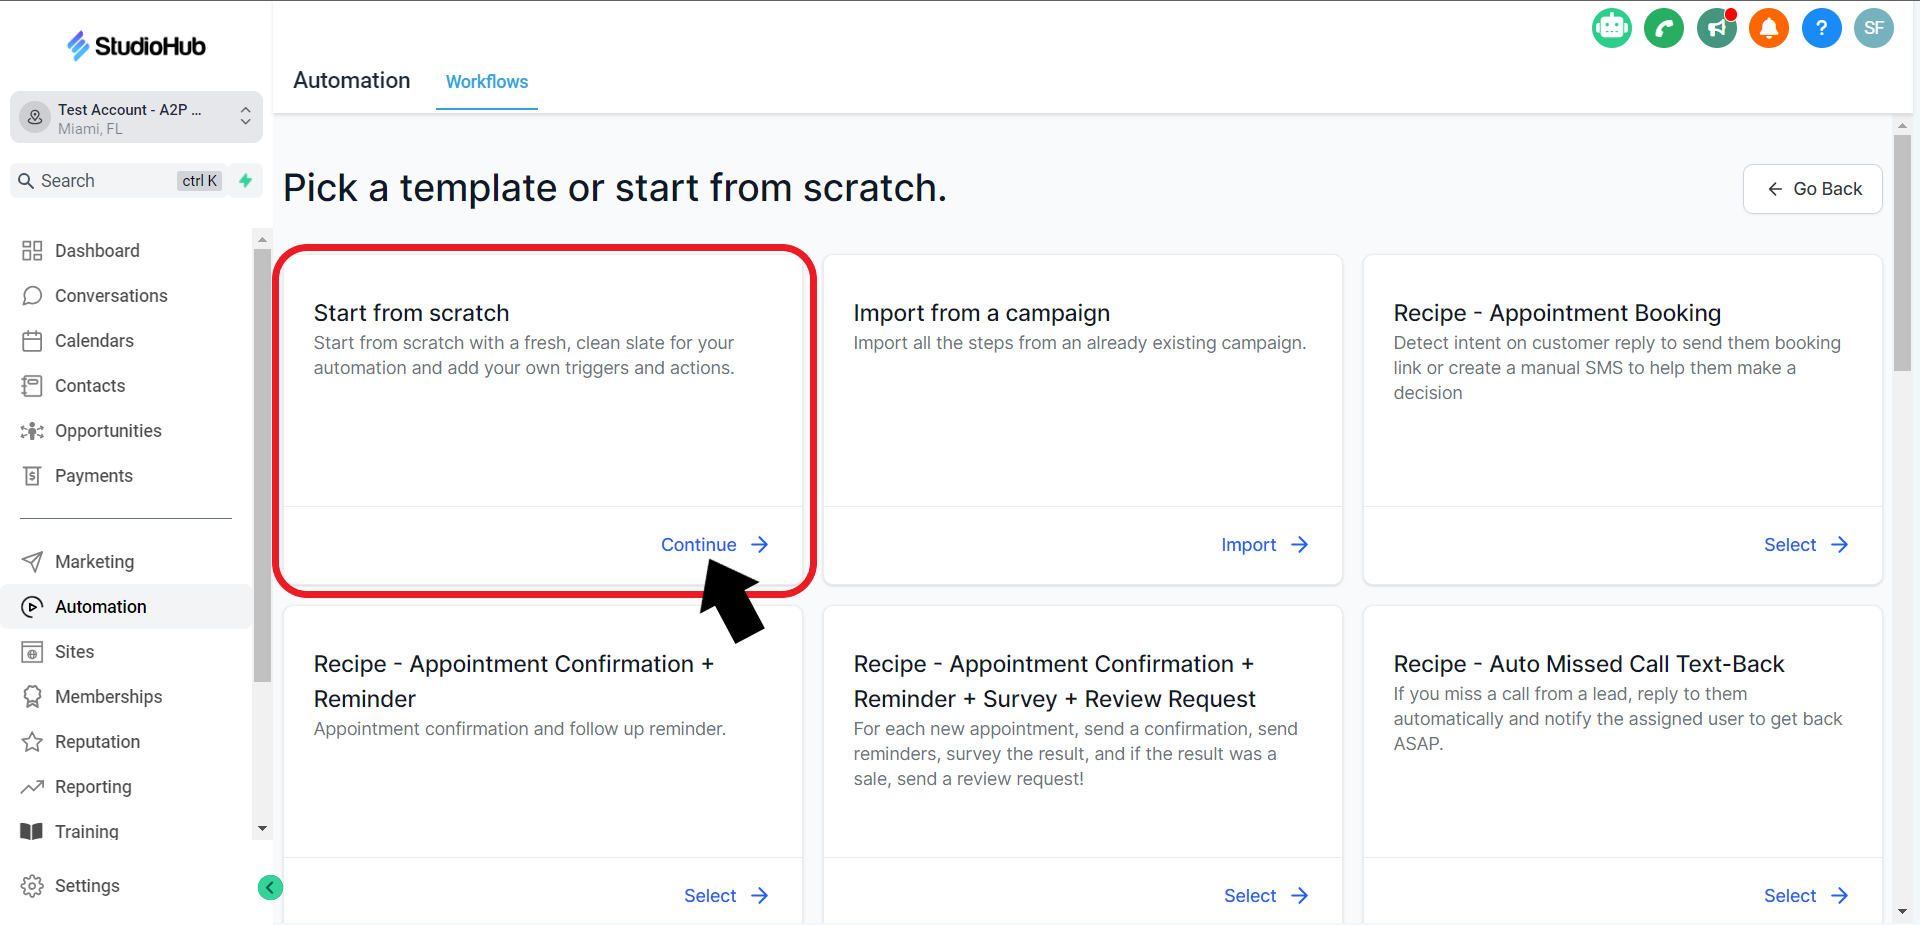
- Select "Start from Scratch" and click on continue
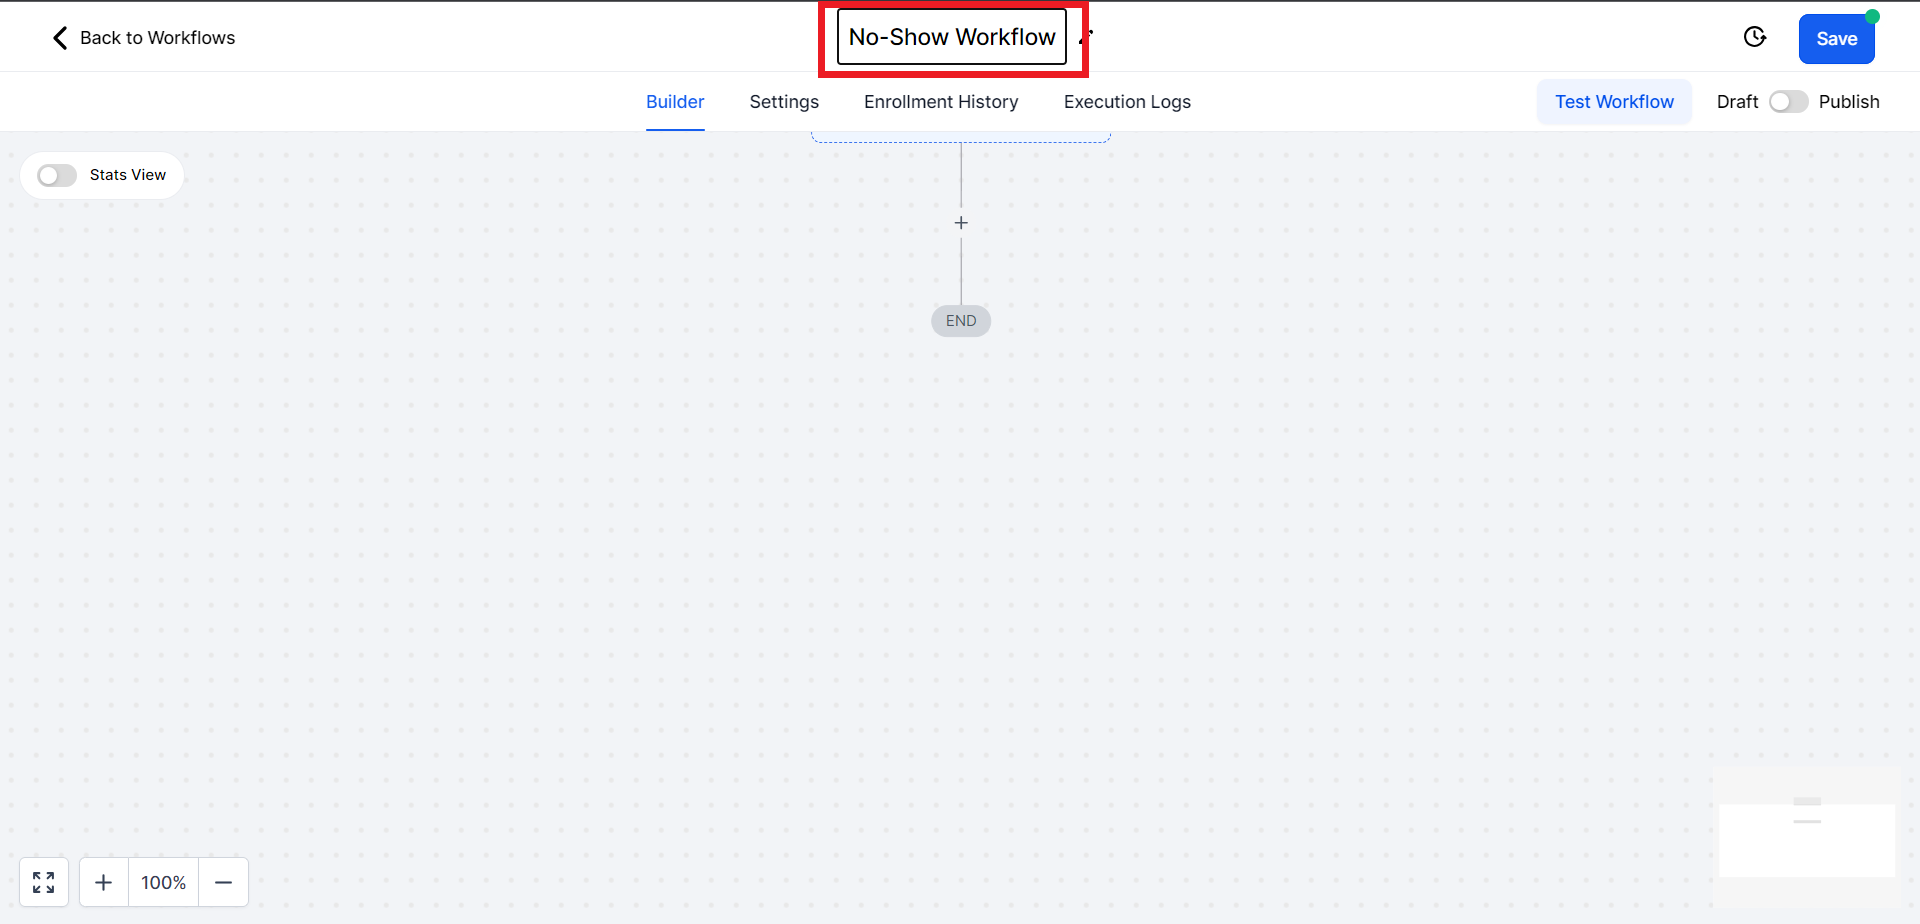
Step 2: Naming the workflow
- Click on the default name at the top to edit it
Step 3: Setting Up the Trigger
- Click on the "Add New Trigger" box
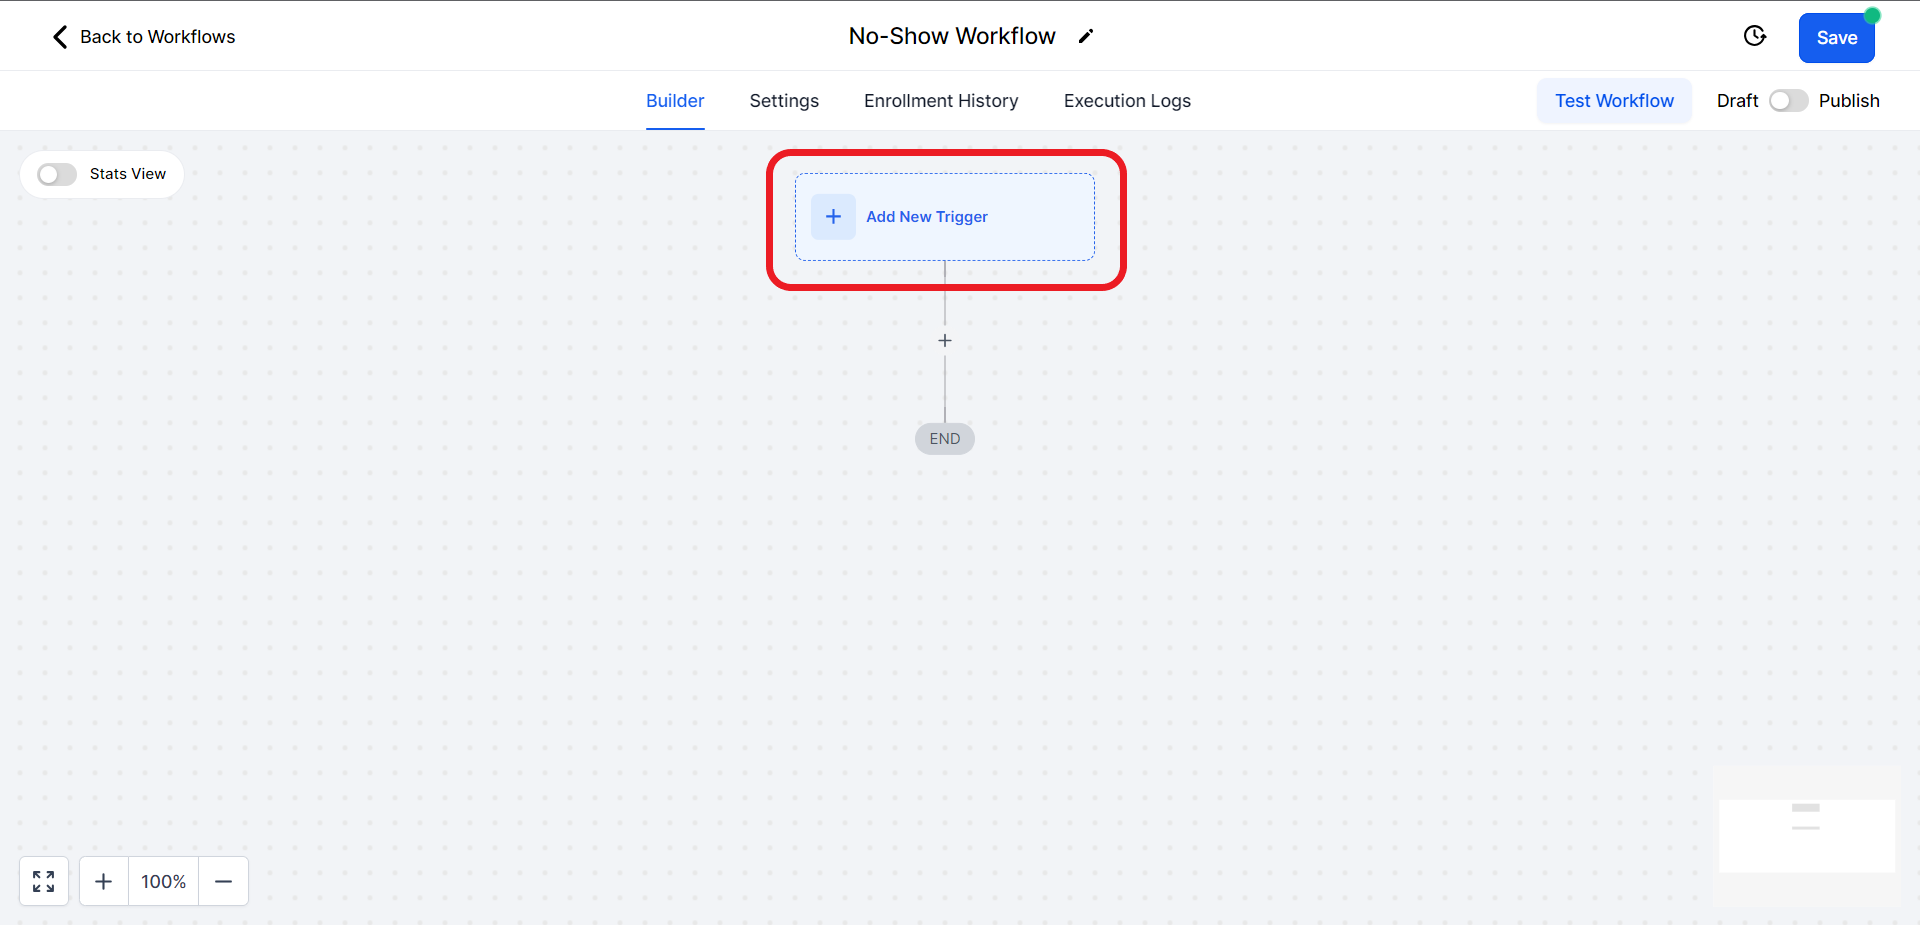
- This will open a trigger search panel on the right. Search and select the "Appointment Status" option.

Step 4: Adding Filters
- Once you've chosen the "Appointment Status" trigger, click "Add Filters."

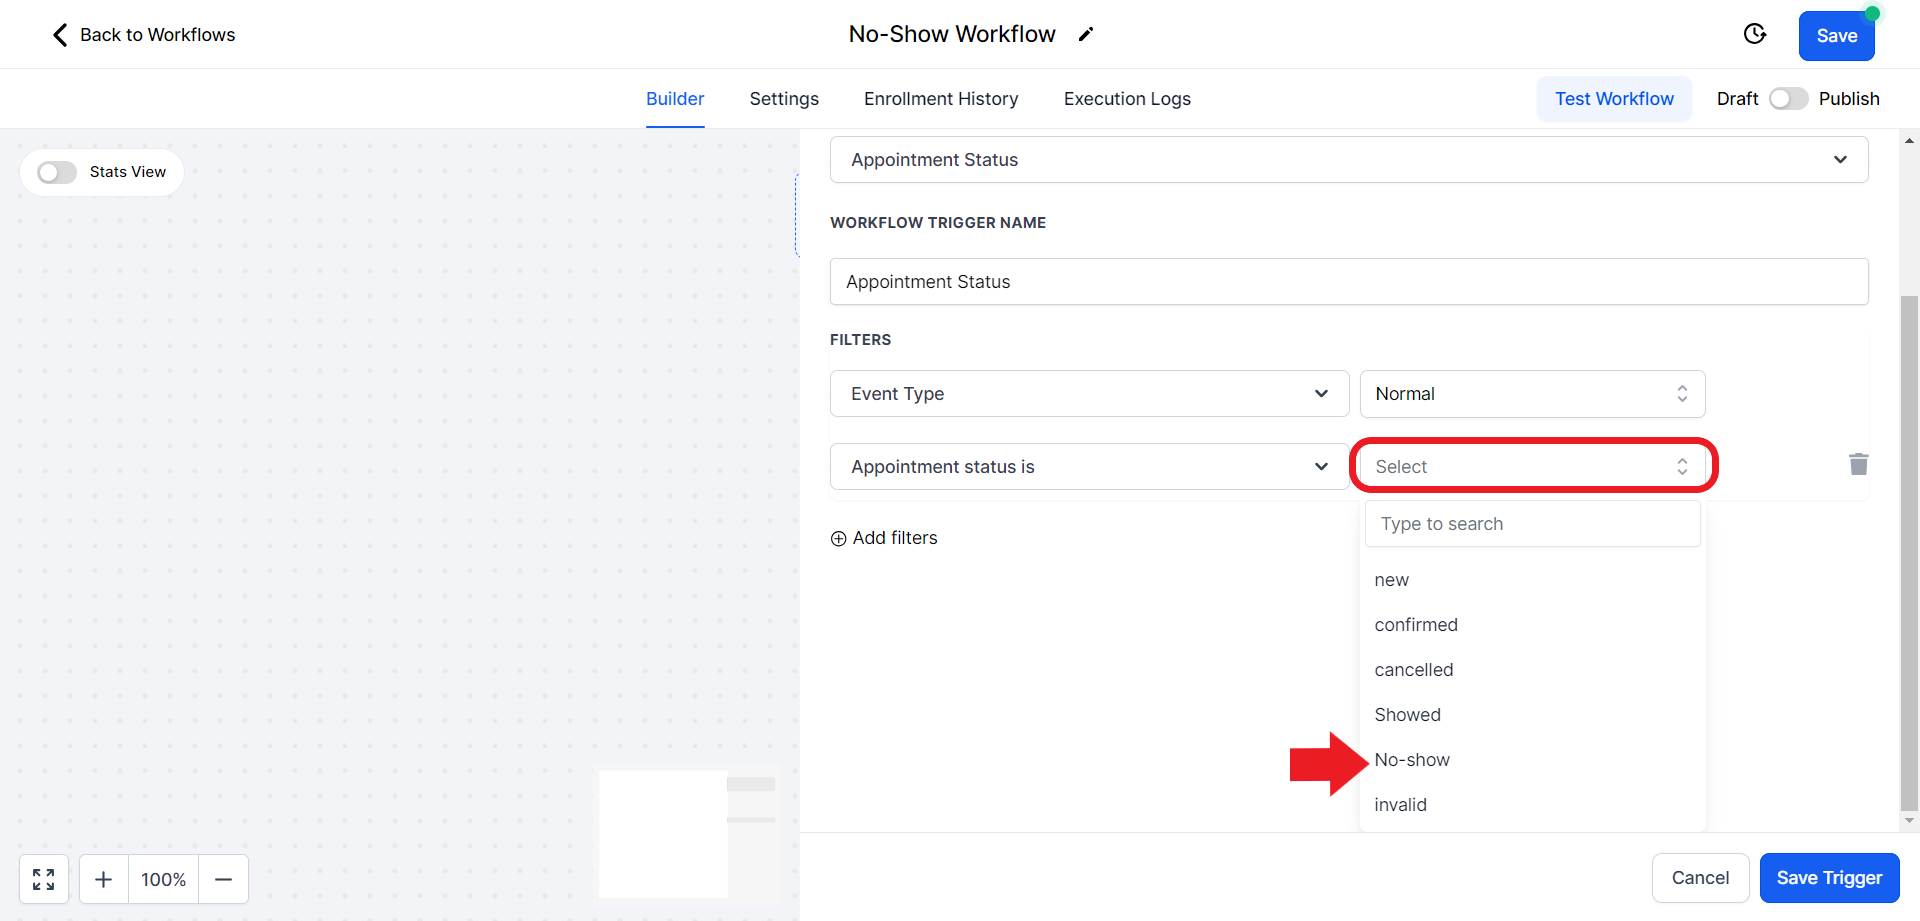
- Click on the filter select field and from the options choose the "Appointment status is" option.

- A new field will appear on the right side of the first one. Click on it and from the options choose the "No-Show" option.
- Click on "Add filter" again

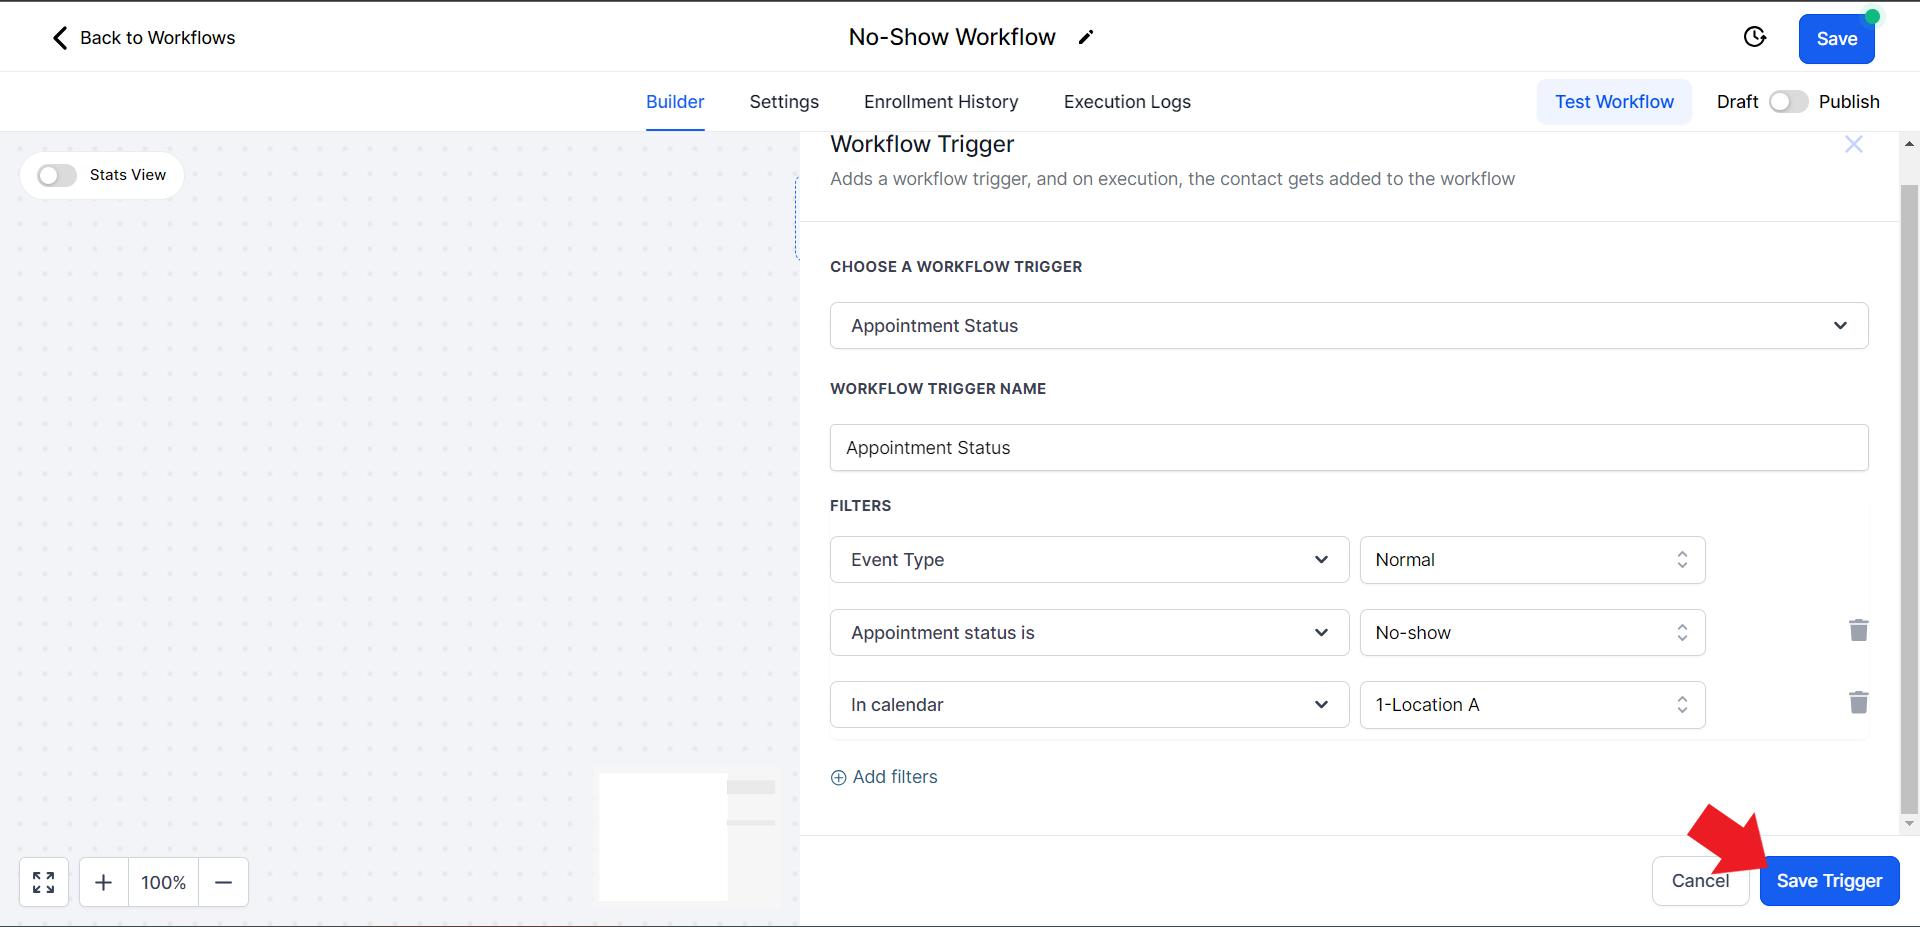
- Click on the filter field and from the options choose the "In Calendar" option

- A new filter field will appear on the right side of the first one. Click on it and from the options choose the calendar you want to choose.

- Click "Save Trigger" once done
Step 5: Adding the First Action Step
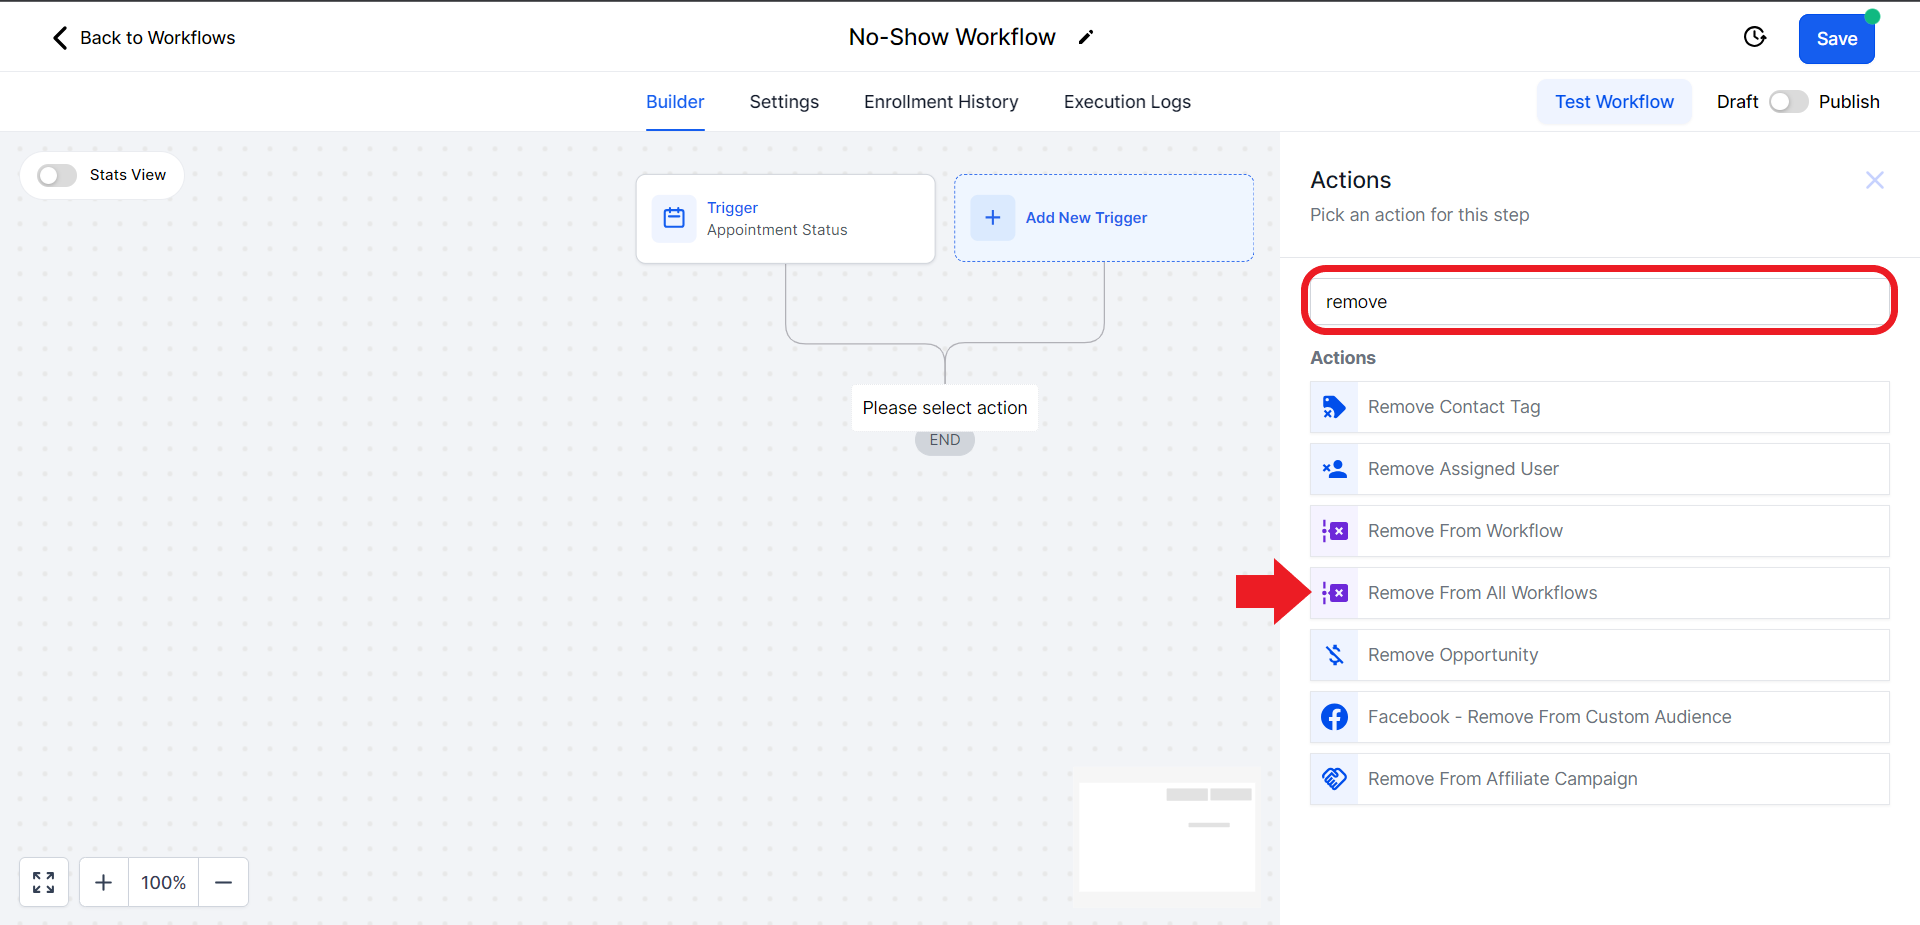
- Click the plus sign to add an action step.

- In the Actions search bar on the right side, search for "Remove" and select "Remove from All Workflows".
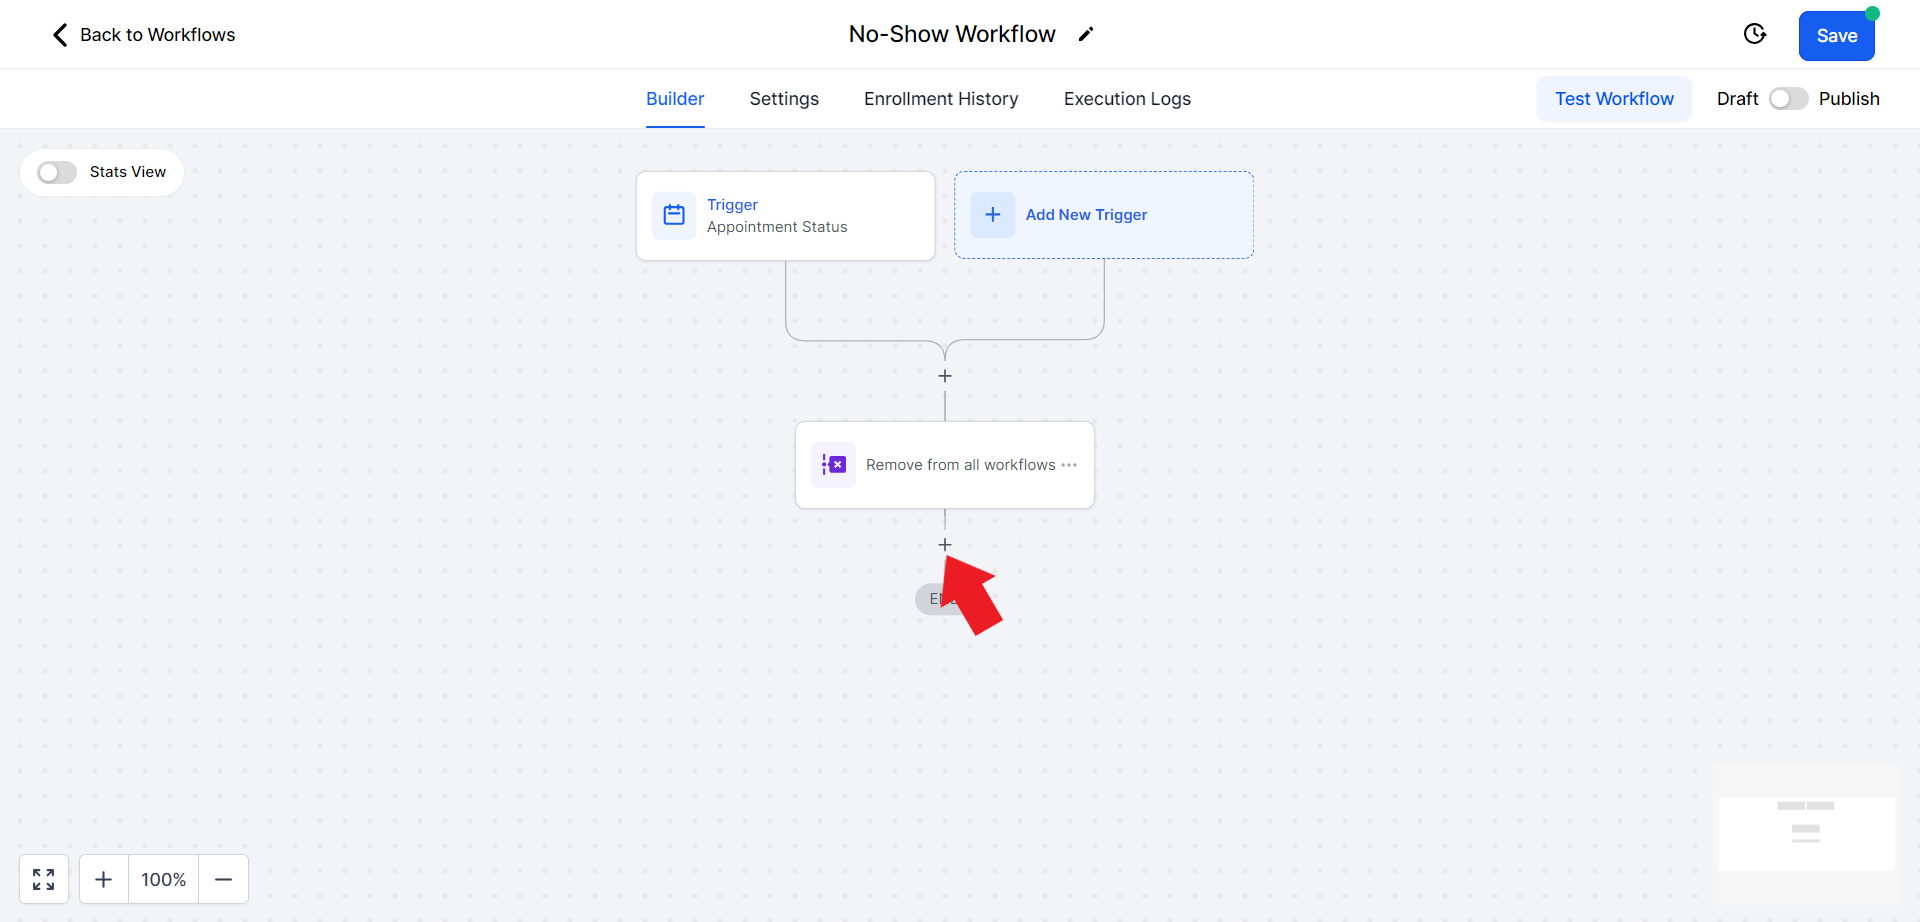
- Toggle the switch by clicking on it to disable "Include current workflow". Once done click "Save Action"

Step 6: Adding Notes
- Add another action step by clicking the plus sign.
- Search for "Note" in the search bar on the right and select "Add to Note."

- In the note content, include a message like "Appointment NO-SHOW in the calendar (new calendar name)", The New calendar name could be the address of your studio e.g.: Side Street 123.
- Click "Save Action" once done

Step 7: Updating Opportunity
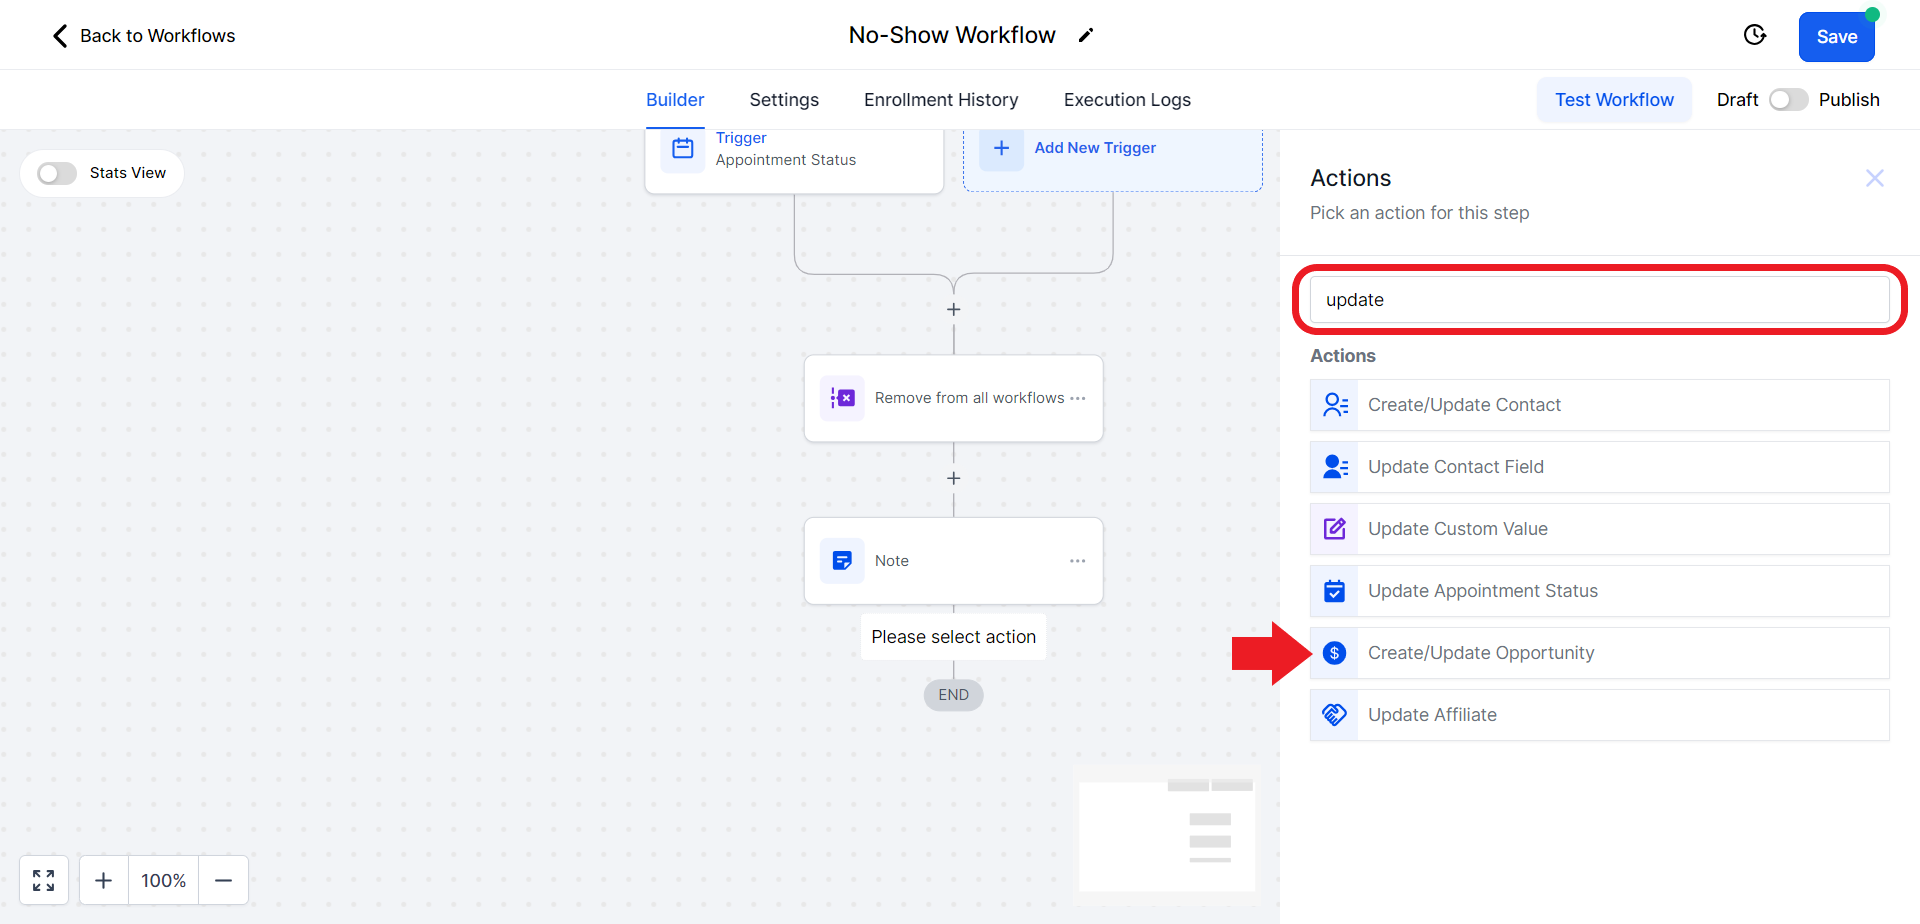
- Add an action step for "Update Opportunity". Click on the plus sign

- In the search bar search for "Update", and click on "Create/Update Opportunity".
- Click on the "Select Pipeline" field and set the Pipeline to "Regular Classes".

- Click on the "Select Pipeline Stage" option and from the drop-down menu choose the "NO-SHOWED" option.

- Scroll down and set the Status to "Open."

- Once done save the action.

Step 8: Sending Appointment "NO SHOW" SMS
- Add an action step for sending an SMS. Click on the Plus sign.

- In the Actions search bar search and select the "Send SMS" option

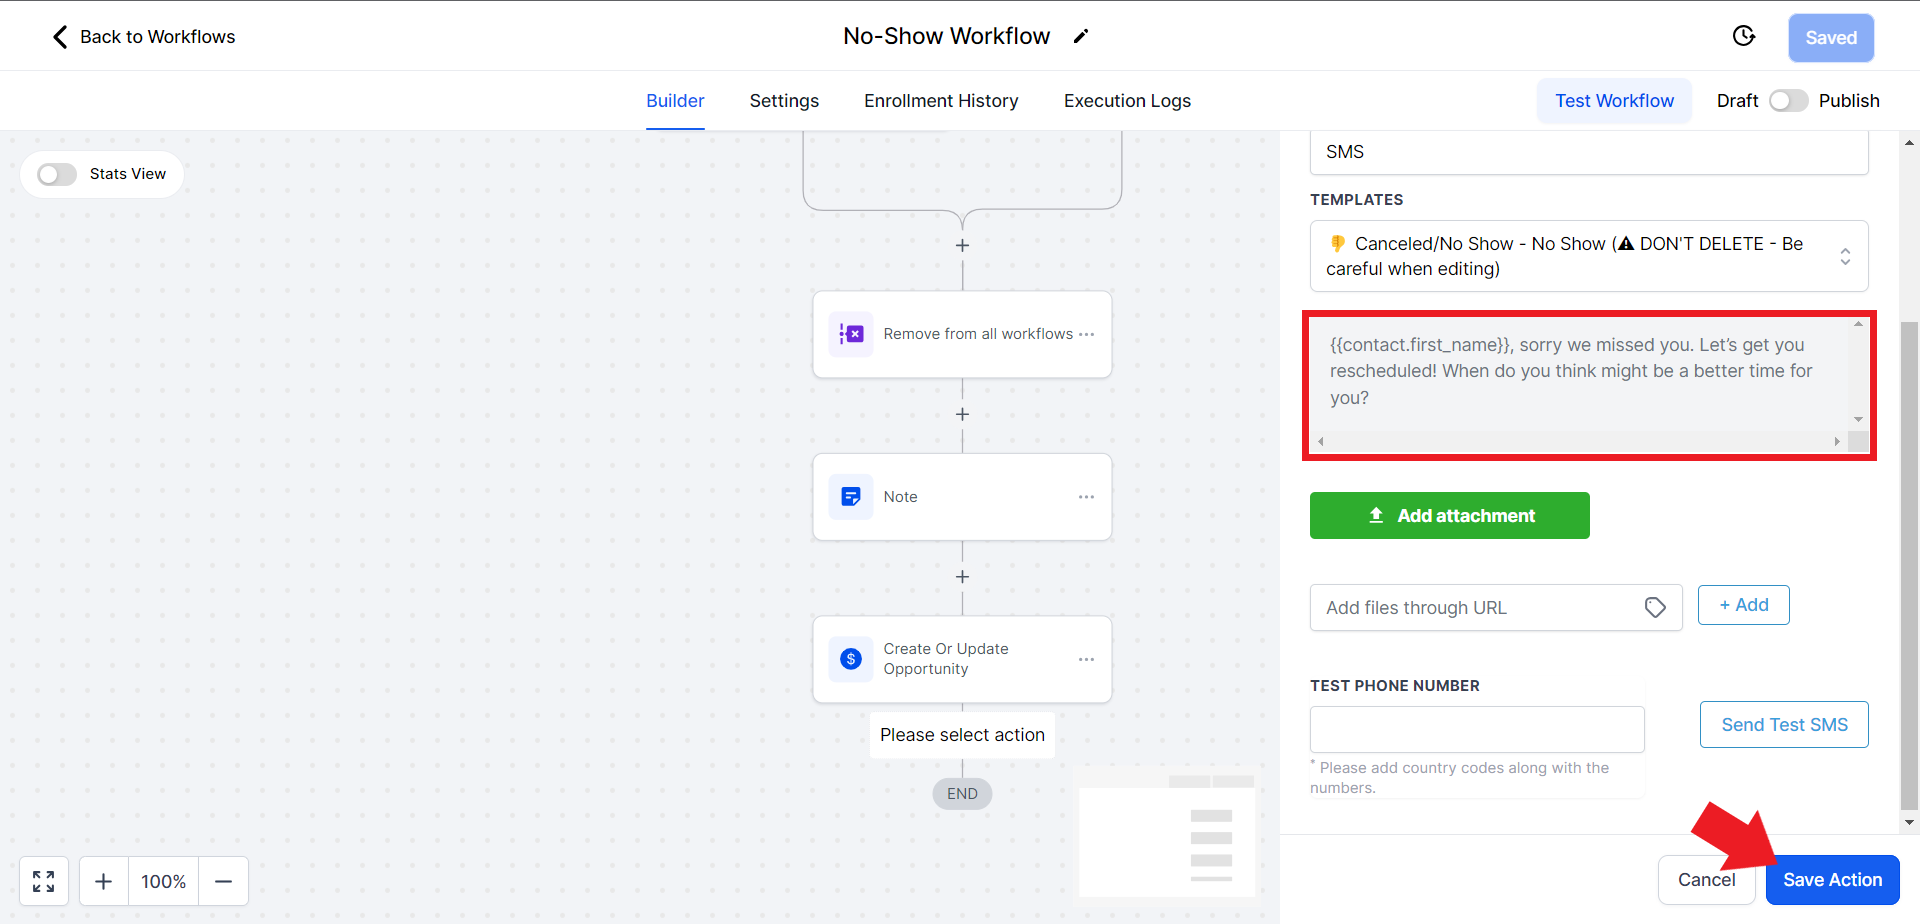
- Click on the "Templates" field and from the options choose "Cancelled/No Show- No Show".

- The message will be composed for you automatically. Click "Save Action" done
Step 9: Adding "Wait 1 day" delay
- Click on the Plus sign again
- In the Action search bar search and select the "Wait" action

- Set the wait value to 23 and the unit to hours. You can also adjust this according to your preference

- Click on the "Advanced Window" option

- Choose the preferred days of the week you would like this message to be sent out on

- Click on the option that says "Window" and change it to "Exact" from the drop-down menu.

- Click on the option that says "Resume at" and change the time according to your preference

- Once done click on "Save Action"

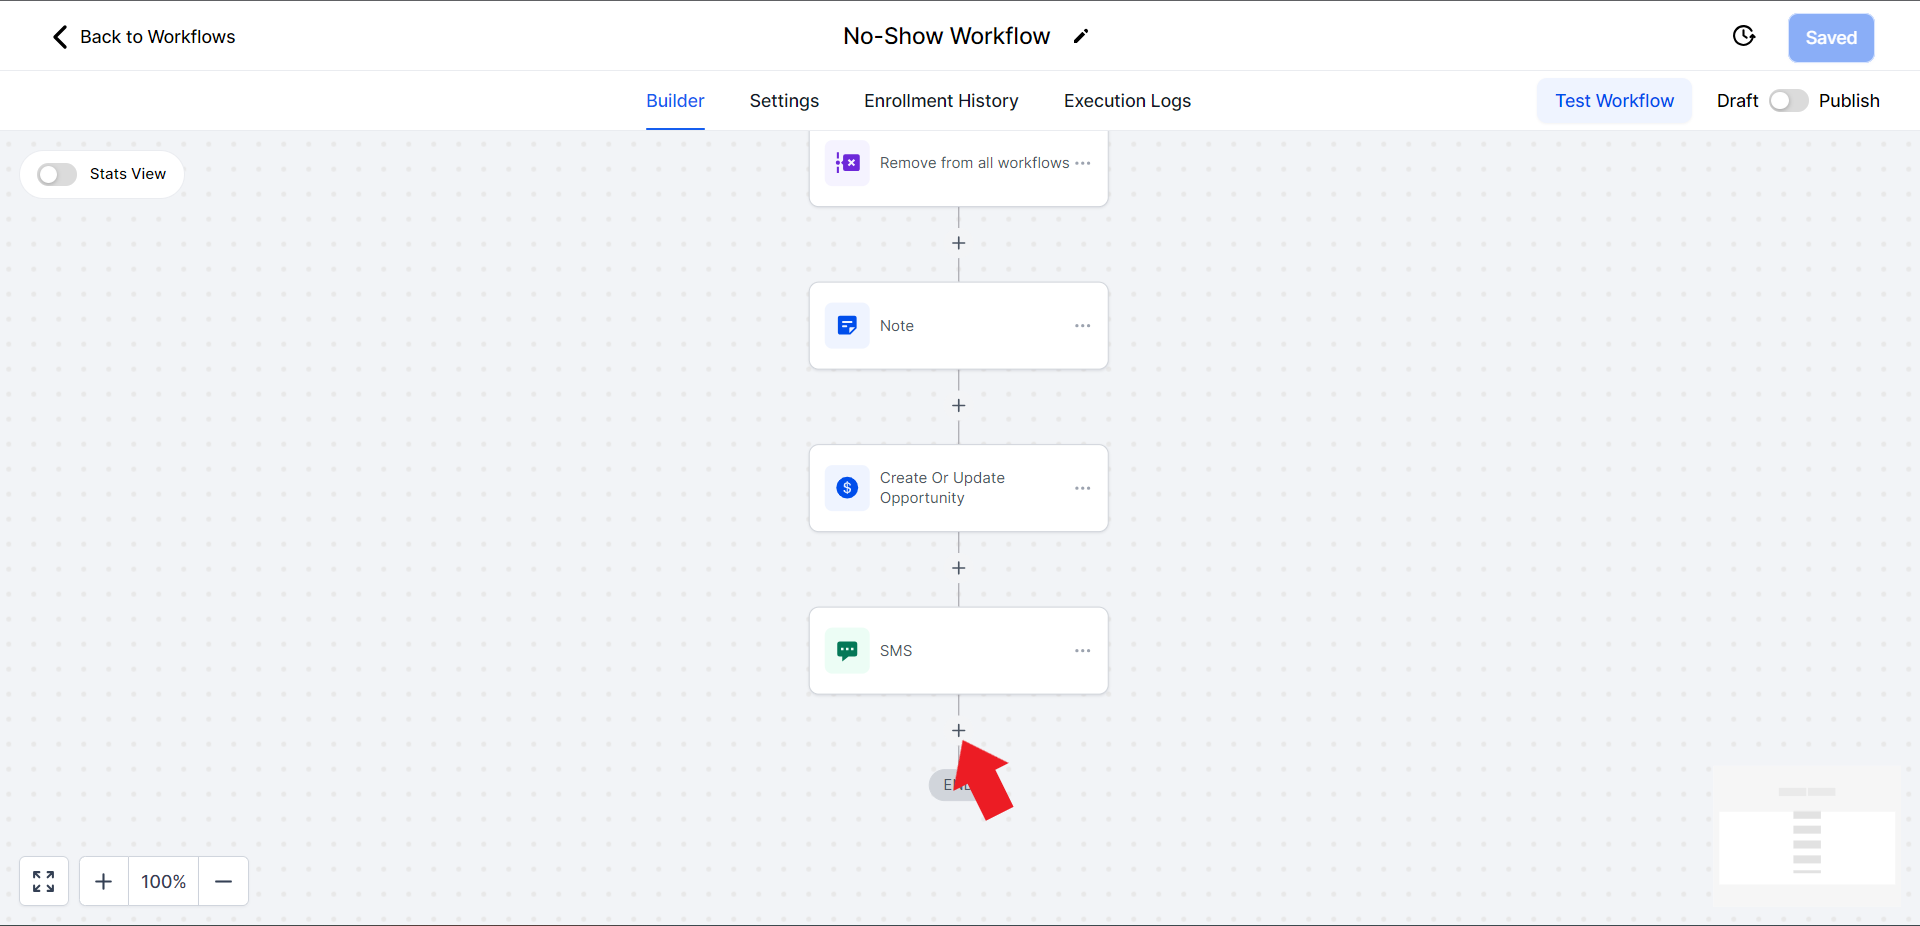
Step 10: Sending SMS 2
- Click on the Plus sign again

- In the Actions search bar search and select "Send SMS" action

- Click on the "Templates" option and from the drop-down choose "Cancelled/No Show- Reschedule?".

- Click on "Save Action"

Step 11: Sending SMS 3 & adding the Second "Wait" block
- Instead of creating individual blocks, we will copy the blocks from the previous step. Click on the 3 dots on the "Wait" block

- Click on Copy, and choose the "Copy All Actions From Here" option

- Scroll down to the bottom and right above the flag click on "Copy Here"

This will copy & paste the "Wait" block and the "SMS" block under it along with their settings
- Click on the recently copied "SMS" block to edit its content

- Click on the "Templates" field and choose "Follow-Up Day 3"

- Click on "Save Action" below

Step 12: Sending SMS 4 & adding the Third "Wait" block
- Like Step 11 we will copy both the Wait and SMS block below it by clicking the 3 dots and choosing "Copy" and then the "Copy All Actions From Here" option
- To paste the actions click on the "Copy Here" option at the very end
- Click on the recently copied "SMS" block to edit its content

- Click on the "Templates" option and choose "Follow-Up Day 4"

- Click on "Save Action" once done

Step 13: Sending SMS 5 & adding the Fourth "Wait" block
- Copy and paste the Wait and SMS block as shown in Steps 11 & 12
- Click on the recently copied "SMS" block to edit its content
- Click on the "Templates" option and choose "Follow-Up Day 5".

- Hit "Save Action" to save the message block settings

Step 14: Adding Fifth and last "Wait" block
- In this step, we will only copy the "Wait" Block and not the SMS. Click on the 3 dots on the previously created wait block.

- Click "Copy" and choose "Copy Action". What this does is it only copies the "Wait" block and not the "SMS" block below it.

- Scroll down to the very end and click on "Copy Here"

Step 15:Marking Opportunity Status as "Abandoned"
- Click on the Add Action plus sign

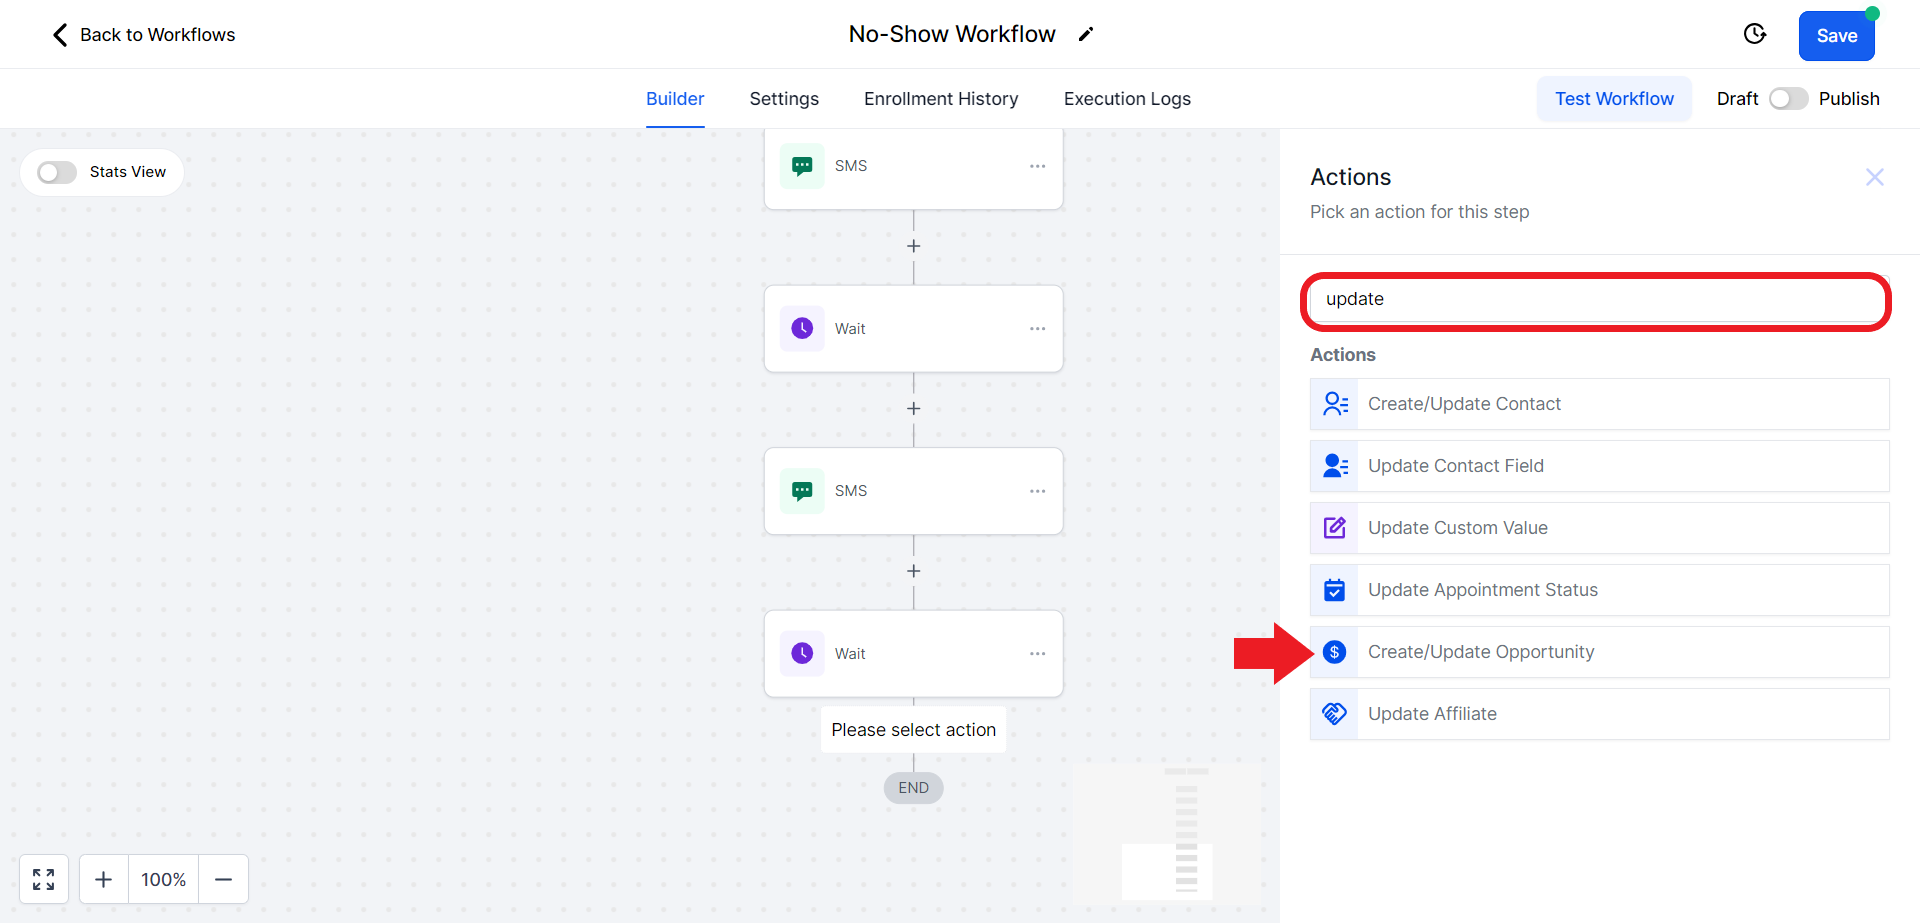
- In the Actions search bar, search for "Updates" and click on "Create/Update Opportunity".
- Click on the "Select Pipeline" field and set the Pipeline to "Regular Classes".

- Click on the "Select Pipeline Stage" field and from the options choose the "NO-SHOWED" option.

- Scroll down and set the Status to "Abandoned".

- Click "Save Action" once done

Step 16: Publishing the Workflow
- Once everything is done, you will need to publish the workflow in order to activate it. Toggle the switch on the top right corner to publish. If done correctly it should turn blue.

- Click on the "Settings" Option in the menu

- Toggle the "Allow re-entry" option to turn it ON.

- Hit "Save" on the top

Conclusion
By following the detailed steps in this guide, you can create a seamless workflow that automates the handling of "No Show" appointments, engages clients to reschedule, and enhances your appointment management process. StudioHub's automation empowers you to focus on core business activities while ensuring improved client engagement and satisfaction. Elevate your appointment management with StudioHub's automation capabilities.
Check out the next guide on How to Organize Workflows on StudioHub