Introduction
If you need to edit or update your StudioHub Chat Widget, you have found the correct article! A chat widget is the part of a website or app, that allows you to chat with your leads in real time. This guide will walk you through the steps to edit and update your chat widget in StudioHub.
⚠️ Once any changes are made to your chat widget, complete Step 3: Update the New Code on Your Website or else the changes won’t reflect on your website correctly ⚠️
TABLE OF CONTENTS
Step 1: Access the Chat Widget Settings
Return Visitor Custom Greetings
Step 3: Update the New Code on Your Website
Step 1: Access the Chat Widget Settings
- Navigate to Sites in StudioHub.
- Click on Chat Widget in the upper menu.

- Click on the three-dots next to the chat widget that you want to edit.
- Click on Edit. This will open up the chat widget setting.

Step 2: Edit Your Chat Widget
The chat widget settings have several features you can use to edit your chat widget.
⚠️Important: The editable features are on the left-hand side. Each change you make will be reflected in a preview on the right-hand side.⚠️Below are settings you can explore for your chat widget:
1. STYLES
- Click on Widget and go to Styles.

Chat Prompt: This refers to the text next to the chat icon.
Use the toggle to turn it on / off.
Select your desired chat prompt style. This option will not be available if the chat prompt toggle is turned off.

Chat Icon: This refers to which icon you want to display next to your chat box.
- Select the chat icon of your choice.

Theme: This refers to the overall look of your chat widget.
- Click on the theme you want.

- To customize your theme, click on the customize icon option. This will display two settings below it: Custom Color Options and Topography.
- Click on the circle in front of each of the custom color options to pick your preferred color.
- Typography is the style and appearance of the text of your chat widget. To pick a font of your choice, click on the drop-down icon under font family.
- Click on the circle in front of each of the text color options under the font setting.

Welcome Message: This option allows you to add a custom message you want your visitors to see when they open the chat widget
- Input your custom message into the Welcome Message text box.
- For example, 'Hi there, have a question about dance program? Text us here.'.

Return Visitor Custom Greetings: This option lets you set a custom message for leads that have messaged you more than once in the chat widget. You can use this setting to enable custom greetings for your returning leads.
- Click on the toggle to turn it on or off.
- Add your custom greeting in the text box.
- For example, 'Welcome back {{name}}, how can we help you today?'

Widget Customization
Select Widget Customization.

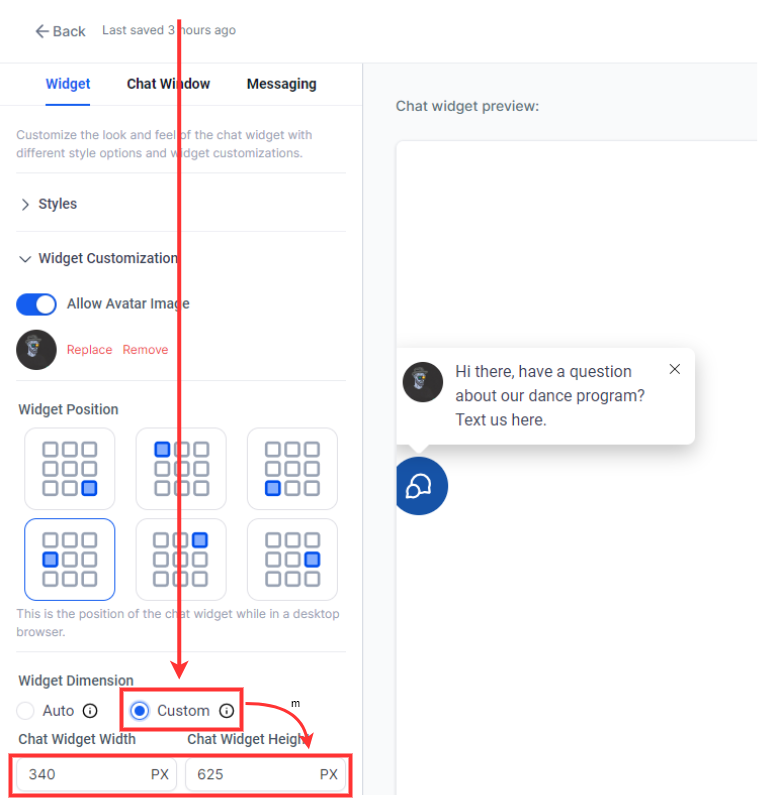
Allow Avatar Image: This option allows you to upload a picture to your chat widget profile.
- Use the toggle to turn it on / off.
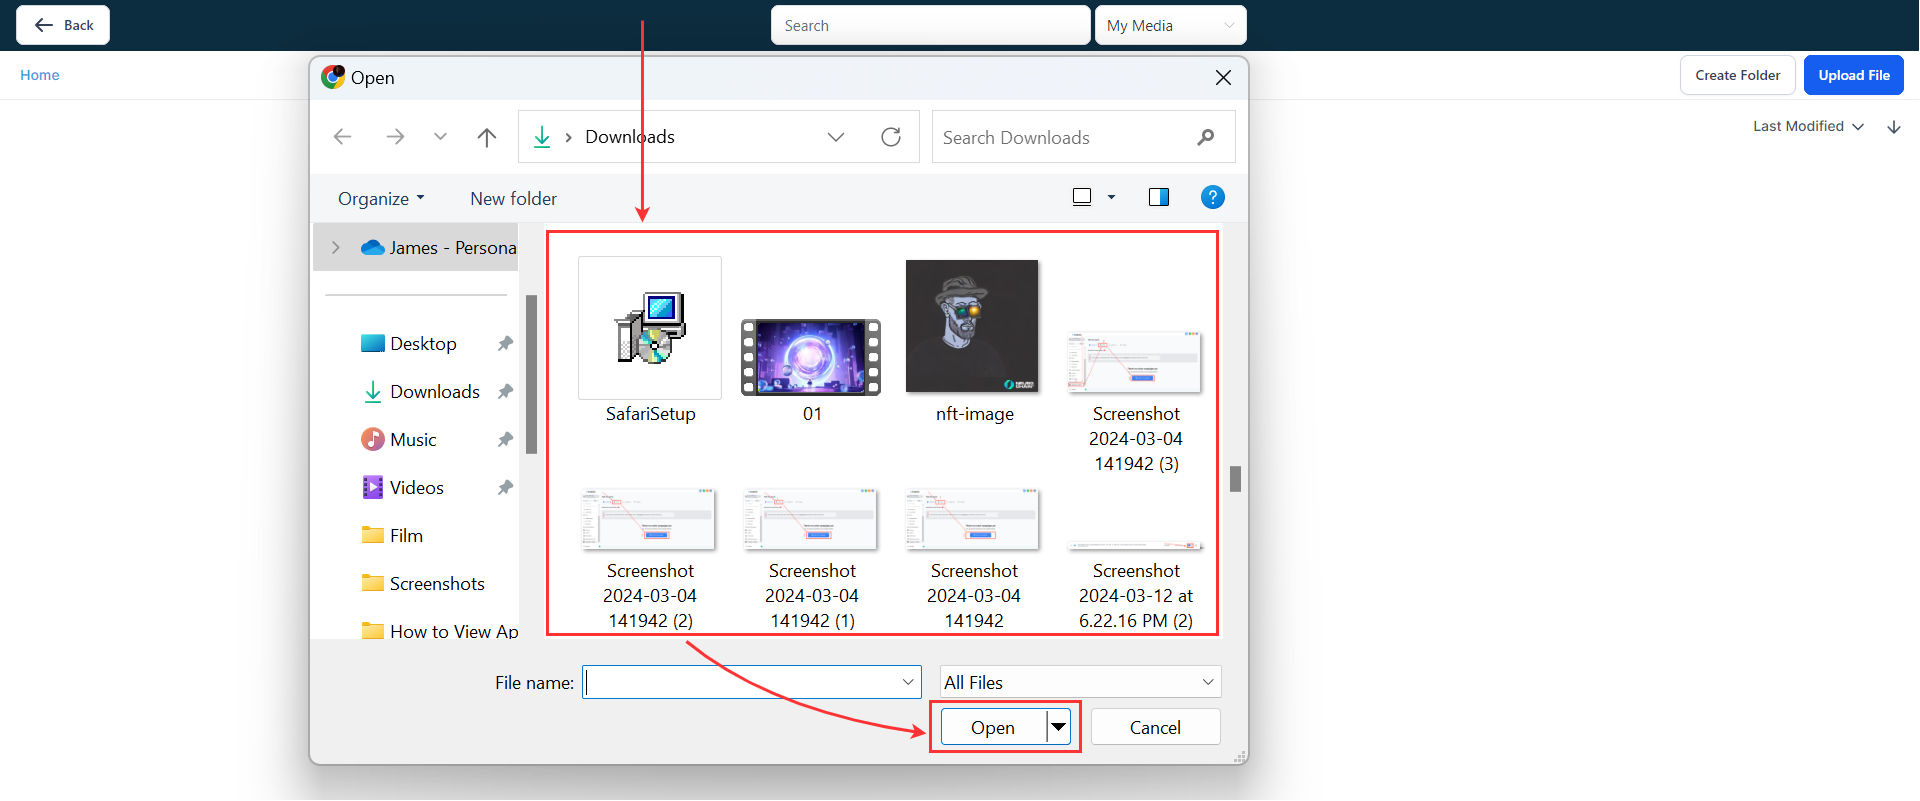
- Selecting Replace will open your PC file manager. If you don't want to use any avatar image, click on Remove.

- Go to Upload File.

- Select the picture you want to use.
- Select Open.
Widget Position: This option sets where your chat widget will appear on your website when someone views your website in a web browser.. It doesn't apply to a mobile browser.
Select the position you want for your chat widget.

Widget Dimension: This refers to the size of the chat widget in terms of width and height.
Select Auto if you want the widget dimension to automatically adjust to the device screen size.

Select Custom if you want to manually change the chat widget size.
2. CHAT WINDOW
Select the Chat Window tab and click on Title and Intro.

Chat Window Title: This is the header of the chat window.
- Fill the text box in front of Chat Window Title with the title you want to use.
- For example, 'Have a question about our dance program?'

Intro Message: The intro message refers to the type of information that you want the lead to submit.
For example, 'Enter your question below and someone from our studio will get right back to you'.
- Fill in the Intro Message text box.

Contact Form Options: This adds mandatory fields for leads to input their contact details for the first time that they send a message
- You can add up to 5 fields:
- By default, these fields are Name, Phone and Message
- Name is mandatory
- Either Email or Phone must be selected (if neither are selected, Phone will be automatically added)
- By default, these fields are Name, Phone and Message

CTA: This is the button for leads to submit their information.
- Edit the content inside the CTA text box.

Additional Options
To proceed, go to Additional Options.

Agency Branding: This sets the agency name to appear at the bottom of the chat widget.
Use the toggle to turn it on / off.

Display Name: This refers to the name of the agency.
- Fill in the text box under Display Name.

URL: This option refers to the website of the agency.
- Fill in the agency website into the text box under URL.

Consent Checkbox For HIPAA: This adds a checkbox in front of the Legal Message to indicate consent to it.
- Click on the Consent Checkbox toggle to turn it on or off.

Legal Message: This refers to any legal information associated with the chat.
- Edit the Legal Message text box.

3. MESSAGING
Proceed to Messaging and click on Acknowledgement.

Acknowledgement
Customer Support Contact: You can set the chat widget to display the Customer Support contact to visitors who send a chat.
- Fill the text box in front of Customer Support Contact with either an email or phone number with which visitors can contact you.

Acknowledgment Message: This refers to the message a visitor gets after sending a chat.
- Fill the text box in front of Acknowledgement Message.

Acknowledgement Greeting: This refers to the greeting a visitor gets after sending a chat.
- Fill the text box in front of Acknowledgement Greeting with the greeting you like to use.

Acknowledgement Icon: This icon to indicate whether a message sent has delivered or has been read.
- Select the acknowledgement icon of your choice.
- Click on the color in front of Placeholder Color and select the icon color you want.

Language
- To proceed. go to Language.

Select Language: You can select the language that is applicable to your chat.
- Click on the drop-down arrow below Select Language to select the language of your choice.

Step 3: Update the New Code on Your Website
- Go to the top right corner of your screen and click on Save.

- Go to Get Code.
- Click on Copy Code.

- Add the copied code to your website. If you do not know how to do this, contact our support email (support@getmorestudents.com)
- Once you’ve updated your site with the code, check to see that the widget has been updated
⚠️ Once any changes are made to your chat widget, complete Step 3: Update the New Code on Your Website or else the changes won’t reflect on your website correctly ⚠️
Conclusion
By following the steps outlined above, you have successfully edited or updated your chat widget in StudioHub.
If you need any assistance or have any questions, please reach out to us at support@getmorestudents.com