Introduction
In this guide, we'll show you how to create an automated follow-up workflow in StudioHub. This is a valuable tool for staying engaged with your leads and customers by sending timely and relevant messages. Let's get started!
Steps
Step 1: Access Automation Settings
- Make sure you're logged into your StudioHub account on your computer.
- Click on "Automation" located in the left-hand menu.

Step 2: Create a New Workflow
- Within the "Automation" section, click on "Create Workflow."

- Choose the "Start from scratch" option, click "Continue"

Step 3: Name Your Workflow
- At the top of the page, provide a name for your workflow.

- Make sure to click "Save" at the top right corner of the screen to keep your workflow progress saved.

Step 4: Create an Initial Action
- Click the plus sign to add the first step. For example, to send a text message when people enter this workflow.
- In the Action search bar type "SMS", and you'll find "Send SMS" as an action.

- Compose a message

- To add custom values click on Custom Values

- Once done click "Save Action"

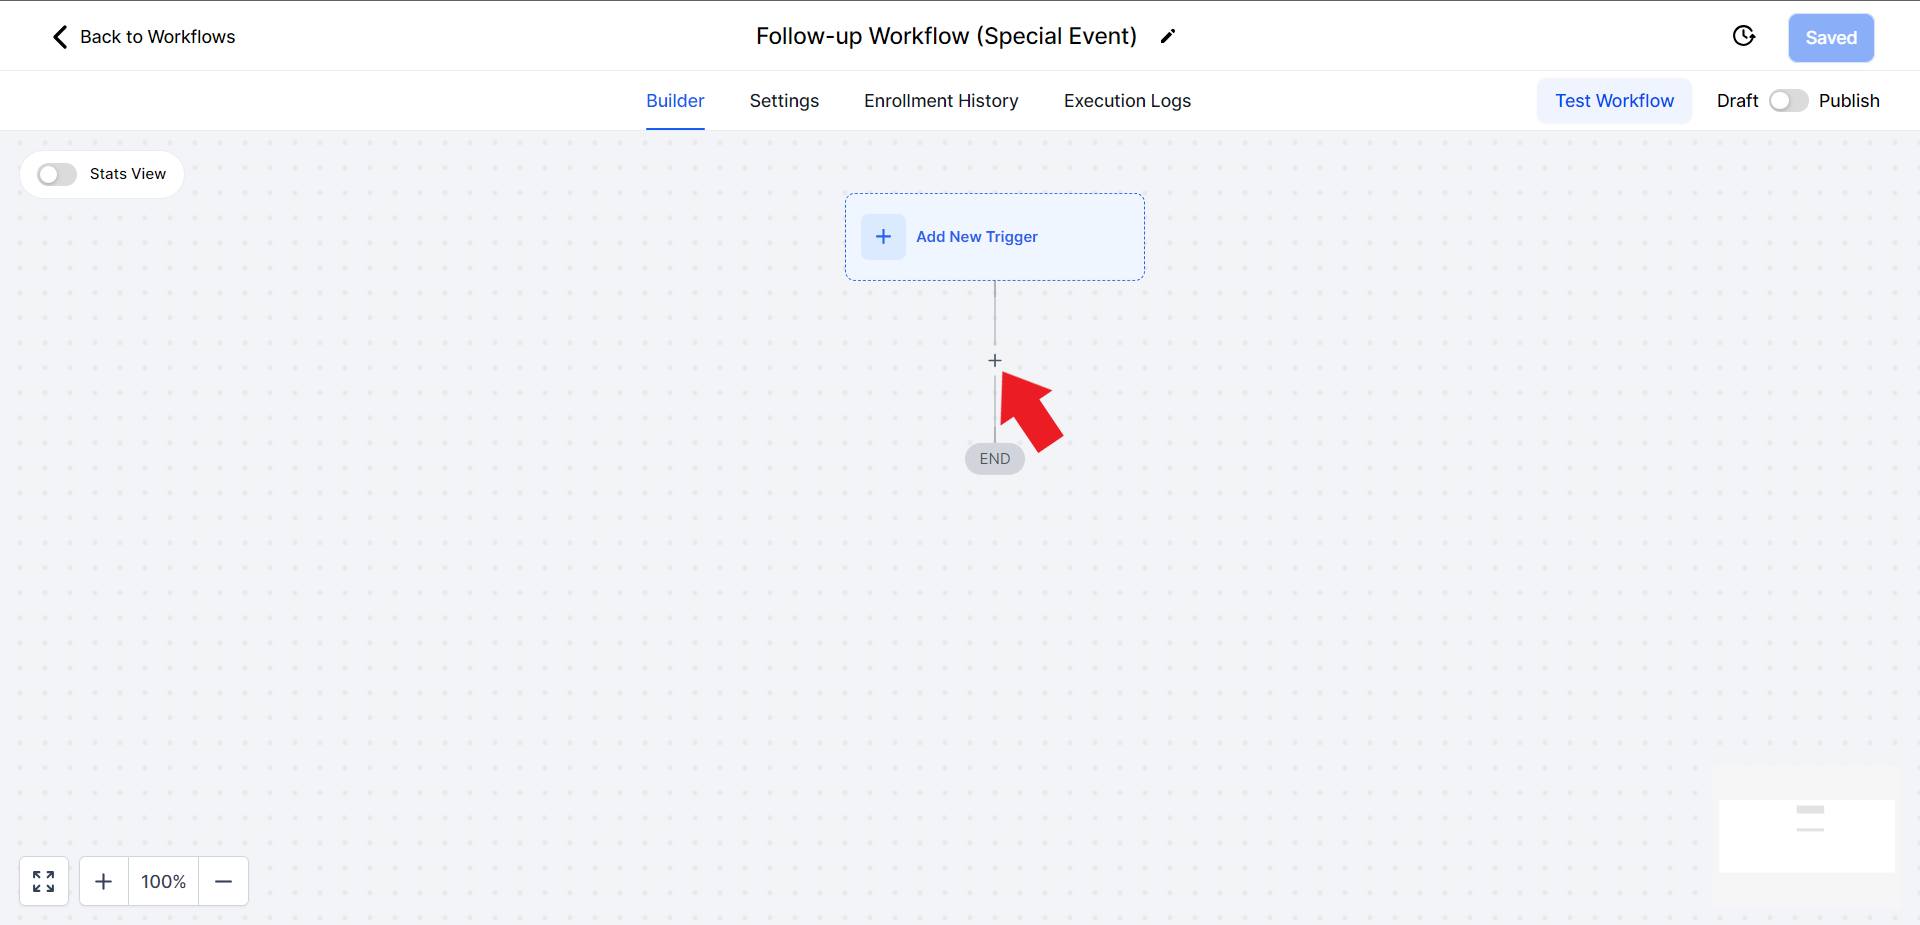
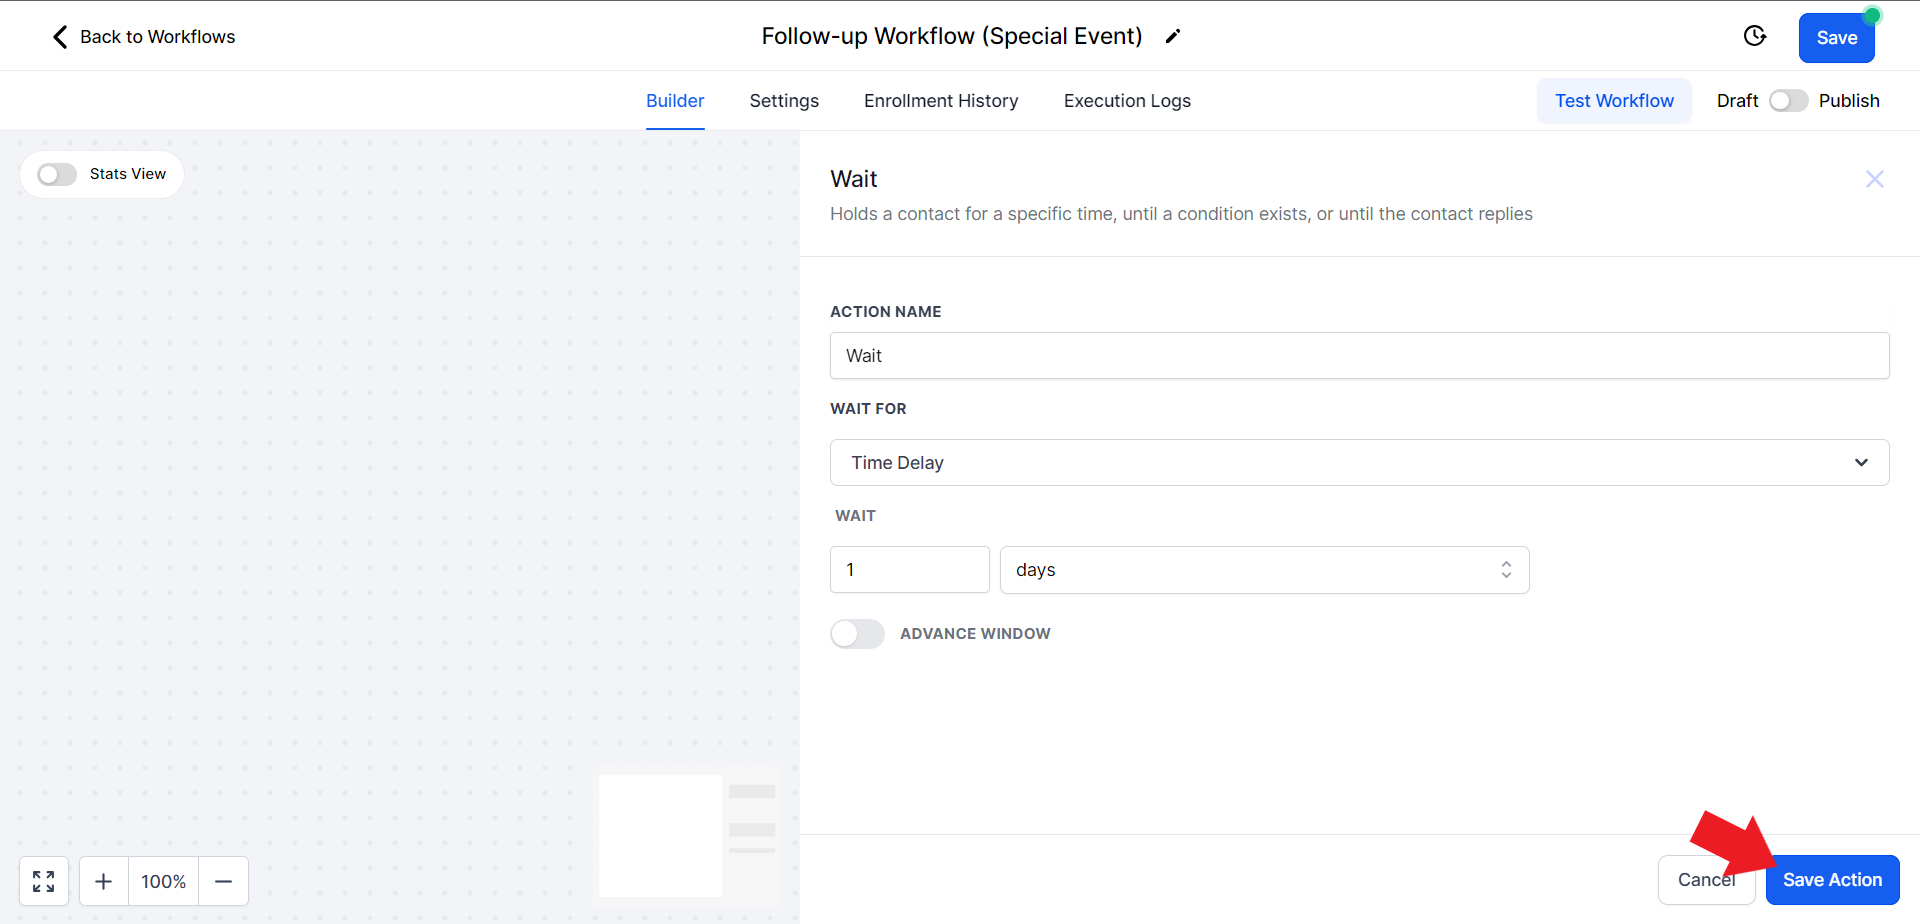
Step 5: Add Wait Times
- To create intervals between messages, add a wait action. Click on the plus symbol again.

- Action search bar type "Wait" and choose "Wait" action

- Change the time unit from minutes to days and set your preferred waiting period. For instance, "1 day"

- Add the numeric value for the unit of time (e.g. 1 day or 1 hour, etc)

- Click "Save Action"
Step 6: Adding Email Action
- You can follow up with another type of communication, such as sending an email. Click on the Plus symbol again

- Search for "Email" in the Actions search bar and select the "Send Email" option

- Enter details for the email such as Name, Email Address, Subject
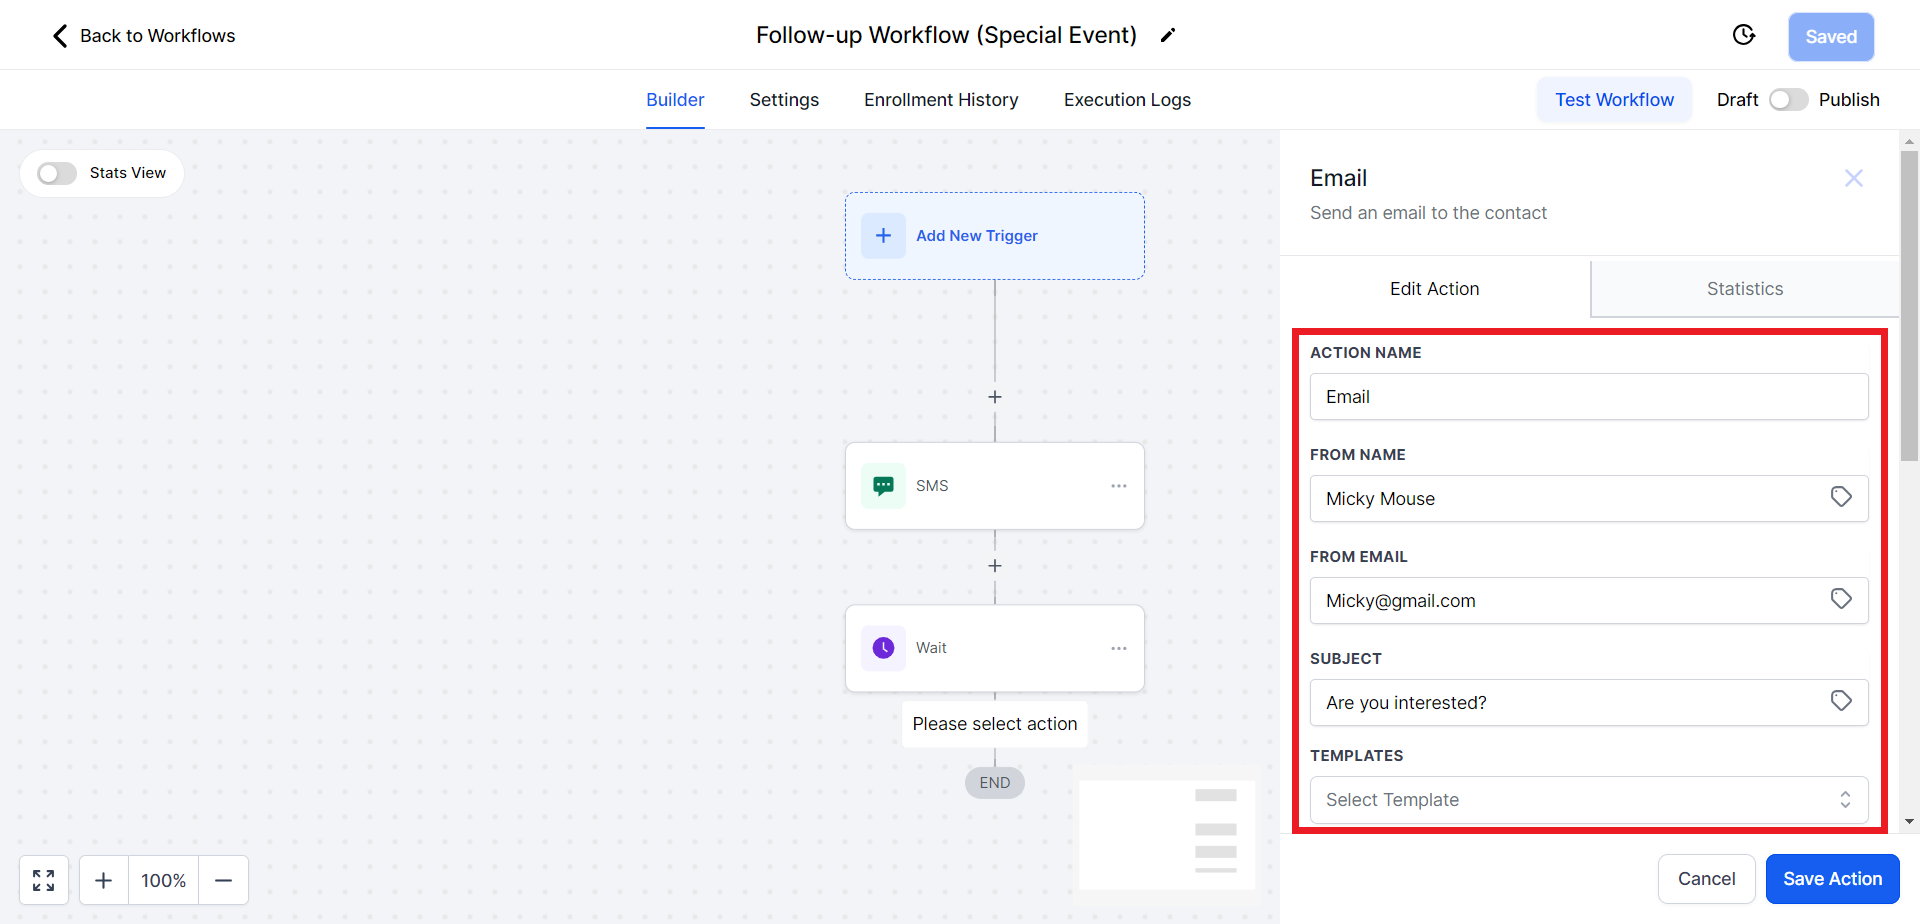
- Create the email content and personalize it using the Custom Values option.

- Click "Save Action" and then "Save" at the top.

Make sure to save the workflow by clicking save at the top right corner
- You can repeat this process by adding more actions and wait times to form a follow-up sequence. For example, you could send a text, wait for a day, send an email, and then wait for another day, and so on.
- Customize the timing and content to suit your goals.
Step 7: Publishing the Workflow
- On the top right of the window, toggle the switch to "Publish", it should turn blue from grey/white

- Click "Save" at the top to activate the workflow.

Step 8: Enable Re-entry
- Click on "Settings" for the workflow.

- Toggle ON "Allow Re-entry" to enable the same person to re-enter this workflow if you desire. This is useful for ongoing follow-ups.

- Hit "Save" to confirm your settings.

Conclusion
The automated follow-up workflow in StudioHub will help you stay engaged with leads and customers by sending timely and relevant messages. You can customize the workflow by specifying different actions and intervals as per your needs. Remember to publish the workflow and enable reentry to ensure that contacts can re-enter the workflow for ongoing follow-up. Now you're ready to enhance your communication and engagement with your audience.