Introduction
In this guide, we'll walk you through adding a dedicated domain to StudioHub. This essential setup allows you to send emails from your personalized domain name through StudioHub. Before we begin, you should ensure that you have access to your domain registrar, where your domain name is registered.
Steps
Step 1: Add Domain in StudioHub
- Next, open StudioHub in your web browser. You must do this on your computer. Once you've logged in, head to the settings section.

Step 2: Access Email Services
- In the settings, scroll down until you find the "Email Services" option. Click on it to proceed.

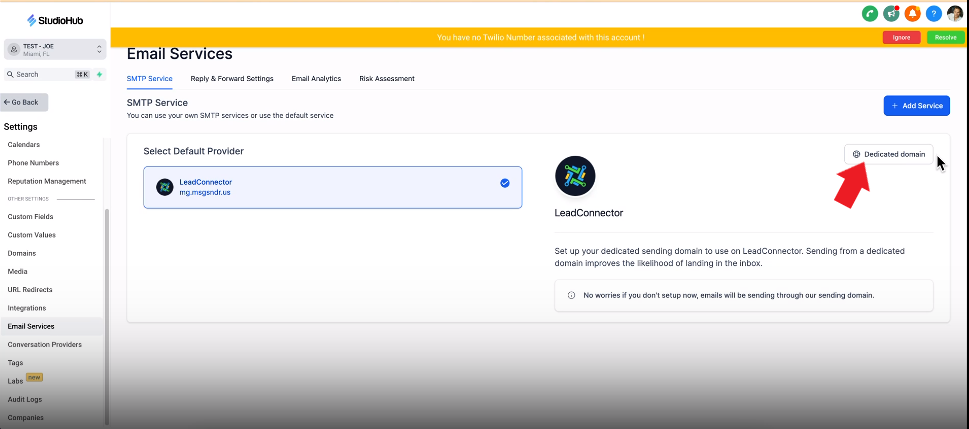
Step 3: Add Dedicated Domain
- Look for "Dedicated Domain" and click the "Add Domain" button. You'll be prompted to add your dedicated domain name.

Step 4: Configure Domain
- Enter your dedicated domain in the format "sh.yourdomainname.com." For instance, if your domain is "myawesomestudio.com," you'd enter "sh.myawesomestudio.com."
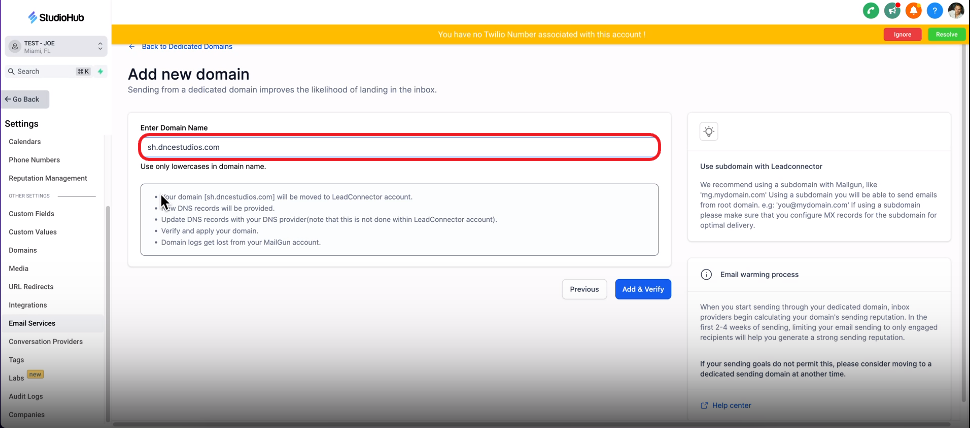
Step 5: Verify Domain
- Click "Add and Verify" to initiate the domain addition process.

Conclusion
Once you've completed these steps, your dedicated domain will be added to StudioHub, enabling you to send emails from your personalized domain name. Remember that your domain name should match the format "sh.yourdomainname.com."
This process enhances your brand's professionalism and ensures that emails sent through StudioHub bear your unique domain. You've now successfully integrated your dedicated domain into StudioHub.