Introduction
Whether you're managing a series of shows, recitals, or any event with varying dates and require a streamlined reminder system, this guide has you covered. By the end of these steps, you will have a versatile workflow that sends timely reminders to your participants, enhancing your event's organization and ensuring everyone is well-prepared.
Steps
Step 1: Access Studio Hub and Navigate to Workflow Creation
- Start by logging into Studio Hub from your computer. Click on the "Automation" tab to access the automation features.

- Go to the "Workflow" section in the automation menu.

- Under "Workflow," select "User Accessible."

Step 2: Create a New Workflow
- Click on "Create Workflow."

- Choose "Start from Scratch" to create a new workflow.

Step 3: Name the Workflow
- Assign a name to your workflow. For example, if your event has multiple dates but uses the same reminders, you can name it something like "Show Reminders".

Step 4: Add a Wait Step for the First Reminder
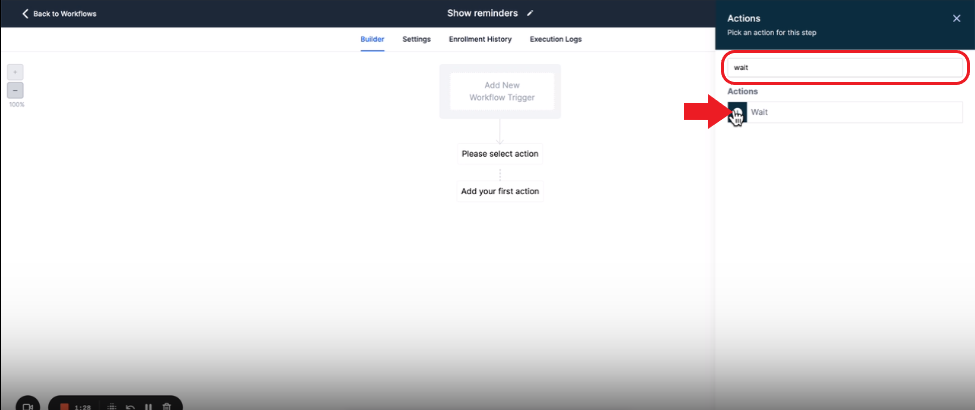
- To set the timing for the first reminder, add a wait step. Click on the Add Action/Plus symbol

- In the Action search bar on the right, search for "Wait" and then select the option
- In the wait step, Click on the "Wait for" field and change it to "Event/Appointment Time".

- If you want people to receive the reminder the day before then choose "Before" and "24 hours" or if you want them to receive it before one hour, then choose "Before" and "1 hour"
- Select "Before" in the When field

- If it's a day before then add a value in the Days field, or if it's an hour or X hours before then a particular value in the Hour field. We have chosen to send this reminder a day before hence we will be adding 1 in the Day(s) field
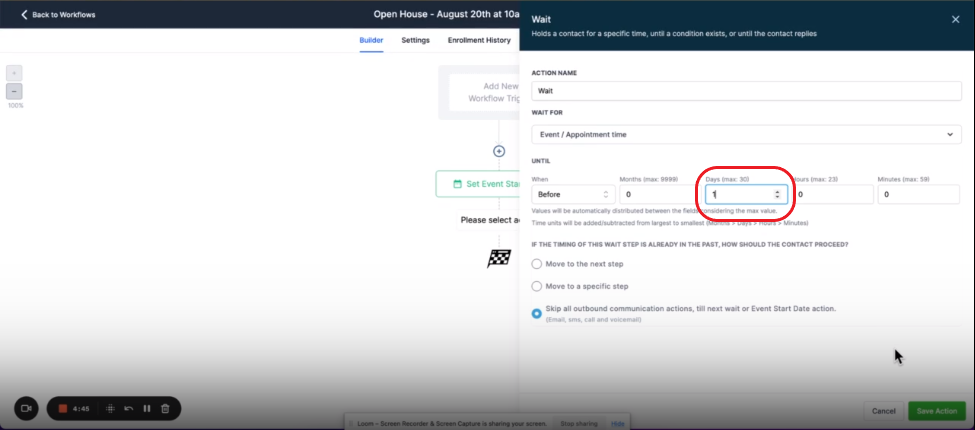
- Rename this wait step for clarity, such as "One Day Before Event"
- Click "Save Action"

Step 5: Include SMS Reminder
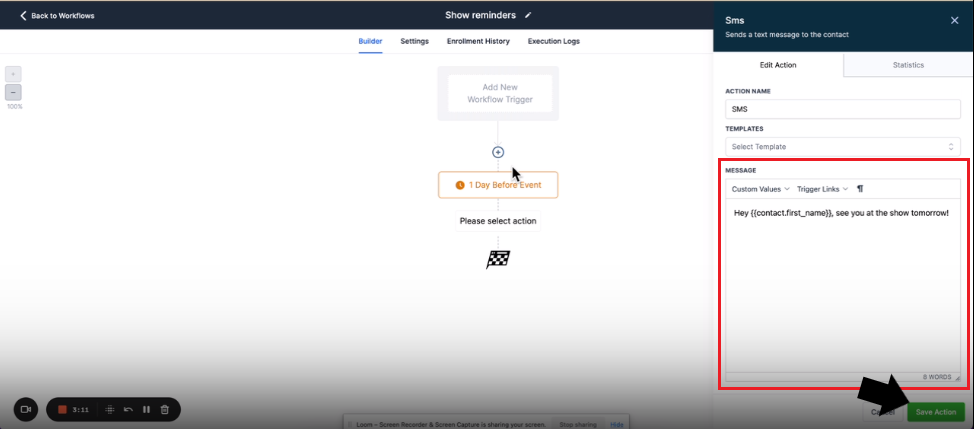
- Add a "Send SMS" action step for the first reminder. Click on the Add Action/Plus symbol and then search for the "Send SMS" action and select it

- In the SMS, you can customize the message. Utilize custom values to personalize the message. For instance, address the recipient by their first name.

- Craft a message like "Hey [Contact First Name], see you at the show tomorrow." Once done hit "Save Action"
Step 6: Add an Email Reminder (Optional)
- If you wish to include an email reminder, add a "Send Email" action step by clicking the plus symbol and then selecting it from the Actions panel

- Customize the email message and subject line. Use custom values to personalize the email, like addressing the recipient by their first name.
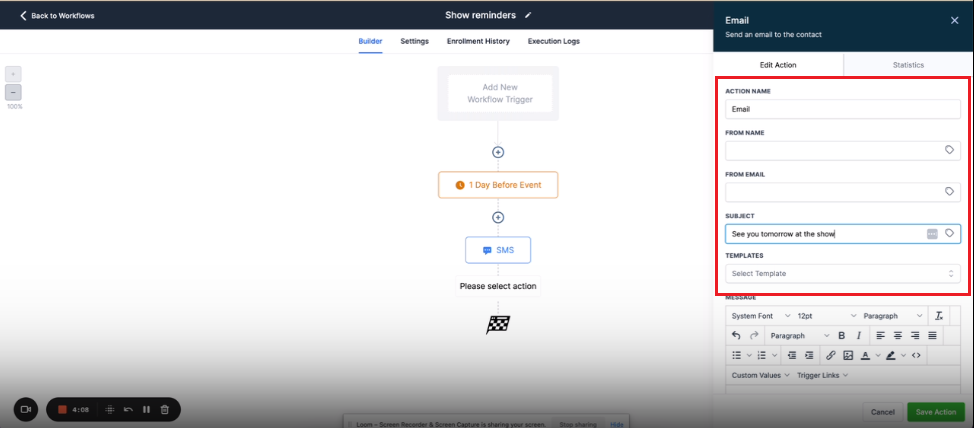
- Edit the message for example, the email can say, "See you tomorrow at the show, [Contact First Name]." Hit "Save Action" once done.

- Make sure to save the workflow progress by clicking the Save button at the top right corner

Step 7: Adding More Actions
- If you want to send additional reminders (e.g., 10 minutes before the event), repeat the steps above.
- Add a wait step for the desired timing, such as "10 minutes before."
- Create SMS or email reminders for this additional timing, customizing the messages as needed.
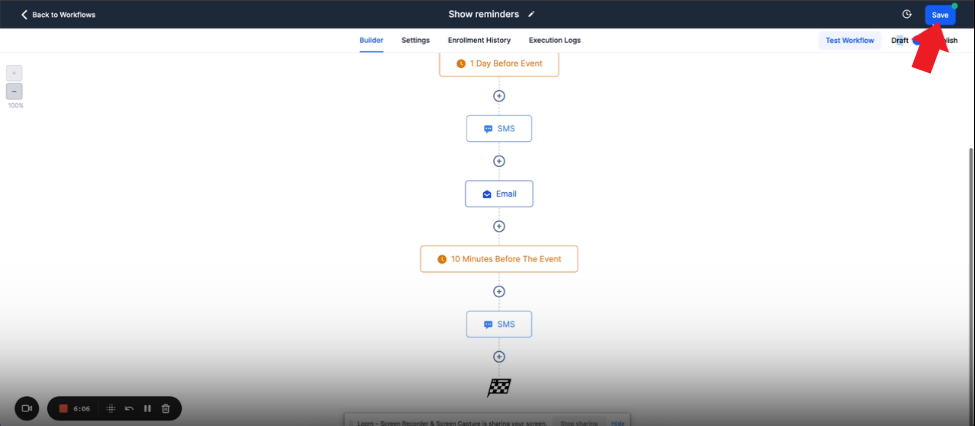
Step 8: Publish and Save Your Workflow
- Toggle the workflow switch to "Publish" to make your workflow accessible for use.

- After adding all the necessary Action steps and publishing your workflow, click "Save."
Conclusion
By setting up this workflow in Studio Hub, you can ensure all your participants receive timely notifications, enhancing their event experience and alleviating organizational challenges. This guide has equipped you with the necessary steps to streamline your event planning, making the process smoother and more enjoyable for both organizers and attendees. In the next guide, we will talk about adding contacts to this workflow, make sure to follow it along.