Introduction
It's not uncommon for Facebook to disable ad accounts due to various reasons, often unrelated to any wrongdoing on your part. In this guide, we'll walk you through the steps to resolve this issue and reactivate your ad account.
Steps
Step 1: Request a Review for Your Disabled Ad Account
- Log in to your Facebook Business Manager account.
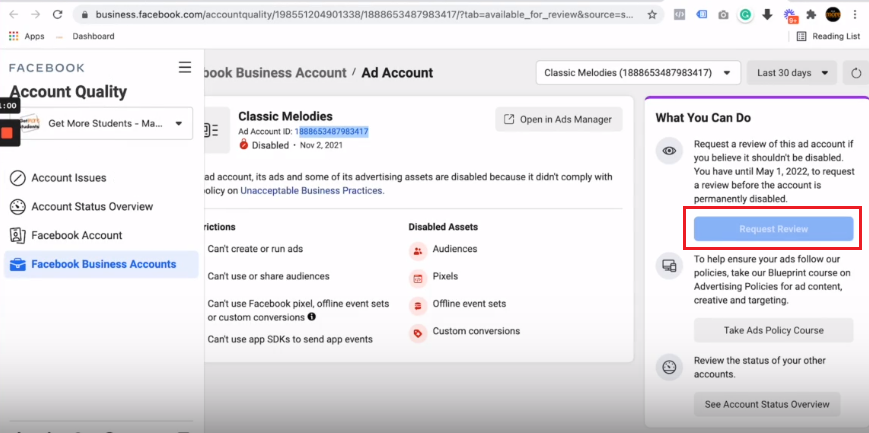
- Check for the disabled ad account notification. Upon logging in, you may see a pop-up notification that says your ad account has been disabled. Click on "See details".

Step 2: Locate the Ad Account Information
- You will be directed to a page displaying your ad account's name and account number. Make sure you are using the right ads account.

Step 3: Request a Review or Submit an Appeal
- Look for a blue "Request Review" button (please note that Facebook's interface may change with time) that allows you to request a review, submit an appeal, or ask for a reconsideration of your ad account. Click this button and follow the provided steps.

Step 4: Wait for Reinstatement
- After submitting your request or appeal, Facebook will review your ad account.
- The time it takes for your ad account to be reinstated can vary, usually ranging from a few hours to a couple of days. Be patient.
Conclusion
Remember that ad account disablements can occur for various reasons, but following these steps should help you resolve the issue and get your ad account back up and running.
We hope this guide has been helpful. If you have any questions or encounter any issues during this process, please reach out for further assistance.
