Introduction
In this tutorial, you will learn how to add the intro message to your bot in StudioHub, an essential step for engaging effectively with new inquiries.
Steps
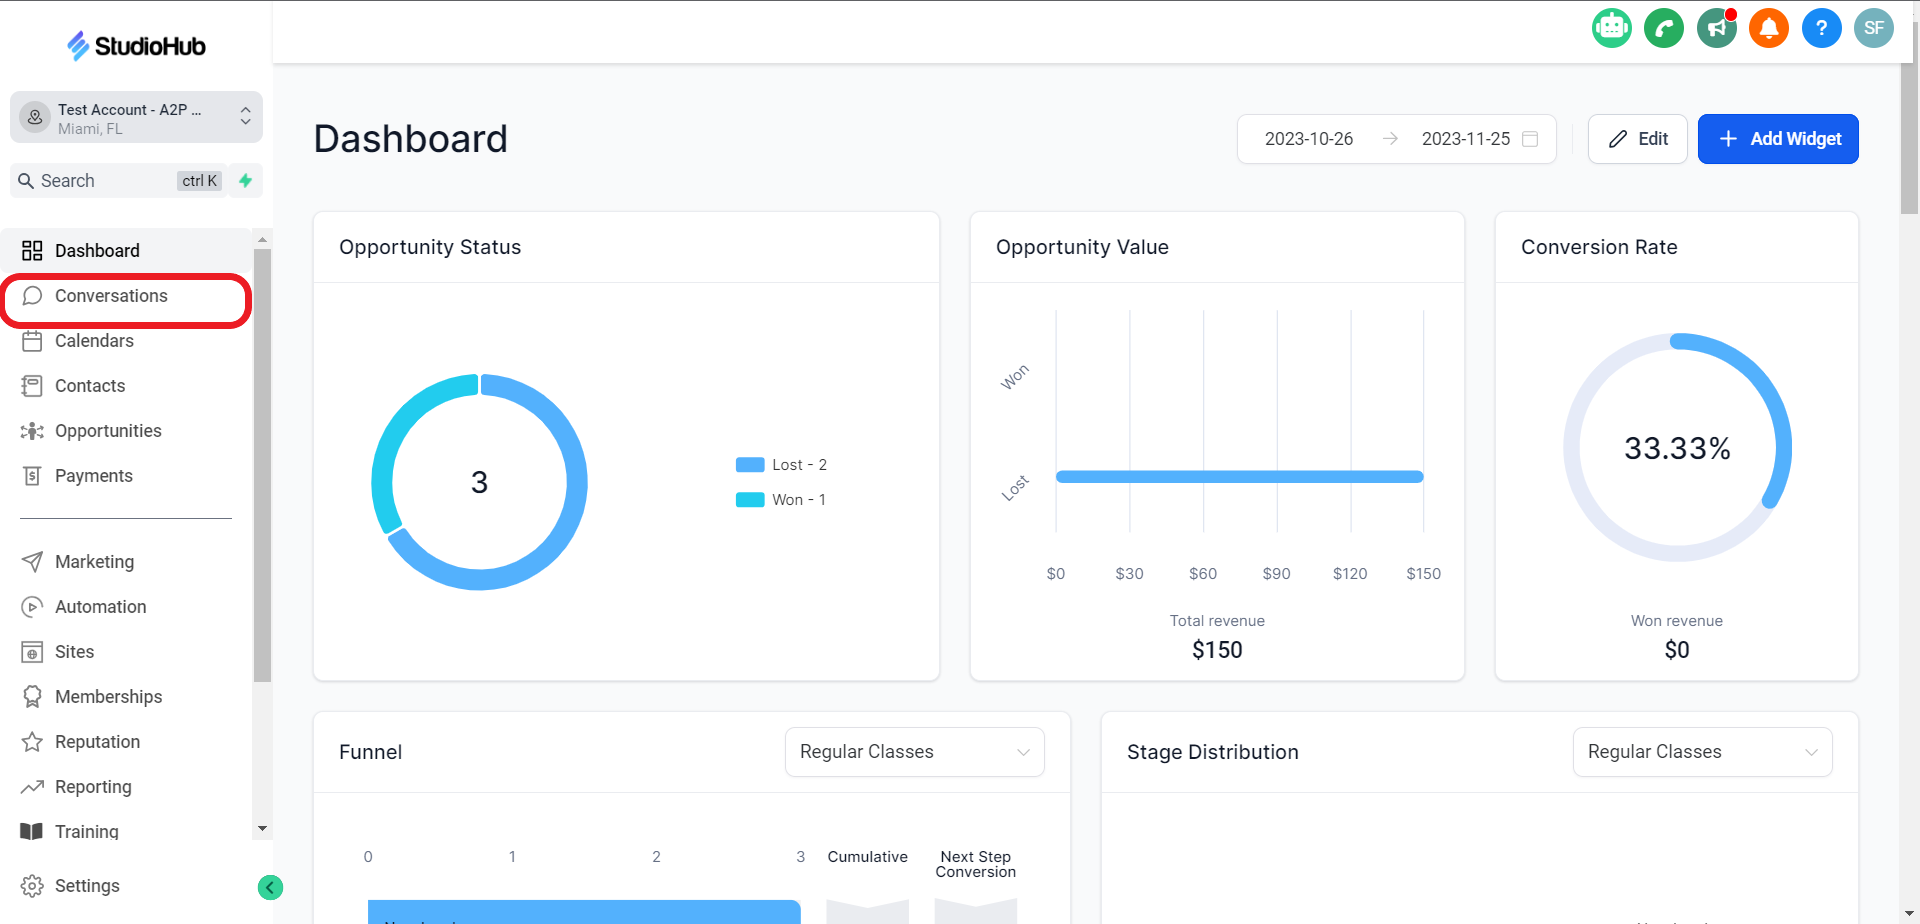
Step 1: Access StudioHub and Navigate to Conversations
- Begin by logging into Studio Hub on your computer. Once you're in your dashboard, look for and select "Conversations", on the left-hand side of the screen.
Step 2: Access Templates and Find the Introductory Message
- Inside the Conversations section, click on the "Templates" tab

- Scroll down through the templates until you find the one labeled "New Leads-General Day One" or something similar, depending on your configuration (it might also be named "New Leads-Facebook Day One").

- Copy the body text

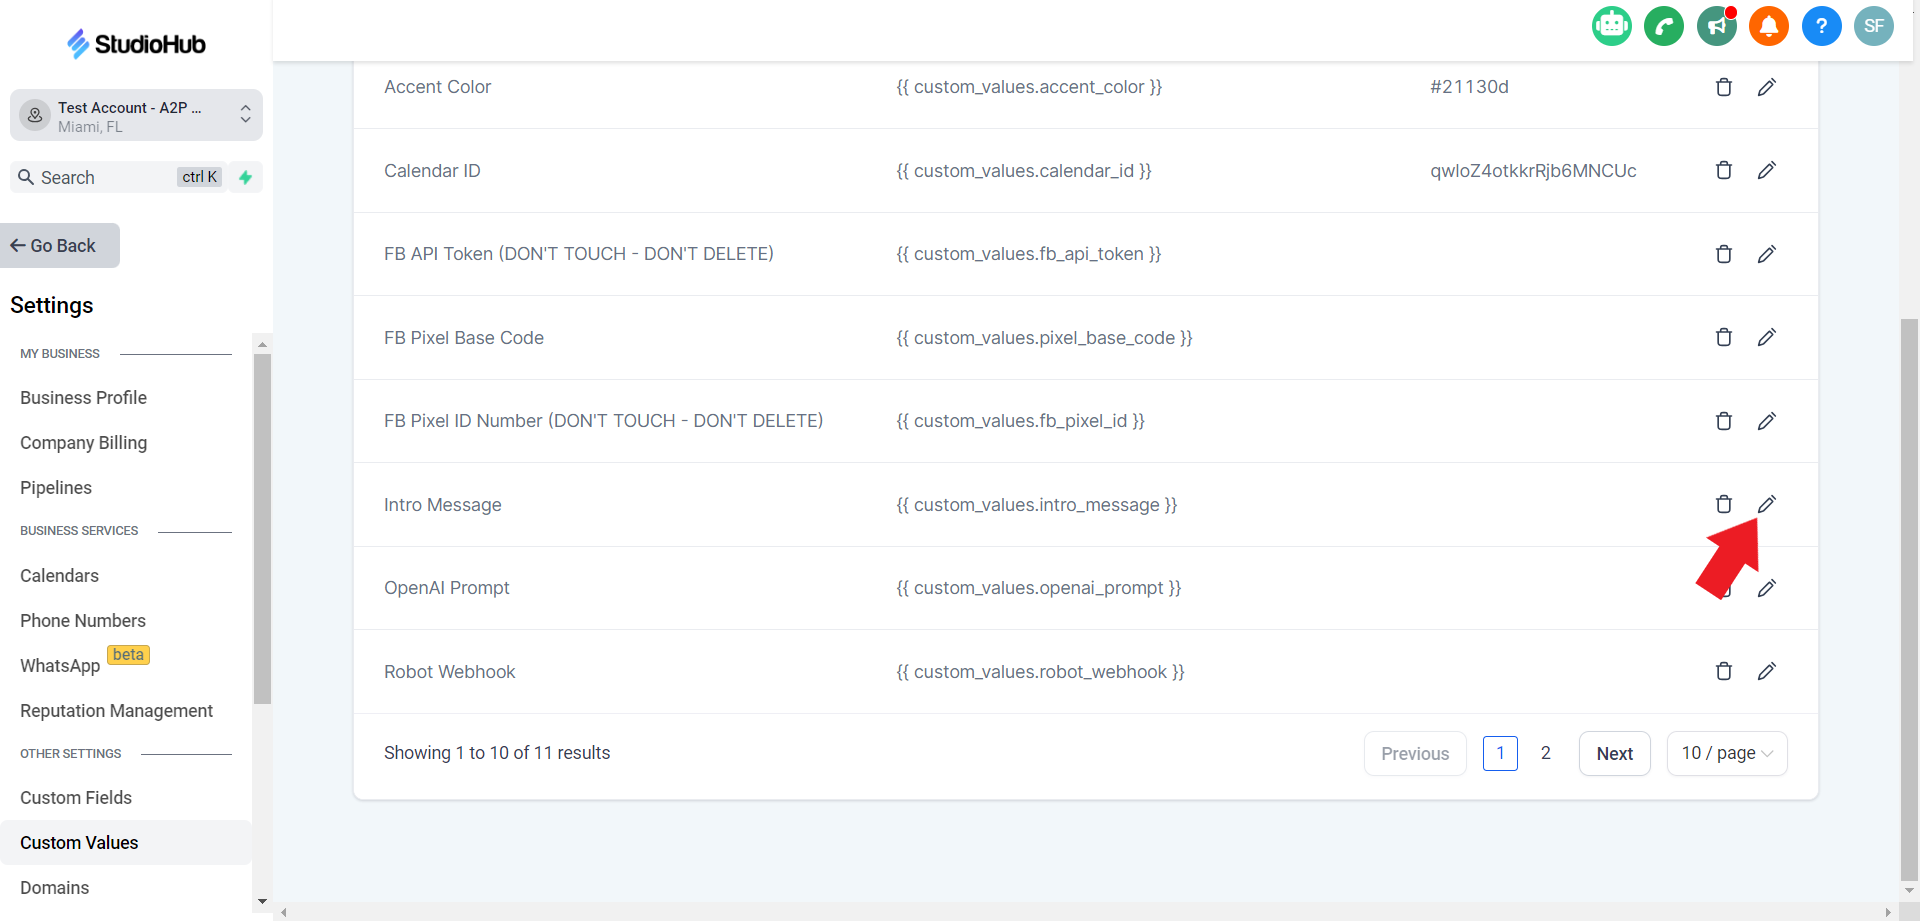
Step 3: Access Studio Hub Settings
- Go back to your Studio Hub dashboard and access "Settings." You can usually find this on the left-hand side of the screen.

Step 4: Open Custom Values and Locate the Intro Message
- Inside the Settings menu, choose "Custom Values."

- In the list of custom values, you should find one labeled "Intro Message", which is typically empty.

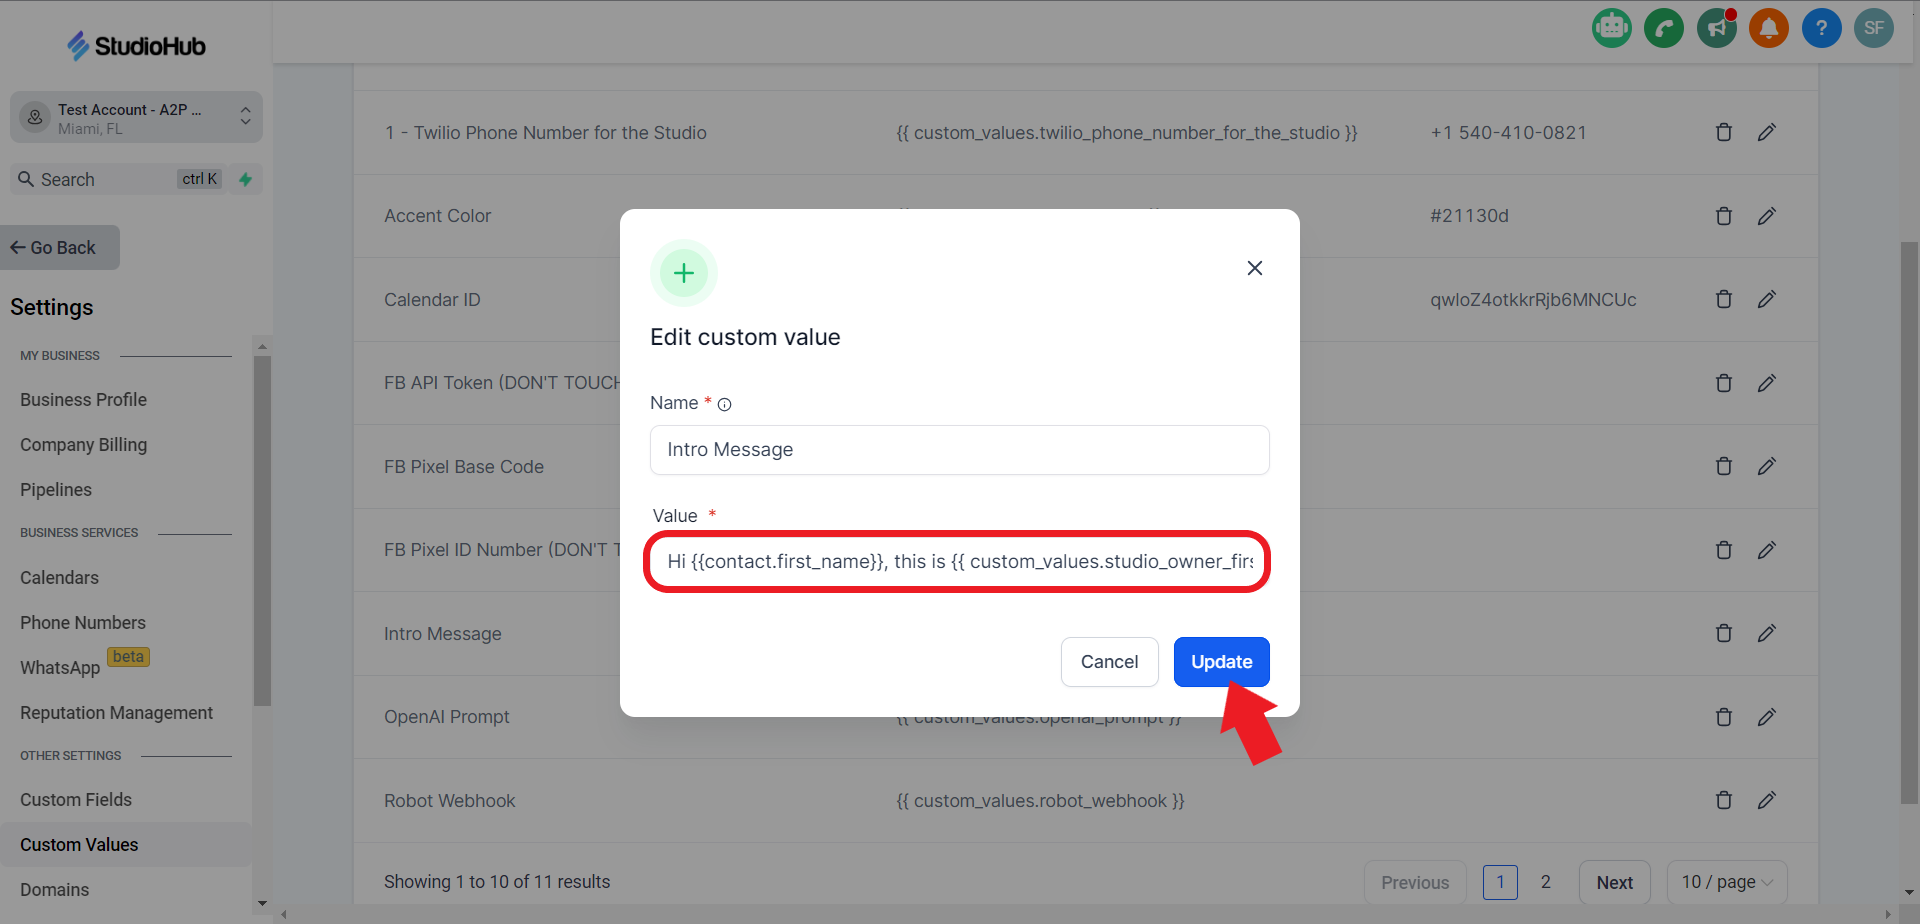
Step 5: Add the Introductory Message
- Click on the pencil icon next to "Intro Message" to edit it.
- Paste the introductory message copied in Step 2 in the "Value" box. Once done click "Update"
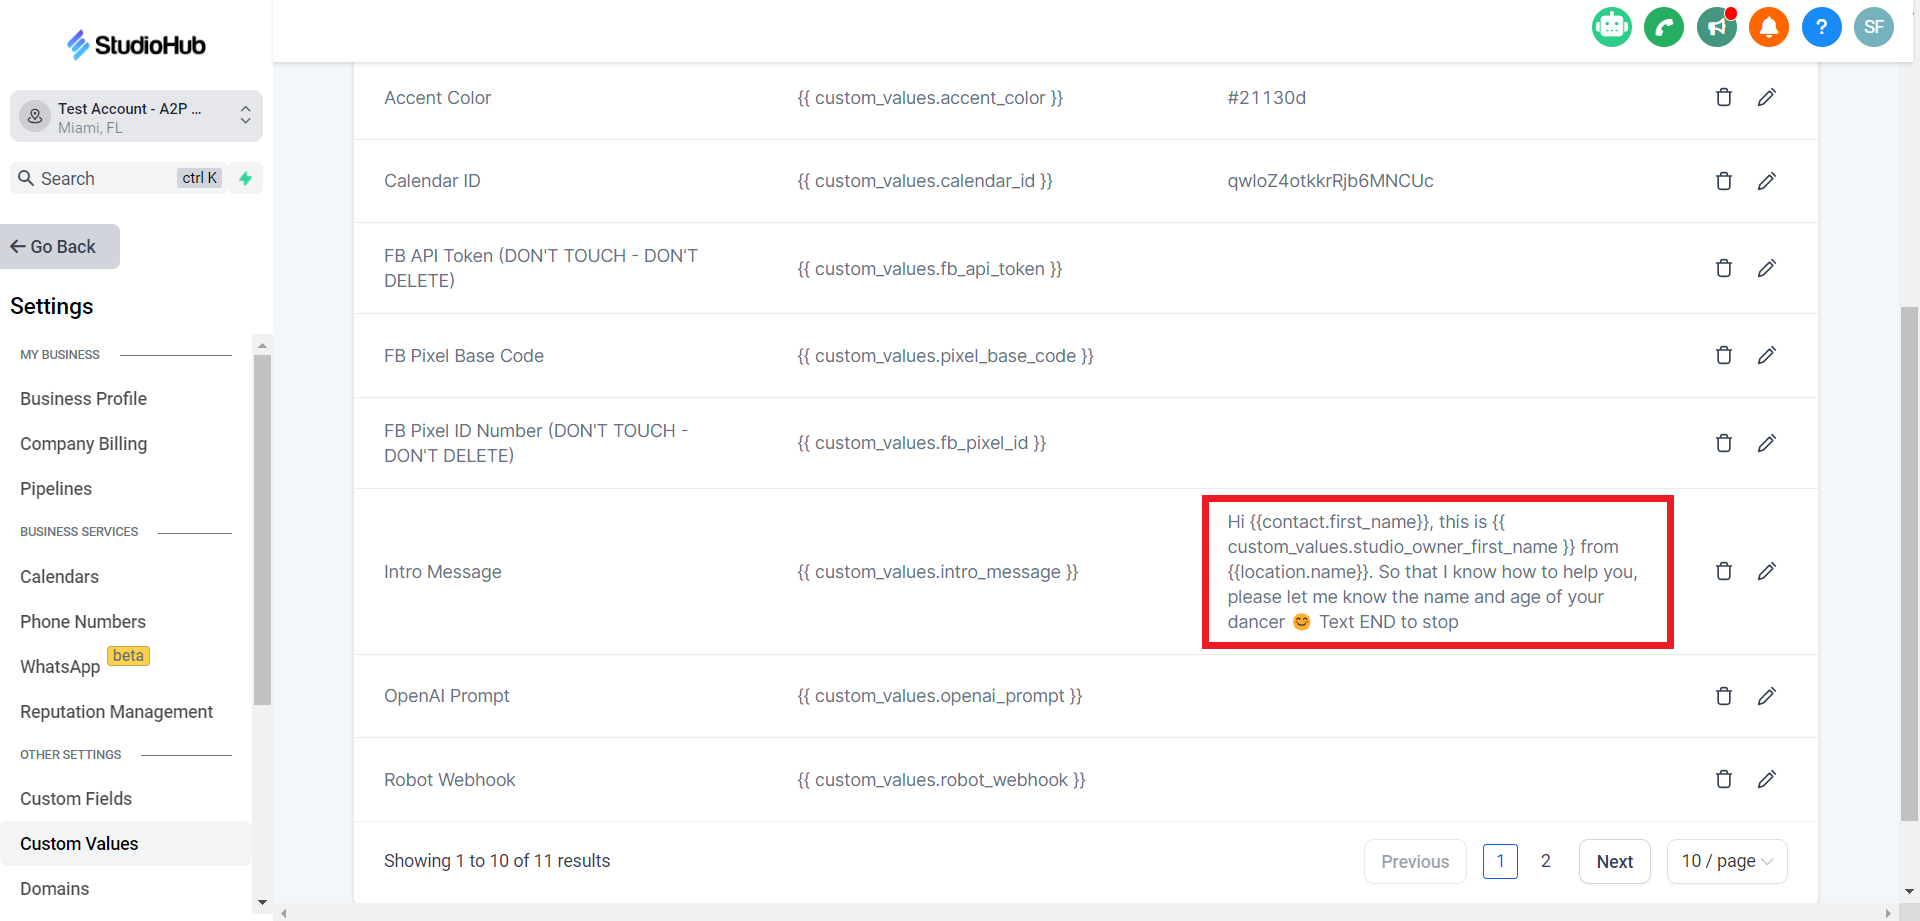
Step 8: Verify the Update
- After saving, you should see the entire introductory message displayed in the "Intro Message" custom value.
Conclusion
By following these steps, you've successfully added the intro message to your bot's settings in StudioHub. This message will be used when engaging with new inquiries to provide a warm and informative greeting.
Check out this next guide on what a Bot prompt is and how you can create one easily