Introduction
In this tutorial, we'll guide you through two methods to mark appointments as "Showed" or "No-Show" using the StudioHub app. Keeping track of attendance and appointment status is crucial for effective communication and management. We will demonstrate both the fastest way and an alternative method for marking appointments.
Method 1 (Fast)
- Tap on the Calendar icon in the bottom menu

- Make sure you are on the "Main Calendar" and on the right month

- Press and hold on the appointment that you want to interact with
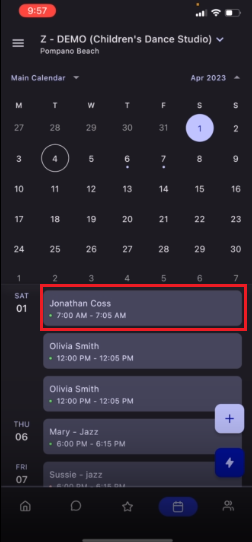
- Change the status of the appointment to Showed or No-Show

Method 2
- Go to the conversations and choose the client.

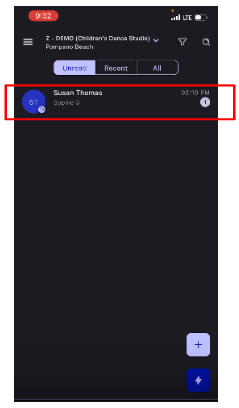
- Click on their profile picture.

- Once you are on the profile menu, swipe or tap on the "Appointments" tab on the top.

- Tap on the appointment that you want to interact with

- Choose "Edit" on the top

- Scroll down to the bottom where it says "Appointment status" and tap on it

- Once you tap on the "Appointment Status" a drop-down menu will open, change the status to "Showed" or "No- Show"

- Once done tap on "Save"

Conclusion
Managing appointments and accurately marking them as "Showed" or "No-Show" is essential for maintaining effective communication with your contacts. The StudioHub app offers two convenient methods to achieve this: a fast way through the calendar view and a detailed approach using conversation and appointment details. Utilize these methods to keep track of attendance and appointment status seamlessly.