Introduction
Preparing your contacts list is a crucial step before uploading it into StudioHub for efficient communication and organization. This guide will walk you through the process of getting your contacts list ready for seamless integration with StudioHub.
Steps
Step 1: Download and Separate Your Contacts
- Access your studio management software (e.g., Jack Rabbit, Dance Studio Pro, Mindbody, etc.).
- Download your contacts list in separate reports or filters:
- Currently Enrolled Students
- Past Students
- Leads
- Ensure each list contains columns for Parent's First Name, Parent's Last Name, Email, and Phone Number.
- Save these three lists on Google Sheets, and MS Excel in separate files.

Step 2: Organize and Clean Up in Google Sheets:
Open Google Sheets or Excel. Upload each of the three lists into separate sheets. Ensure each sheet contains columns: Parent's First Name, Parent's Last Name, Email, and Phone
- Delete any irrelevant columns, leaving only the required information. To do that just right-click on the cell, column, or row that you want to delete, and choose the delete option.

- After deleting all the unnecessary data you should only be left with the "First Name", "Last Name", "Phone", and "Email".

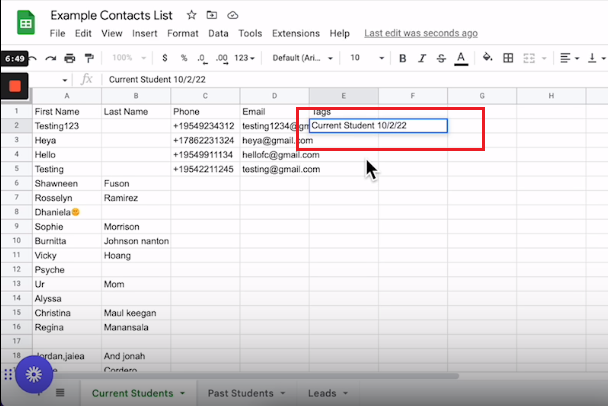
Step 3: Tag Your Lists:
- Create a new column called "Tags" in each sheet.

- In the "Tags" column for each list, add the appropriate tag for each group
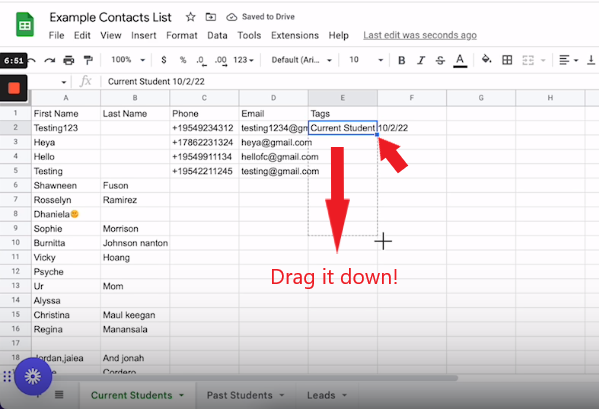
Currently Enrolled Students: "Current Student" + Date (e.g., "Current Student 10/02/22")
- You can copy this on the entire column by just dragging the right bottom corner of the cell
Step 4: Repeat for Past Students and Leads:
- Once you are done with the "Current students", you can now repeat steps 2 and 3 for "Past Students" as well as "Leads".
You can use the following tags for"Past Students" and "Leads"
Past Students: "Past Student" + Date (e.g., "Past Student 10/02/22")
Leads: "Leads" + Date (e.g., "Lead 10/02/22")
Step 5: Save as CSV file:
- Once you have formatted the contacts list, save it as CSV. Start by clicking on "File".

- Hover over the "Download" option
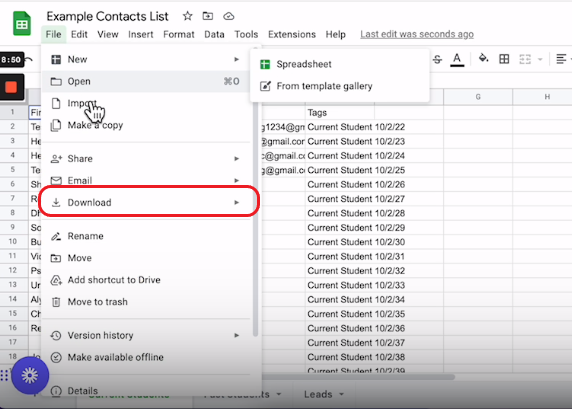
- Choose the CSV option

Make sure to rename each file "Current Students", "Past Students", and "Leads". Import these files to StudioHub or your Studio account.
Conclusion
By following these steps, you'll have your contacts list organized, cleaned, and tagged for easy upload into StudioHub. Properly prepared contact lists will help streamline your communication and engagement efforts within the StudioHub platform.