Introduction
In this guide, we will walk you through the process of uploading your contact list into StudioHub, a crucial step for effective communication and marketing.
Steps
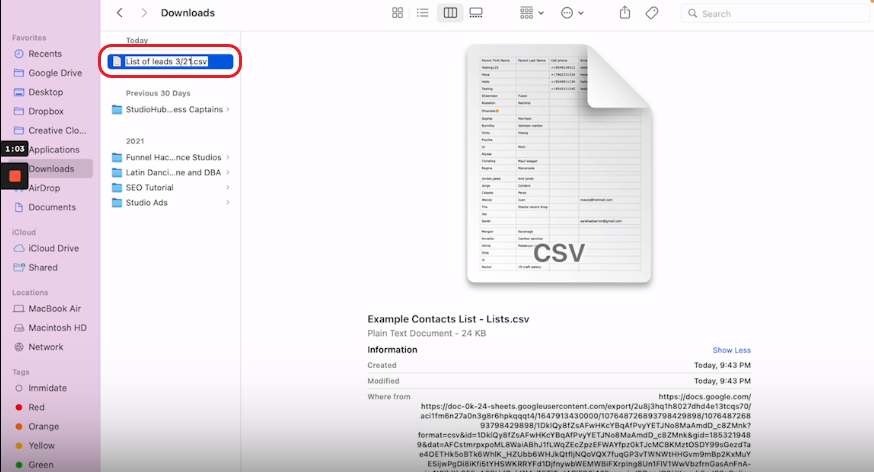
Step 1: Download Your List as a CSV File
- Access your contact list in Google Sheets or Excel. Go to "File" and select "Download."

- Choose the option "Comma Separated Values (.csv)" to download it as a CSV file.

- Locate the downloaded CSV file in the Download section and rename the file with a descriptive name and date (e.g., "List of Leads 3/21/22").
Step 2: Accessing Contacts on StudioHub
- Open StudioHub and click on the "Contacts" section.

Step 3: Click on "Import Contacts"
- Within the "Contacts" section, locate and click on the "Import Contacts" option.

Step 4: Match the Fields
- An Upload Your File pop-up will appear. Click on the "Upload a file" option.

- Select the CSV file that you saved earlier in the Downloads section and then click "Open".

- Click"Next".

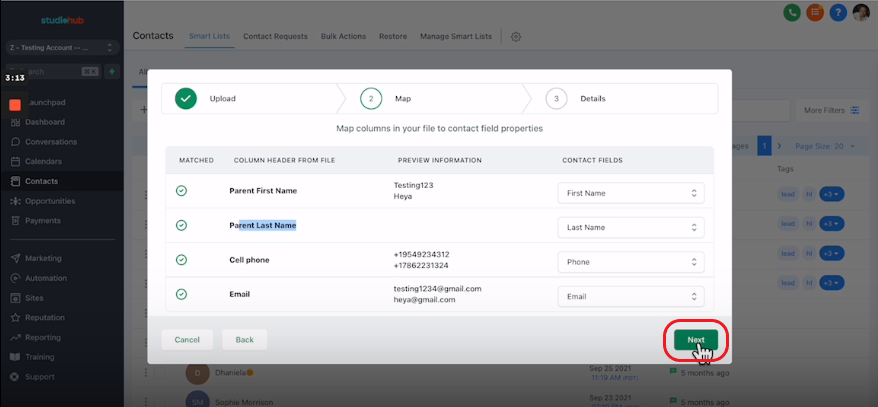
- StudioHub will prompt you to match the fields in your CSV file with the fields in StudioHub.
1. For example, match "First Name" in your CSV with "First Name" in StudioHub.
2. Ensure that "Last Name" in your CSV matches with "Last Name" in StudioHub.
3. Match the "Phone" and "Email" fields accordingly.
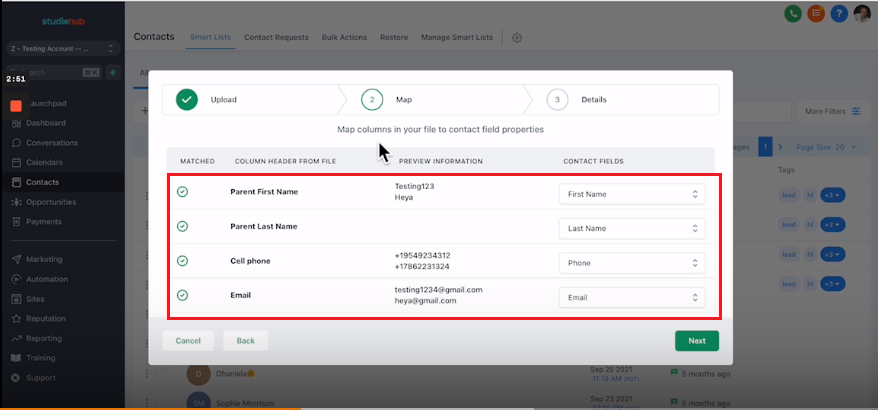
- Once done hit "Next".
Step 5: Name the Import
- Assign a name to your import. Use a clear and descriptive name, such as "List of Leads 3/21/22."

Step 6: Click the "Advanced" Link
- Click on the "Advanced" option provided in the import settings.

Step 7: Change "Email" to "Phone"
- In the advanced settings, change the field mapping for "Email" to "Phone". This helps match contacts based on phone numbers. This step is essential if you want to avoid creating duplicate contacts for individuals already in StudioHub.

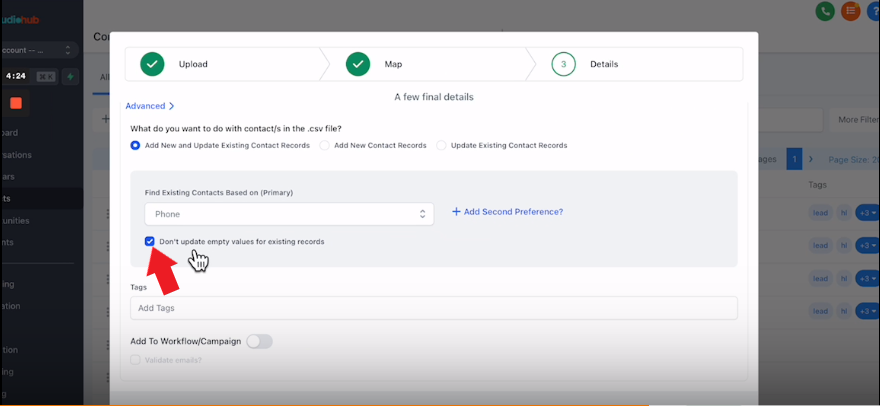
Step 8: Uncheck "Don't Update Empty Fields for Existing Contacts"
- Make sure to uncheck the box that says "Don't Update Empty Fields for Existing Contacts". This ensures that information is updated, even if some fields are empty.
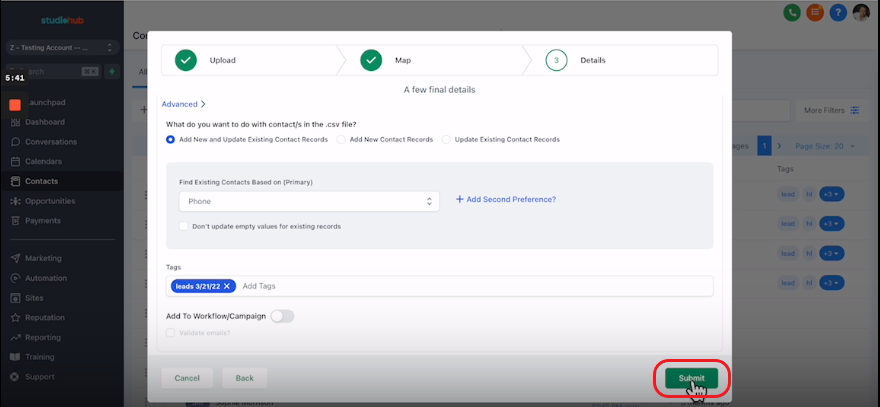
Step 9: Add Tags
- Use tags to categorize and identify the imported contacts.

- Assign relevant tags based on the type of list you're importing (e.g., "Leads 3/21/22" for a list of leads). Click "Add" after entering the tag name to apply it.

Step 10: Click "Submit"
- After setting up all the import options, click the "Submit" button to initiate the import process.
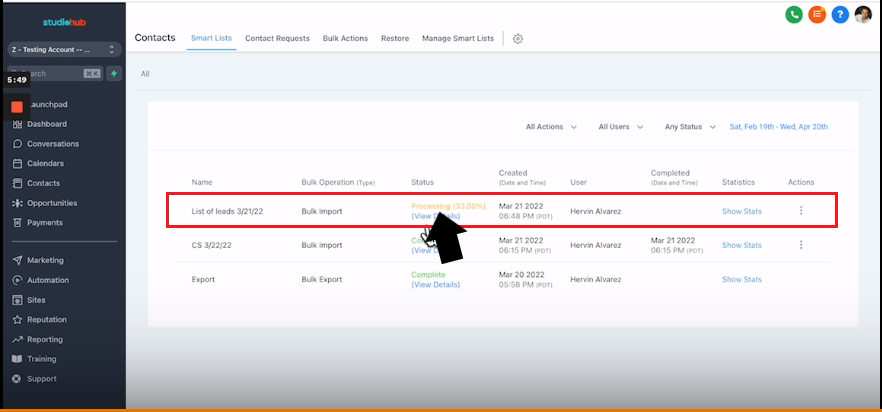
Step 11: Wait for Processing
- StudioHub will process your file. You will receive an email notification once the process is complete. You can also check the progress by clicking on the "Click Here" highlighted text on the processing prompt window.
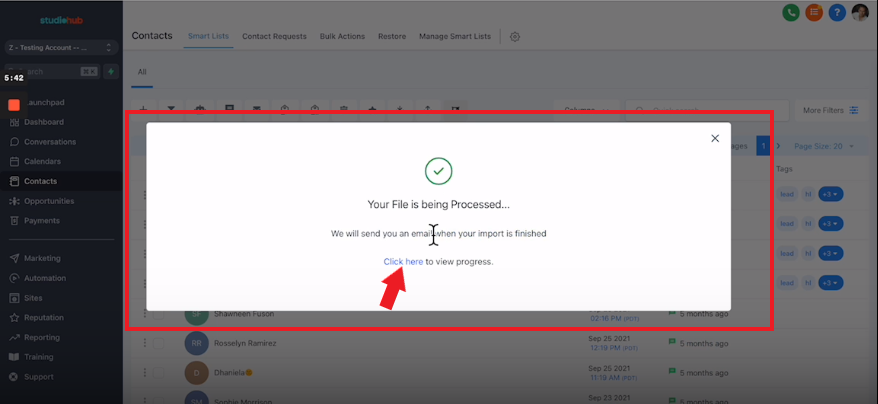
- You can see the progress being loaded in real-time.
Step 12: Verify Imported Contacts
- Return to the "Contacts" section of StudioHub.
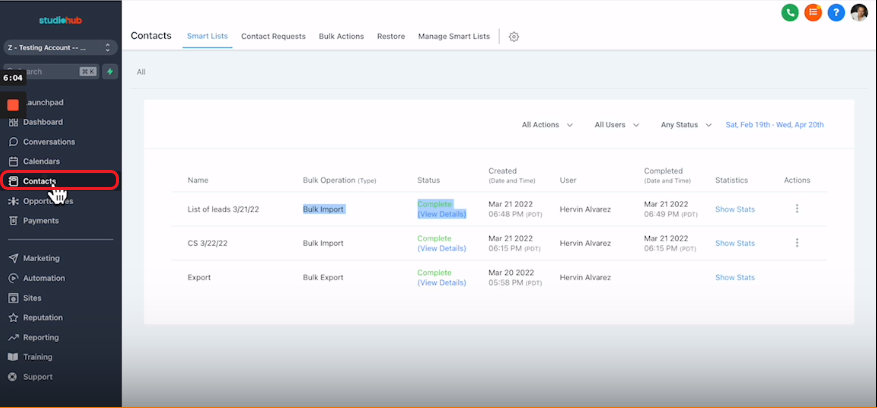
- Use filters and tags to locate and verify the imported contacts. Click on "More Filters".

- In the Filters panel on the right click on "Tag".

- Click on "Select Tag" and in the drop-down option select the "Leads 3/21/22" tag.

- Hit "Apply".

- Now you can see all the contacts/leads having the "Lead 3/21/22" tag will appear.

Conclusion
Uploading your contact list into StudioHub is a crucial step in organizing and managing your contacts for effective marketing and communication campaigns. Ensure you follow these steps to streamline your contact management process within StudioHub.