Introduction
Preparing to launch your text blast campaign is an exciting moment. To ensure a successful launch, make sure you've completed the necessary prerequisites. If you haven't done so already, go through the previous guide titled "Are You Ready to Launch?" for a complete checklist of the steps you should complete before proceeding with this guide.
Steps
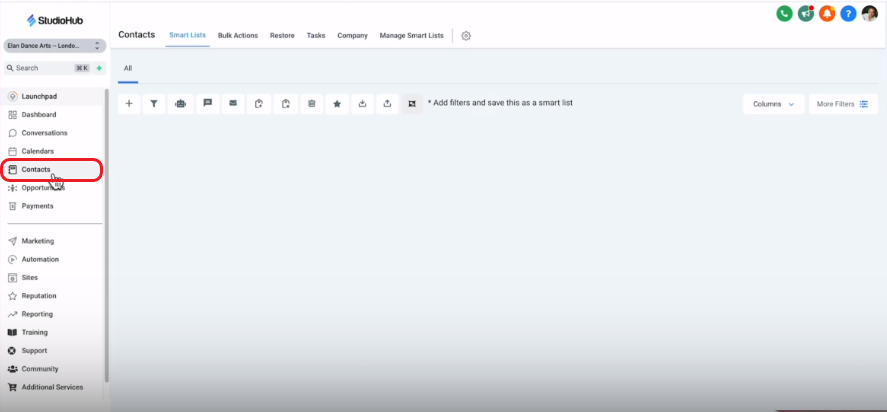
Step 1: Log in to Studio Hub and Access Contacts
- Start by logging into Studio Hub on your computer. From the StudioHub dashboard, go to the 'Contacts' section.
Step 2: Choose Your Tagged Contacts
- Use the tags you've previously set up to identify the right contacts for your campaign. For example, if you're promoting summer camps, you might tag the relevant contacts as 'Summer Camp Enthusiasts.'
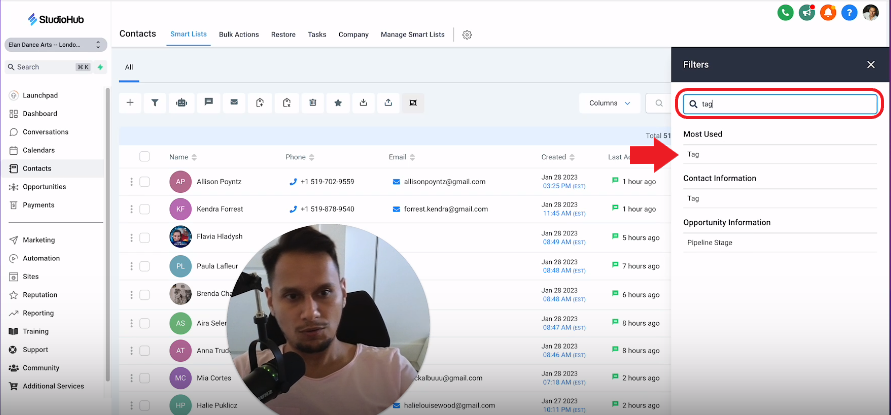
- Click on the "More Filters" option

- In the filters search bar, search for "tag" and then choose the option from the suggestions
- Click on the "Select Tag" option

- From the Tags list, select the tag associated with a specific contacts list. E.g.: "Leads 3/21/22" or "Student-Active". To learn more about how to find grouped contacts or filters follow this guide here.
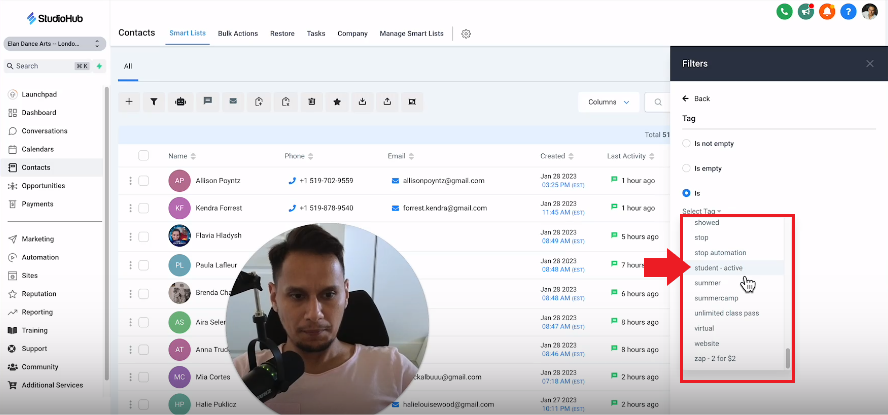
- Once done click "Apply" for the effect to place

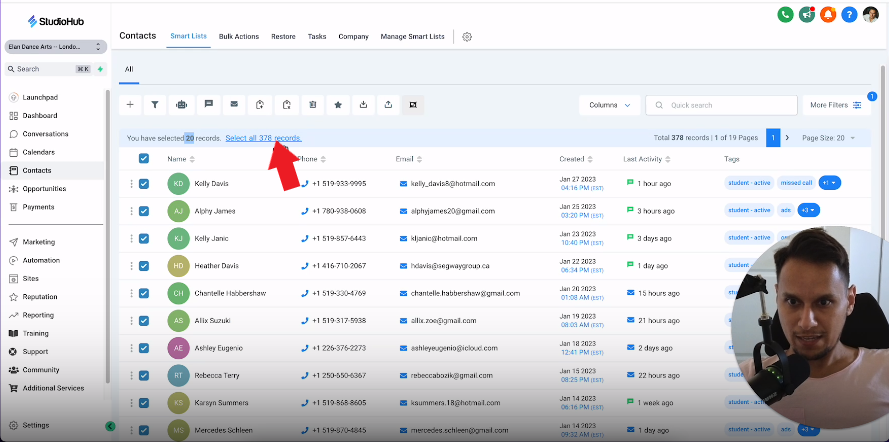
Step 3: Select All Contacts
- Click on the checkbox to select all contacts. This option will only select the contacts on that particular page and not all of the 378 contacts (The number of contacts may vary for you)
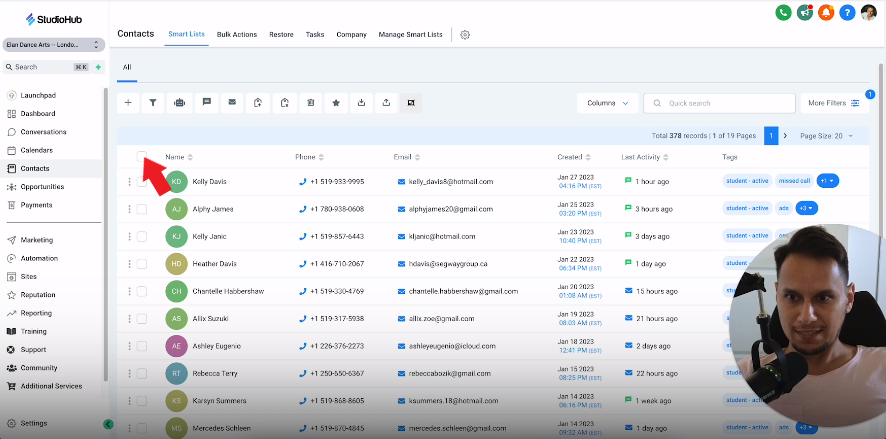
- To select all 378 contacts, click the 'Select all 378 records' link to ensure all the identified contacts are selected.
Step 4: Add to Workflow
- Find the 'Trigger Automation' button.

- Opt for 'Add in drip mode' to enable gradual message delivery rather than sending all messages at once.

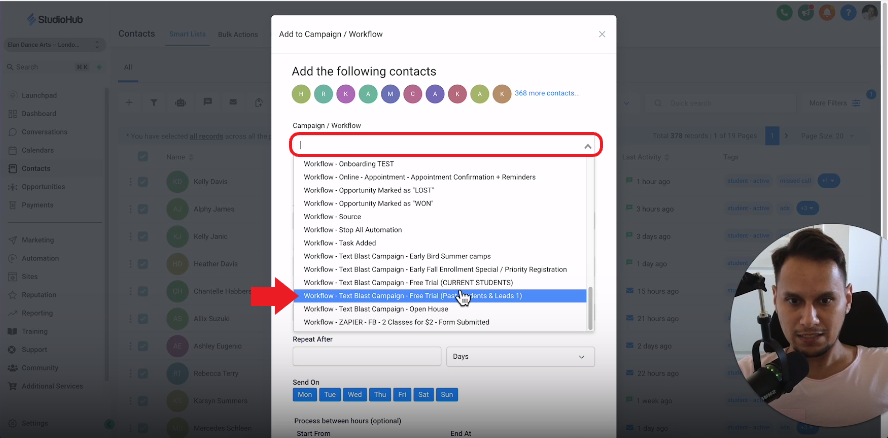
Step 5: Pick Your Campaign Workflow
- Select the workflow that you created for the text blast campaign.
⚠️ If you haven't created a workflow yet, please check this article on how to do so: How to create a workflow for your Text Blast Campaign ⚠️
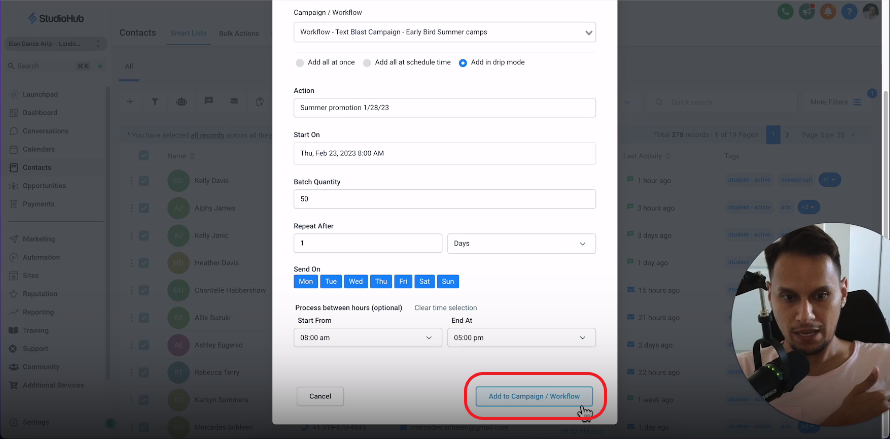
Step 6: Action Name and Start Date
- Name your campaign action, like 'Summer Camp Promo - Jan 28, 2023'.

- Select your preferred campaign start date.

Step 7: Batch Quantity & Scheduling (Important)
- To ensure smooth message delivery, start with a batch size of 50 to 75 messages. Avoid exceeding 100 messages per day to prevent getting flagged as spam.

- Set how often you want each batch to be sent. For example, you can choose to send a batch of messages every day.

- Choose the days of the week when you want to send messages. You can exclude weekends if your campaign strategy requires it. Blue means selected and gray means not selected.
- BTW you can not change the days once the campaign is active. Make necessary changes now

- Define the hours during which messages will be sent. A common window is between 8:00 AM and 5:00 PM.

Step 8: Review
- Before proceeding, review your selections to ensure everything is correctly set up, including contacts, tags, workflow, drip mode, start date, batch size, repetition schedule, send days, and send hours.
- Once you are happy click "Add to Campaign/Workflow"
- You will see a processing window, just click OK

Conclusion
With these steps completed, your text blast campaign is ready for launch. Once your campaign is active, closely monitor its progress to ensure it aligns with your campaign goals and objectives. Good luck with your campaign!